1. Johdanto
The Cherry MW 8C Ergo is an ergonomic, right-handed wireless mouse designed for comfort and precision. It offers flexible connectivity options via Bluetooth or a 2.4 GHz wireless USB dongle, ensuring a stable and secure connection with AES-128 encryption. This rechargeable mouse features a high-precision sensor for accurate tracking and is built for durability and extended use. This manual provides detailed instructions for setting up, operating, maintaining, and troubleshooting your MW 8C Ergo mouse.
2. Pakkauksen sisältö
Tarkista pakkauksesta seuraavat tuotteet:
- Cherry MW 8C Ergo langaton hiiri
- USB-A-USB-C-latauskaapeli
- 2.4 GHz Wireless USB Receiver (dongle)
- Storage Pouch (fabric carry pouch)
- Käyttöohje (tämä asiakirja)
3. Tuotteen ominaisuudet
- Ergonominen muotoilu: Shaped for comfortable right-handed use, reducing strain during long periods.
- Kaksinkertainen langaton yhteys: Seamlessly switch between Bluetooth and 2.4 GHz wireless modes.
- Ladattava akku: Integrated battery provides long-lasting power and can be charged via USB-C.
- Korkean tarkkuuden optinen anturi: Ensures accurate and smooth cursor control.
- AES-128 Encryption: Secure wireless transmission for data protection.
- Säädettävä DPI: Customize cursor speed to suit your preferences.
- Kestävä rakenne: High-quality materials for reliability and longevity.
4. Asennus
4.1. Hiiren lataaminen
Before first use, it is recommended to fully charge the mouse. Connect the supplied USB-A to USB-C charging cable to the USB-C port on the front of the mouse and to a USB-A port on your computer or a USB power adapter.
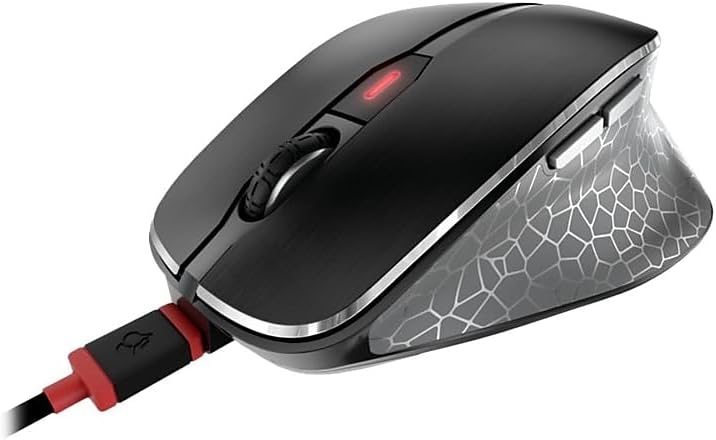
Image: The Cherry MW 8C Ergo mouse connected to its USB-C charging cable, showing the charging port and the mouse's top view.
The LED indicator on the mouse will show charging status. Once fully charged, the LED will change or turn off depending on the model's specific indicator behavior.
4.2. Connecting via 2.4 GHz Wireless (USB Receiver)
- Locate the 2.4 GHz USB receiver (dongle), usually stored magnetically in a compartment on the bottom of the mouse.
- Kytke USB-vastaanotin tietokoneen vapaana olevaan USB-A-porttiin.
- On the bottom of the mouse, slide the 3-position switch to the "2.4 GHz" position (often indicated by a small wireless icon).
- Tietokoneesi pitäisi automaattisesti tunnistaa ja asentaa tarvittavat ajurit. Hiiri on käyttövalmis.
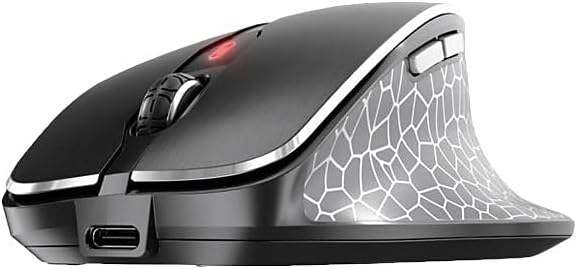
Kuva: Etupuoli view of the Cherry MW 8C Ergo mouse, highlighting the USB-C charging port and the scroll wheel.
4.3. Yhdistäminen Bluetoothin kautta
- On the bottom of the mouse, slide the 3-position switch to the "Bluetooth" position (often indicated by a Bluetooth icon).
- Press and hold the Bluetooth detection button on the bottom of the mouse for a few seconds until the LED indicator starts blinking, indicating pairing mode.
- Avaa tietokoneellasi Bluetooth-asetukset:
- Windows: Go to Settings > Devices > Bluetooth & other devices. Click "Add Bluetooth or other device" and select "Bluetooth".
- MacOS: Go to System Preferences > Bluetooth.
- Select "Cherry MW 8C Ergo" from the list of available devices.
- Suorita pariliitosprosessi loppuun noudattamalla näytön ohjeita. Hiiren LED-merkkivalo lakkaa vilkkumasta, kun pariliitos on muodostettu onnistuneesti.
5. Hiiren käyttö
5.1. Painikkeiden toiminnot
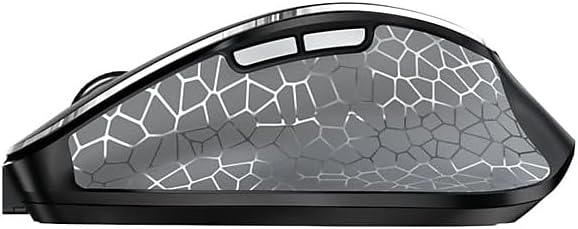
Kuva: Puoli view of the Cherry MW 8C Ergo mouse, highlighting the two programmable side buttons.
- Vasen napsautuspainike: Ensisijainen napsautustoiminto.
- Hiiren oikeanpuoleinen painike: Toissijainen napsautustoiminto, avaa yleensä kontekstivalikot.
- Vierityspyörä: Vieritä asiakirjoja ylös/alas ja web sivuja. Voidaan painaa myös keskipainikkeen napsautusta varten.
- DPI-painike: Located behind the scroll wheel, this button allows you to cycle through different DPI (Dots Per Inch) sensitivity settings.
- Sivupainikkeet: Two buttons located on the thumb side of the mouse. By default, these often function as "Forward" and "Back" in web selaimet ja file explorers. Their functions may be customizable via software (if available).
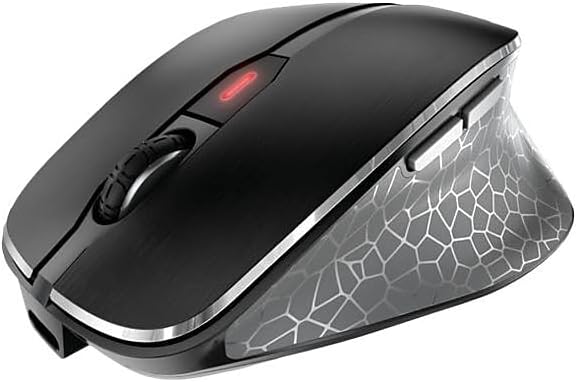
Kuva: Ylhäältä alas -kuva view of the Cherry MW 8C Ergo mouse, clearly showing the scroll wheel and the DPI adjustment button.
5.2. DPI-herkkyyden säätäminen
Press the DPI button (located behind the scroll wheel) to cycle through the available sensitivity settings. Each press will change the cursor speed, allowing you to find the optimal setting for your tasks. The mouse typically has multiple preset DPI levels.
5.3. Yhteystilojen vaihtaminen
To switch between 2.4 GHz wireless and Bluetooth modes, use the 3-position switch on the bottom of the mouse. Ensure the correct mode is selected for your desired connection type.
6. Huolto
6.1. Hiiren puhdistaminen
- Disconnect the mouse from any charging cables and turn it off using the switch on the bottom.
- Käytä pehmeää, nukkaamatonta liinaa hieman damppyyhi hiiren pinta vedellä tai miedolla puhdistusliuoksella.
- Vältä voimakkaiden kemikaalien, hankaavien puhdistusaineiden käyttöä tai nesteiden suihkuttamista suoraan hiireen.
- Puhdista optinen anturi pölystä ja roskista varovasti kuivalla vanupuikolla.
6.2. Akun hoito
- Akun käyttöiän pidentämiseksi vältä hiiren akun usein tapahtuvaa täydellistä tyhjentämistä.
- Charge the mouse regularly, especially when the low battery indicator appears.
- If storing the mouse for an extended period, charge it to about 50% and turn it off. Recharge every few months to prevent deep discharge.
7. Vianmääritys
7.1. Hiiri ei vastaa
- Tarkista teho: Varmista, että hiiri on päällä ja sen akussa on riittävästi virtaa.
- Tarkista yhteystila: Verify the switch on the bottom of the mouse is set to the correct mode (2.4 GHz or Bluetooth) for your connection type.
- 2.4 GHz liitäntä:
- Varmista, että USB-vastaanotin on kytketty tukevasti toimivaan USB-porttiin.
- Kokeile kytkeä vastaanotin toiseen USB-porttiin.
- Ensure the receiver is within range of the mouse (typically up to 10 meters).
- Bluetooth-yhteys:
- Varmista, että Bluetooth on käytössä tietokoneessasi.
- Try re-pairing the mouse with your computer (refer to Section 4.3).
- Ensure the mouse is within range of your computer's Bluetooth receiver.
- Käynnistä uudelleen: Turn the mouse off and then on again. Restart your computer if necessary.
7.2. Cursor Movement is Erratic or Inaccurate
- Puhdista anturi: Puhdista hiiren pohjassa oleva optinen anturi (katso kohta 6.1).
- Pinta: Käytä hiirtä puhtaalla, heijastamattomalla ja tasaisella pinnalla. Vältä lasia tai voimakkaasti heijastavia pintoja.
- DPI -asetus: Adjust the DPI sensitivity using the DPI button to see if a different setting improves performance.
7.3. Mouse Not Charging
- Kaapeliliitäntä: Ensure the USB-C cable is securely connected to both the mouse and the power source.
- Virtalähde: Try a different USB port on your computer or a different USB power adapter.
- Kaapelin eheys: Inspect the charging cable for any damage. Try using a different USB-C charging cable if available.
8. Tekniset tiedot
| Ominaisuus | Yksityiskohta |
|---|---|
| Mallin nimi | MW 8C Ergo |
| Tuotteen mallinumero | JW-8600US |
| Merkki | Kirsikka |
| Yhteystekniikka | Bluetooth, 2.4 GHz:n langaton |
| Liiketunnistus | Optinen |
| Virtalähde | Paristokäyttöinen (ladattava) |
| Käyttöjärjestelmän yhteensopivuus | Windows 7, Windows 8, Windows 10, Windows 11 |
| Tuotteen paino | 8 unssia (noin 227 grammaa) |
| Tuotteen mitat (PxLxK) | 4.72 x 3.11 x 1.75 tuumaa (noin 120 x 79 x 44 mm) |
| Väri | Musta |
| Salaus | AES-128 (for 2.4 GHz wireless) |
9. Takuu ja tuki
9.1. Takuutiedot
Cherry products are manufactured to high-quality standards. This product is covered by a limited warranty against defects in materials and workmanship. Please refer to the official Cherry website or your purchase documentation for specific warranty terms and conditions applicable to your region. Keep your proof of purchase for warranty claims.
9.2. Tekninen tuki
If you encounter any issues not covered in the troubleshooting section or require further assistance, please contact Cherry customer support. You can find contact information, FAQs, and additional resources on the official Cherry websivusto:
Official Cherry Websivusto: www.cherry.de/en/
Please have your product model number (JW-8600US) and proof of purchase ready when contacting support.