Weiser SmartCode 5 Lever Electronic Lock
Malli: 9GED14550-005
1. Johdanto
This manual provides comprehensive instructions for the Weiser 9GED14550-005 SmartCode 5 Lever Electronic Lock with Z-Wave technology. This electronic lever lock offers keyless entry, enhanced security, and smart home integration capabilities. Please read this guide thoroughly before installation and operation to ensure proper function and longevity of your lock.
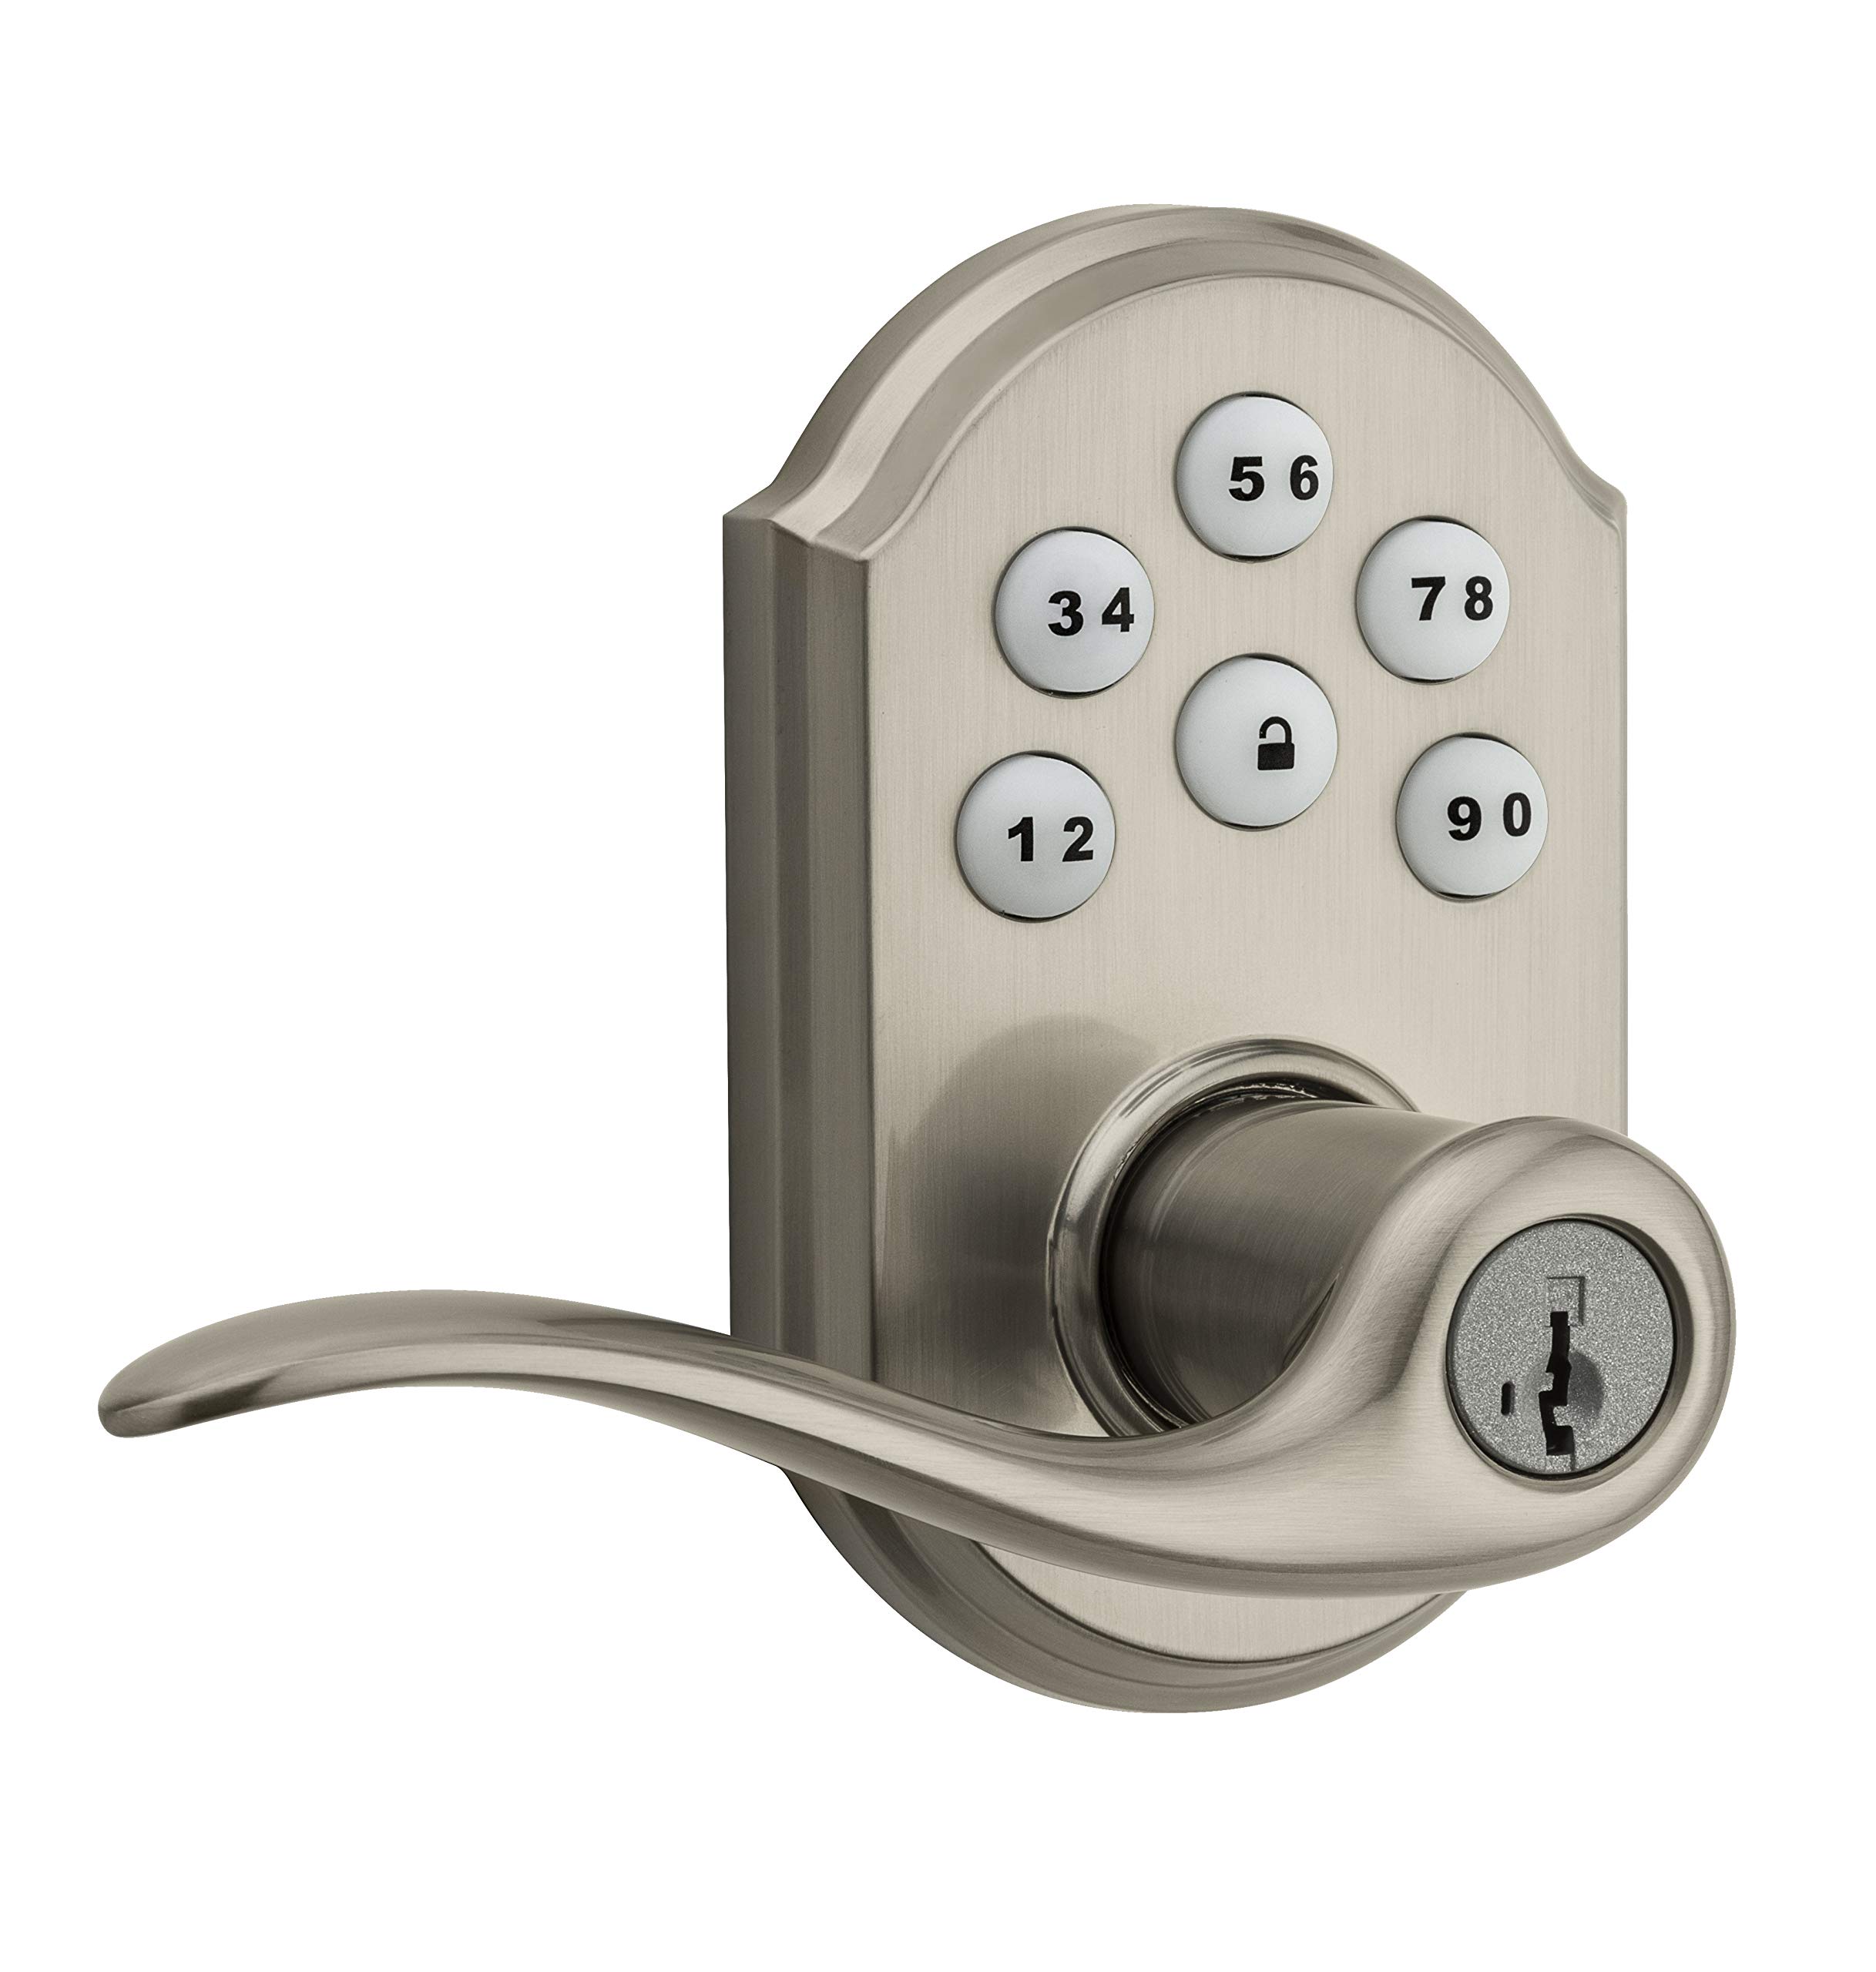
Image 1: Weiser SmartCode 5 Lever Electronic Lock in Satin Nickel finish. This image displays the complete lock assembly, including the exterior keypad and interior lever components.
2. Tuotteen ominaisuudet
- Avaimeton sisäänkäynti: Backlit keypad for convenient code access.
- Z-Wave 500 Home Connect Technology: Enables wireless communication with other smart home devices.
- Etäkäyttö: Remotely check lock status, lock/unlock, and receive notifications via web-enabled devices.
- Smart Home -yhteensopivuus: Works with Z-Wave certified controllers, including Samsung SmartThings and Wink for Amazon Alexa integration.
- SmartKey Re-key Technology: Allows re-keying the lock to a new key in seconds.
- Lukitus yhdellä kosketuksella: Motorized locking with a single touch.
- Automaattinen lukitus: Customizable automatic re-locking after 30 seconds for added security.
- Käyttäjäkoodit: Supports up to 30 unique user access codes and 1 master code.
- Kestävyys: ANSI/BHMA-luokan 2 sertifioitu.
- Helppo asennus: Designed to fit most standard residential door preparations (1-3/8" to 1-3/4" door thickness, adjustable 2-3/8" or 2-3/4" backset, 2-1/8" cross bore).
- Turvallisuus: Full 128-bit encryption.
3. Pakkauksen sisältö
Before beginning installation, verify that all components are present. The package typically includes:
- Ulkoinen näppäimistökokoonpano
- Sisävivun kokoonpano
- Salpa
- Lakkolevy
- Asennuslaitteisto
- Installation Guide / Drilling Template
Note: 4 AA alkaline batteries are required and sold separately.
4. Asennusopas
Installation of the SmartCode 5 Lever lock is designed to be straightforward, typically requiring only a Phillips head screwdriver. Ensure your door meets the following specifications:
- Oven paksuus: 1-3/8" to 1-3/4" (35 mm - 44 mm)
- Ristireikä: 54 mm
- Latch Backset: Adjustable 2-3/8" or 2-3/4" (60 mm or 70 mm)
- Oven luovutus: Universal (can be installed on left or right-handed doors)
Asennusvaiheet:
- Valmista ovi: If necessary, use the provided template to drill holes. Ensure the door is properly aligned and the existing latch bore is clear.
- Asenna salpa: Insert the latch into the door edge and secure it with screws. Ensure the latch bolt faces the door frame.
- Ulkoisen näppäimistön asentaminen: Route the cable through the cross bore and position the exterior keypad assembly on the door.
- Asenna sisäosa: Connect the cable from the exterior assembly to the interior assembly. Secure the interior assembly to the door using the provided mounting screws.
- Asenna vivut: Attach the interior and exterior levers according to the instructions, ensuring they operate smoothly.
- Asenna paristot: Insert 4 new AA alkaline batteries into the battery pack.
- Suorita ovenluovutusprosessi: This step is crucial for the lock to learn the orientation of your door. Follow the specific instructions in your physical installation guide to ensure correct operation.
5. Initial Setup & Programming
After installation, the lock requires initial setup, including setting the Master Code and User Codes.
Pääkoodi:
The Master Code is a critical security feature. It is used to add, delete, and modify User Codes and other lock settings. It does not unlock the door. It is highly recommended to create a Master Code immediately after installation.
Käyttäjäkoodit:
The lock supports up to 30 unique 4-8 digit User Codes for family members, guests, or service personnel.
Programming Steps (General):
- Aseta pääkoodi: Refer to your specific programming guide for the sequence to establish your Master Code.
- Lisää käyttäjäkoodi:
- Syötä pääkoodisi.
- Press the Program button (usually located on the interior assembly).
- Syötä uusi 4–8-numeroinen käyttäjäkoodi.
- Paina lukituspainiketta.
- Test the new User Code to ensure it unlocks the door.
- Poista käyttäjäkoodi: Follow the specific instructions in your programming guide, typically involving the Master Code and the User Code to be deleted.
6. Z-Wave Integration
The SmartCode 5 Lever lock features Z-Wave 500 Home Connect Technology, allowing it to integrate with compatible smart home systems.
Enrollment (Adding to Z-Wave Network):
To add the lock to your Z-Wave network, initiate the 'Add Device' or 'Inclusion' process on your Z-Wave controller/hub. Then, follow the lock's specific instructions to put it into inclusion mode (often by pressing the Program button once). The lock will communicate with the controller to join the network.
Exclusion (Removing from Z-Wave Network):
To remove the lock from a Z-Wave network, initiate the 'Remove Device' or 'Exclusion' process on your Z-Wave controller/hub. Then, follow the lock's specific instructions to put it into exclusion mode.
Functionality with Z-Wave:
- Remotely lock and unlock the door.
- Check the current lock status (locked/unlocked).
- Receive notifications for lock activity (e.g., door locked/unlocked, low battery).
The lock is compatible with Z-Wave certified controllers, including those that support Amazon Alexa integration via Samsung SmartThings and Wink.
7. Käyttö
Operating your SmartCode 5 Lever lock is simple and intuitive.
Oven lukitseminen:
- Ulkopuolelta: Press the Lock button on the keypad. The motorized deadbolt will extend.
- Sisätiloista: Rotate the interior thumb turn to the locked position.
Oven lukituksen avaaminen:
- Ulkopuolelta: Enter a valid 4-8 digit User Code on the keypad. The motorized deadbolt will retract.
- Sisätiloista: Rotate the interior thumb turn to the unlocked position.
Automaattinen lukitus:
If enabled, the lock will automatically re-lock approximately 30 seconds after being unlocked from the exterior. This feature provides peace of mind, ensuring your door is always secured.
8. Huolto
Proper maintenance ensures the longevity and reliable operation of your electronic lock.
Akun vaihto:
The lock requires 4 AA alkaline batteries. When the batteries are low, the lock will typically provide an audible and/or visual low battery warning. Replace all four batteries simultaneously with new, high-quality alkaline batteries. Avoid using rechargeable batteries, as they may not provide sufficient voltage.
Puhdistus:
Puhdista näppäimistö ja lukon runko pehmeällä,amp liinalla. Vältä hankaavien puhdistusaineiden, liuottimien tai kemiallisten suihkeiden käyttöä, sillä ne voivat vahingoittaa pintakäsittelyä ja elektronisia komponentteja.
SmartKey-uudelleenavainnäppäily:
If you need to re-key your lock to a new key, follow the specific instructions provided with your SmartKey tool. This process allows you to re-key the lock yourself in seconds without removing it from the door.
9. Vianmääritys
If you encounter issues with your lock, refer to the following common troubleshooting steps:
- Lukko ei vastaa: Check that the batteries are correctly installed and fully charged. Replace batteries if necessary. Ensure all cables are securely connected inside the interior assembly.
- Koodit eivät toimi: Verify that the Master Code is set. Ensure User Codes are entered correctly and are active. Try deleting and re-adding the User Code.
- Z-Wave Connectivity Issues: Ensure your Z-Wave controller/hub is powered on and within range of the lock. Try performing a Z-Wave exclusion and then re-inclusion process.
- Grinding Noise / Latch Not Extending: This can indicate door misalignment or an obstruction. Check that the door frame and strike plate are properly aligned with the latch. Ensure the latch operates freely without resistance.
- Näppäimistö ei syty: Check battery power. If batteries are new, ensure they are inserted with correct polarity.
For more detailed troubleshooting, consult the full product manual or contact Weiser customer support.
10. Tekniset tiedot
| Mallinumero | 9GED14550-005 |
| Merkki | Weiser |
| Materiaali | Nikkeli |
| Valmis | Kiiltävä |
| Väri | Satiini-nikkeli |
| Tyyli | Moderni |
| Lukon tyyppi | Näppäimistö |
| Erikoisominaisuus | Avaimeton |
| Oven paksuus | 1-3/8" to 1-3/4" (35 mm - 44 mm) |
| Salvan takaosa | Adjustable 2-3/8" or 2-3/4" (60 mm or 70 mm) |
| Ristireikä | 54 mm |
| Virtalähde | 4 kpl AA-alkaliparistoa (ei mukana) |
| Sertifikaatit | ANSI / BHMA-luokka 2 |
| Tuotteen paino | 1.51 kg |
| Approximate Dimensions (Parcel) | 25.3 x 14.1 x 9.2 cm |
| Ohjaimen yhteensopivuus | Amazon Alexa, SmartThings, Wink (via Z-Wave hub) |
11. Takuu ja tuki
Weiser stands behind the quality of its products.
Takuutiedot:
- Mechanical & Finish Warranty: Elinikäinen
- Elektroniikan takuu: Yksi vuosi
These warranties apply to the original residential user of the product. Please retain your proof of purchase for warranty claims.
Asiakastuki:
For detailed warranty terms, technical assistance, or further support, please visit the official Weiser website or contact their customer service department. Contact information can typically be found on the Weiser websivustolla tai pakkausmateriaaleissa.


