1. Johdanto
This manual provides essential instructions for the proper setup, operation, and maintenance of your Argox AS-8250U Barcode Scanner. The AS-8250U is a long-range scanner designed for various applications, including retail, inventory management, invoicing, and factory receiving. It offers fast and accurate reading of PDF codes, Code 16K, and all standard linear symbologies.
2. Turvallisuustiedot
- Älä altista skanneria äärimmäisille lämpötiloille, kosteudelle tai suoralle auringonvalolle.
- Vältä skannerin pudottamista tai sen altistamista voimakkaille iskuille.
- Älä yritä purkaa tai muokata skanneria. Tämä mitätöi takuun.
- Pidä skannausikkuna puhtaana optimaalisen suorituskyvyn varmistamiseksi.
- Use only the provided or recommended power source and cables.
3. Pakkauksen sisältö
Valitse seuraavat kohdat rastittamalla ruutu:
- Argox AS-8250U Barcode Scanner
- USB Interface Cable (or other specified interface cable)
- Käyttöopas (tämä asiakirja)
4. Tuote ohiview
The Argox AS-8250U is a handheld barcode scanner designed for ergonomic use and efficient data capture.
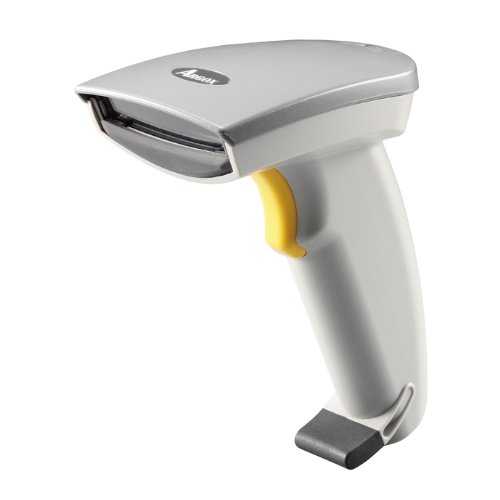
Kuva 1: Etupuoli view of the Argox AS-8250U Barcode Scanner. This image shows the scanner's ergonomic design, scanning window, and trigger button.

Kuva 2: Kulmassa view of the Argox AS-8250U Barcode Scanner, highlighting its compact form factor and the Argox logo.
Tärkeimmät komponentit:
- Skannausikkuna: Emits and receives the laser beam for barcode reading.
- Liipaisinpainike: Aktivoi skannausprosessin.
- Merkkivalo: Provides feedback on scanning status (e.g., successful read).
- Interface Port: Connects the scanner to the host device via USB, RS-232, or Keyboard Wedge (KBW).
5. Asennus
5.1 Skannerin kytkeminen
- Tunnista käyttöliittymä: Determine the interface type required by your host system (USB, RS-232, or Keyboard Wedge). The AS-8250U supports all popular interfaces.
- Kytkentäkaapeli: Plug one end of the interface cable into the scanner's interface port.
- Yhdistä isäntään: Plug the other end of the interface cable into the corresponding port on your computer or POS system.
- USB: Connect to an available USB port. The scanner is typically plug-and-play, and Windows will automatically install necessary drivers.
- RS-232: Connect to a serial port. You may need to configure serial port settings on your host system.
- Keyboard Wedge (KBW): Connect between your keyboard and the computer's keyboard port.
- Virta päälle: Once connected, the scanner should power on automatically. The indicator light may illuminate briefly.
5.2 Driver Installation (for USB)
For USB connections, the Argox AS-8250U is designed for plug-and-play functionality with Windows operating systems. Typically, no manual driver installation is required. Upon connecting the scanner to a USB port, your operating system should automatically detect and install the necessary drivers. If prompted, follow the on-screen instructions. A Windows utility is included for advanced configuration if needed.
6. Skannerin käyttö
6.1 Skannauksen perusmenettely
- Valmistaudu skannaukseen: Ensure the scanner is connected and powered on. Open an application on your host system where you want the barcode data to appear (e.g., a text editor, spreadsheet, or POS software).
- Suuntaa skanneri: Point the scanning window of the AS-8250U at the barcode you wish to read. The optimal scanning distance ranges from contact up to 250mm, depending on the barcode density.
- Paina liipaisinta: Press and hold the trigger button. A red laser line will emit from the scanning window.
- Skannaa viivakoodi: Position the laser line across the entire barcode. Once a successful read occurs, the scanner will typically emit an audible beep and/or the indicator light will flash. The barcode data will then be transmitted to your host system.
- Vapautusliipaisin: Vapauta liipaisupainike onnistuneen skannauksen jälkeen.
6.2 Tuetut viivakoodisymbolit
The AS-8250U is capable of reading a wide range of barcode types, including:
- PDF codes
- Koodi 16K
- All standard linear (1D) symbologies (e.g., UPC/EAN/JAN, Code 39, Code 128, Interleaved 2 of 5, Codabar, etc.)
7. Huolto
7.1 Skannerin puhdistaminen
- Skannausikkuna: Käytä pehmeää, nukkaamatonta liinaa dampened with a mild, non-abrasive cleaner (e.g., glass cleaner) to gently wipe the scanning window. Avoid harsh chemicals or abrasive materials that could scratch the surface.
- Ulkopuoli Casing: Pyyhi skannerin ulkopinta pehmeällä,amp cloth. Do not allow liquids to enter the scanner's internal components.
- johdot: Inspect cables regularly for any signs of damage.
7.2 Varastointi
When not in use, store the scanner in a clean, dry environment, away from direct sunlight and extreme temperatures. Protect it from dust and physical damage.
8. Vianmääritys
| Ongelma | Mahdollinen syy | Ratkaisu |
|---|---|---|
| Skanneri ei käynnisty. | Cable not properly connected or damaged. | Check cable connections at both the scanner and the host device. Try a different USB port or cable if available. |
| Skanneri ei lue viivakoodeja. |
|
|
| Viivakoodin tiedot ovat virheellisiä tai puutteellisia. |
|
|
| Isännälle ei lähetetty tietoja. |
|
|
9. Tekniset tiedot
| Ominaisuus | Yksityiskohta |
|---|---|
| Merkki | Argox |
| Malli | AS-8250U |
| Valmistaja | Argox Information Co., Ltd, Taiwan |
| Yhteystekniikka | USB Cable (also supports RS-232, KBW) |
| Skannausnopeus | 200 skannausta sekunnissa |
| Toiminta-alue | Contact to 250mm on medium density barcodes |
| Tuetut symbolit | PDF codes, Code 16K, all standard linear (1D) symbologies |
| Käyttöjärjestelmän yhteensopivuus | Windows |
| Yhteensopivat laitteet | Pöytätietokone, kannettava tietokone |
| Virtalähde | Johdollinen sähkö |
| Tuotteen paino | 420 g |
| Pakkauksen mitat | 22.8 x 11.8 x 11 cm |
10. Takuu ja tuki
For warranty information and technical support, please refer to the warranty card included with your product or visit the official Argox websivusto. Säilytä ostokuitti ostotodistuksena takuuvaatimuksia varten.
For further assistance, please contact Argox customer support through their official channels.


