Johdanto
This instruction manual provides comprehensive guidance for the safe and effective use of your Vivitar Vivicam V3815 4-megapixel digital camera. Please read this manual thoroughly before operating the camera to ensure proper setup, function, and maintenance. Retain this manual for future reference.
Tuote loppuview
Familiarize yourself with the main components and controls of your Vivitar Vivicam V3815 digital camera.
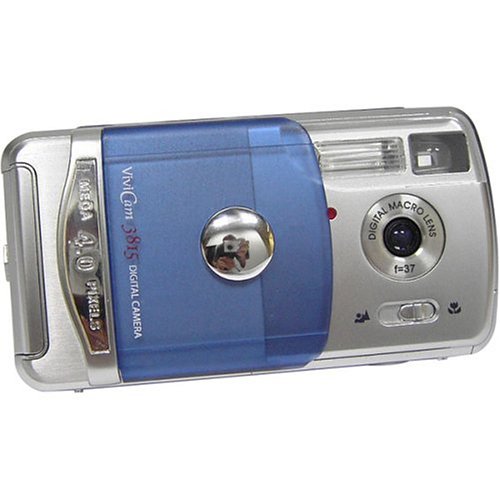
Kuva 1: Takaosa View of Vivitar Vivicam V3815 Digital Camera
The image displays the rear view of the Vivitar Vivicam V3815 digital camera. The 1.4-inch LCD screen is visible, displaying a sample image of a person. To the right of the screen are the 'MODE' and 'MENU' buttons, along with a four-way controller with an 'OK/Q' button in the center, and icons for flash and trash.
Tärkeimmät komponentit:
- Linssi: Fixed focus lens.
- Flash: Built-in autoflash system.
- LCD-näyttö: 1.4-inch color TFT screen for viewkuvien, videoiden ja valikkovaihtoehtojen tarkastelua.
- Ohjauspainikkeet: MODE, MENU, and a directional pad with an OK/Q button for navigation and selection.
- Akkulokero: Located on the camera body for AA batteries.
- Muistikorttipaikka: For optional SD memory cards.
- USB-portti: Tietokoneeseen liittämistä varten.
- Video Out Port: Televisioon liittämistä varten.
Asennus
1. Akun asennus
- Locate the battery compartment cover on the camera.
- Open the cover and insert two AA-size batteries, ensuring correct polarity (+/-) as indicated inside the compartment.
- Sulje paristolokeron kansi kunnolla.
Huomautus: Alkaline batteries are included. For extended use, rechargeable Ni-MH batteries are recommended (not included).
2. Muistikortin asennus (valinnainen)
The camera has 16 MB of built-in memory. For additional storage, an SD (Secure Digital) memory card (up to 512 MB) can be used.
- Paikanna kameran SD-korttipaikka.
- Aseta SD-kortti metallikontaktit alaspäin, kunnes se napsahtaa paikalleen.
- Irrota kortti painamalla sitä varovasti sisäänpäin, kunnes se ponnahtaa ulos.
3. Ensimmäinen käynnistys
Press the power button to turn on the camera. The LCD display will activate. You may need to set the date and time upon first use or after battery replacement.
Käyttöohjeet
1. Still-kuvien ottaminen
- Kytke kamera päälle.
- Ensure the camera is in still photo mode (indicated on the LCD). Use the MODE button to switch if necessary.
- Frame your shot using the LCD display. The camera features fixed focus.
- Ota kuva painamalla laukaisinta pohjaan.
Digitaalinen zoom: The camera supports 2x digital zoom. Use the zoom controls (often integrated with directional pad) to adjust magnification before taking a photo.
2. Recording Video Clips
- Kytke kamera päälle.
- Press the MODE button to select movie-clip mode.
- Press the shutter button to start recording. Press it again to stop.
Huomautus: Video clips are recorded without audio. Maximum duration is approximately one minute at 320 x 240 resolution.
3. Toistotila
- Press the MODE button to enter playback mode.
- Use the directional buttons to navigate through your captured photos and videos.
- Press the OK/Q button to view valittu kohde tai videon toistaminen.
- To delete an image or video, select it and press the trash icon button (often integrated with directional pad). Confirm deletion when prompted.
4. Valikkoasetukset
Press the MENU button to access camera settings. Use the directional pad to navigate and the OK/Q button to select options.
- Kohtaustilat: Select from Auto, Sports, Night, Portrait, Landscape, or Back-light for optimized shooting conditions.
- Väritilat: Choose between Color, Black & White, or Sepia-tone.
- Sharpness and Saturation: Adjust these settings to fine-tune image appearance.
- Itselaukaisin: Set a delay of 5 or 10 seconds before the shutter fires.
- Flash-tilat: The 4-mode autoflash system automatically adjusts based on lighting conditions.
- Resoluutio: Select image resolution (e.g., 2304 x 1728, 1600 x 1200, 1280 x 960, 640 x 480). Higher resolution results in larger file sizes and fewer images stored.
Yhdistäminen tietokoneeseen
Kuvien ja videoiden siirtäminen tietokoneelle:
- Varmista, että kamera on sammutettu.
- Liitä kamera tietokoneeseen mukana toimitetulla USB-kaapelilla.
- Käynnistä kamera. Tietokoneesi pitäisi tunnistaa kamera irrotettavana tallennuslaitteena.
- Access the camera's internal memory or SD card (if inserted) to copy files tietokoneellesi.
- Safely eject the camera from your computer before disconnecting the USB cable.
Huomautus: A CD-ROM with necessary software may be included for older operating systems or specific functionalities. For Windows XP and newer, drivers are often not required as the camera functions as a mass storage device.
Huolto ja hoito
- Puhdistus: Use a soft, dry cloth to clean the camera body. For the lens and LCD screen, use a lens cleaning cloth specifically designed for optical surfaces. Avoid abrasive materials or harsh chemicals.
- Varastointi: Store the camera in a cool, dry place away from direct sunlight, extreme temperatures, and high humidity. If storing for an extended period, remove the batteries.
- Akun käsittely: Always use the correct type of batteries. Remove depleted batteries promptly to prevent leakage. Do not mix old and new batteries or different types of batteries.
- Vedenkestävyys: This camera is not water-resistant. Avoid exposure to water or moisture.
Vianetsintä
| Ongelma | Mahdollinen syy / Ratkaisu |
|---|---|
| Kamera ei käynnisty. |
|
| Kuvat ovat epäselviä. |
|
| Salama ei välähdä. |
|
| Date and time settings reset. |
|
| Ei voi siirtää files tietokoneelle. |
|
Tekniset tiedot
| Ominaisuus | Yksityiskohta |
|---|---|
| Anturin tyyppi | 4 megapikselin CMOS |
| Tehokas Still-resoluutio | 4 MP |
| Maximum Still Resolution | 2304 x 1728 pikseliä |
| Digitaalinen zoom | 2x (4x during playback) |
| Tarkennustyyppi | Fixed Focus Autofocus |
| Näyttö | 1.4 tuuman värillinen TFT LCD |
| Sisäinen muisti | 16 MB built-in non-volatile flash memory |
| Ulkoinen muisti | SD Card (up to 512 MB, not included) |
| Videotila | Yes (320 x 240, approx. 1 minute, no audio) |
| Yhteydet | USB 1.1 / 2.0 -yhteensopiva |
| Virtalähde | 2 x AA Alkaline batteries (included) or Ni-MH (not included) |
| Salama | Built-in, 4-mode autoflash system |
| Kuvaustilat | Fully automatic, Scene modes (Auto, Sports, Night, Portrait, Landscape, Back-light) |
| Väritilat | Color, Black & White, Sepia-tone |
| Itselaukaisin | 5 tai 10 sekuntia |
| Paino | 0.14 Kilograms (without batteries) |
Mitä laatikossa on
The Vivitar Vivicam V3815 package includes the following items:
- Vivitar Vivicam V3815 Digital Camera
- USB-kaapeli
- video johdot
- Käsihihna
- Kantolaukku
- 2 x AA-alkaliparistoa
- Käyttöohje (tämä asiakirja)
- CD-ROM ohjelmistolla
Takuu ja tuki
Takuutietoja tai teknistä tukea varten katso tuotteen mukana toimitettu takuukortti tai käy Vivitarin virallisella verkkosivustolla. websivusto. Säilytä ostokuitti ostotodistuksena mahdollisten takuuvaatimusten varalta.


