
Johdanto
This manual provides detailed instructions for the safe and efficient operation of your TOOLTOP UKF10 Foot Pedal Capacitor Spot Welder. This device is designed for precise spot welding of 18650 lithium battery packs and other compatible materials, offering multiple welding modes and high power output for various DIY welding applications.
Please read this manual thoroughly before operating the device to ensure proper usage, prevent damage, and maintain safety.
Turvallisuusohjeet
VAROITUS: Näiden turvallisuusohjeiden noudattamatta jättäminen voi aiheuttaa sähköiskun, tulipalon, vakavan loukkaantumisen tai kuoleman.
- Always wear appropriate personal protective equipment (PPE), including safety glasses, welding gloves, and protective clothing, when operating the spot welder.
- Varmista, että työskentelyalue on hyvin tuuletettu ja ettei siinä ole syttyviä materiaaleja.
- Älä käytä hitsauslaitetta d-tilassaamp tai kosteissa olosuhteissa.
- Pidä lapset ja luvaton henkilökunta poissa hitsausalueelta.
- Do not touch the welding electrodes or workpieces immediately after welding, as they will be hot.
- Irrota virtalähde ennen huolto- tai puhdistustoimenpiteitä.
- Use only the original charging cable and accessories provided with the device.
- Do not attempt to disassemble or modify the spot welder. Refer all servicing to qualified personnel.
- Be aware of potential sparks and molten metal during operation.
Tuote loppuview ja komponentit
The TOOLTOP UKF10 is a compact and powerful capacitor spot welder. Familiarize yourself with its main components:
- Pääyksikkö: Contains the control panel, power knob, and charging port.
- Hitsauskynät: Two intelligent manual spot welding pens for precise application.
- Poljin: For triggering welds in foot pedal mode.
- Latauskaapelit: Type-C to Type-C and Type-A to Type-C for charging.
- Nickel Coil: For welding applications.
- Spare Soldering Pins: Replacement pins for the welding pens.
- Hioa: For preparing surfaces.

Image: The main unit of the TOOLTOP UKF10 spot welder with its intelligent manual welding pens and foot pedal.

Image: Included accessories: foot pedal, nickel coil, C-C charging cable, A-C charging cable, spare soldering pins, and sandpaper.

Kuva: Yksityiskohtainen view of the intelligent manual spot welding pen, highlighting its ergonomic design and connection points.
Asennus
- Purkaminen: Poista kaikki osat varovasti pakkauksesta ja tarkista mahdollisten vaurioiden varalta.
- Lataus: Before first use, fully charge the spot welder using the provided Type-C charging cable. Connect one end to the welder's Type-C port and the other to a compatible USB power adapter (not included). The display will indicate charging status.
- Yhdistä hitsauskynät: Insert the intelligent manual spot welding pens firmly into their designated ports on the main unit. Ensure a secure connection.
- Jalkapolkimen kytkeminen (valinnainen): If using foot pedal mode, connect the foot pedal to its dedicated port on the main unit.
- Valmistele työkappale: Ensure the surfaces to be welded are clean, dry, and free from rust, oil, or other contaminants. Use the provided sandpaper if necessary.
Käyttöohjeet
Virta päälle/pois
- To power on, press and hold the power button (usually integrated with the knob) for a few seconds until the display illuminates.
- Sammuta virta painamalla virtapainiketta uudelleen ja pitämällä sitä painettuna, kunnes näyttö sammuu.
Mode Selection and Adjustments
The UKF10 offers multiple welding modes and adjustable parameters for precise control. Use the main knob and display to navigate and adjust settings.

Image: The control system interface displaying various adjustable parameters: Mode (Manual/Auto), Preheat, Pause, Gear (power level), Trigger, and Stitch Welding.
- Hitsaustavat: Select between Manual, Automatic, or Foot Pedal welding modes.
- Manuaalinen tila: Triggered by a button on the welding pen.
- Automaattinen tila: Welds automatically when both pen tips contact the workpiece.
- Foot Pedal Mode: Triggered by pressing the connected foot pedal.
- Esilämmitys (0.1–0.5 ms): Adjusts the preheating time to prepare the material for welding, improving weld quality.
- Pause (1-20ms): Sets the pause duration between welding pulses.
- Vaihde (001-100): Controls the welding power level. Start with lower settings and gradually increase as needed.
- Trigger (0.5-5.0s): Sets the trigger delay or duration.
- Stitch Welding (1-2 times): Configures the number of welding pulses for a single trigger.
Rotate the knob to select a parameter and press the knob to confirm or enter adjustment mode. Rotate again to change the value, and press to confirm.
Hitsausprosessi
- Valitse tila: Choose your desired welding mode (Manual, Automatic, or Foot Pedal).
- Säädä asetuksia: Based on the material thickness and type, adjust the Preheat, Gear (power), and other parameters. Refer to the material compatibility guidelines below.
- Työkappaleen sijainti: Place the nickel strip or other material onto the battery terminal or workpiece.
- Apply Welding Pens: Firmly press both welding pen tips onto the nickel strip, ensuring good contact with both the strip and the underlying material. Maintain even pressure.
- Trigger Weld:
- Manuaalinen tila: Press the button on the welding pen.
- Automaattinen tila: The weld will trigger automatically once good contact is detected.
- Foot Pedal Mode: Press the foot pedal.
- Tarkista hitsaus: After welding, carefully inspect the weld joint for strength and appearance. Adjust settings if the weld is too weak or too strong.
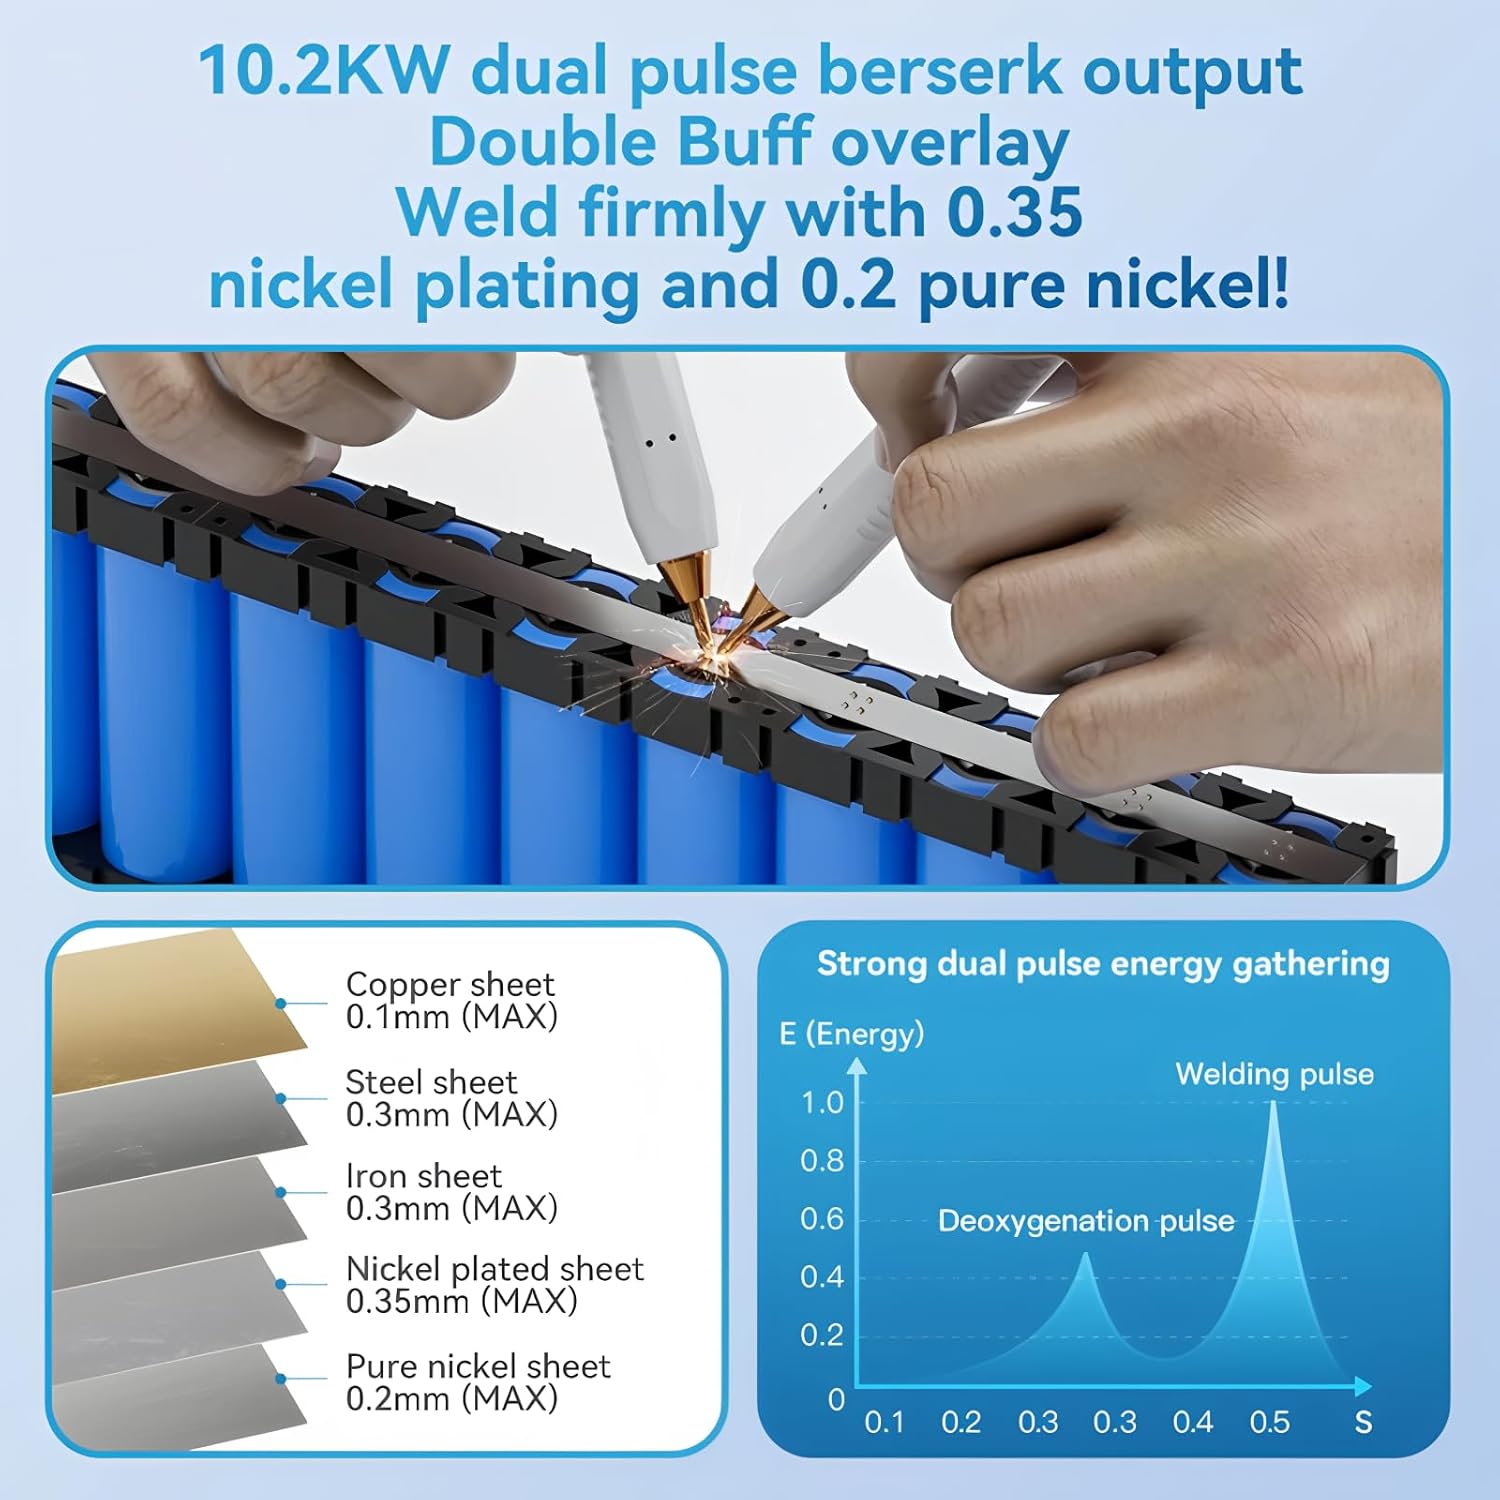
Image: Illustration of the spot welding process on battery cells, showing the application of welding pens to a nickel strip.
Materiaalien yhteensopivuus
The UKF10 spot welder is capable of welding various materials with specific thickness limitations:
| Materiaalityyppi | Suurin paksuus |
|---|---|
| Kuparilevy | 0.1 mm |
| Teräslevy | 0.3 mm |
| Rautalevy | 0.3 mm |
| Nickel plated sheet | 0.35 mm |
| Pure nickel sheet | 0.2 mm |
Note: Optimal welding results depend on material cleanliness, proper pressure, and correct power settings.
Huolto
- Puhdistus: Regularly clean the welding pen tips and the main unit with a dry, soft cloth. Ensure no metal dust or debris accumulates around the connections.
- Elektrodin kunto: Inspect welding pen tips for wear or oxidation. If necessary, gently sand them with fine sandpaper to ensure good conductivity. Replace worn-out soldering pins with the provided spares.
- Varastointi: Store the spot welder in a cool, dry place, away from direct sunlight and moisture. Ensure it is fully charged before long-term storage to preserve battery life.
- Akun hoito: Avoid fully discharging the battery frequently. Recharge when the battery indicator is low.
Vianetsintä
| Ongelma | Mahdollinen syy | Ratkaisu |
|---|---|---|
| Hitsauskone ei käynnisty | Akun varaus vähissä; Virtapainiketta ei painettu oikein | Lataa laite; Paina virtapainiketta tukevasti ja pidä sitä painettuna. |
| Heikot tai epäjohdonmukaiset hitsaukset | Insufficient power setting; Dirty or oxidized welding tips; Poor contact with workpiece; Material too thick | Increase "Gear" (power) setting; Clean or replace welding tips; Ensure firm and even pressure; Check material thickness against specifications. |
| Excessive sparks or burn-through | Too high power setting; Material too thin | Decrease "Gear" (power) setting; Verify material thickness is within limits. |
| Welder overheats | Continuous heavy use; Poor ventilation | Allow the welder to cool down; Ensure adequate airflow around the unit. |
| Foot pedal not triggering | Foot pedal not connected; Welder not in Foot Pedal mode | Ensure foot pedal is securely connected; Select "Foot Pedal" mode on the welder. |
Tekniset tiedot
- Mallinumero: TT-Awithz-UKF10
- Teholähtö: 10200W (huippu)
- Latausportti: Tyyppi-C
- Hitsaustavat: Manual, Automatic, Foot Pedal
- Säädettävät parametrit: Preheat, Pause, Gear (1-100), Trigger, Stitch Welding
- Capacitor Lifespan: 500,000+ cycles (based on AWithZ laboratory testing)
- Sertifikaatit: CE, RoHS
- Valmistaja: TOOLTOP

Kuva: Sisäinen view highlighting the high-quality Farad capacitors, indicating a life extension of 120%, over 500,000 cycles, and a 30% increase in charging speed.
Takuu ja tuki
The TOOLTOP UKF10 Foot Pedal Capacitor Spot Welder comes with a manufacturer's warranty. Please refer to your purchase documentation for specific warranty terms and conditions.
- EU-varaosien saatavuus: 1 vuosi
- For technical support, warranty claims, or service inquiries, please contact your retailer or the manufacturer directly.
- Do not attempt to repair the device yourself, as this may void the warranty and pose safety risks.