
1. Johdanto
Thank you for choosing the KEENSTAR 20Bar Espresso Machine. This manual provides essential information for the safe operation, maintenance, and troubleshooting of your new espresso machine. Please read it thoroughly before first use and keep it for future reference.
2. Tärkeitä turvallisuusohjeita
- Lue kaikki ohjeet ennen laitteen käyttöä.
- Älä koske kuumia pintoja. Käytä kahvoja tai nuppeja.
- Suojataksesi tulipalolta, sähköiskulta ja henkilövahingoilta, älä upota johtoa, pistokkeita tai laitetta veteen tai muuhun nesteeseen.
- Tarkka valvonta on tarpeen, kun mitä tahansa laitetta käyttävät lapset tai lapset ovat niiden lähellä.
- Irrota pistoke pistorasiasta, kun et käytä ja ennen puhdistusta. Anna jäähtyä ennen osien pukemista tai irrottamista ja ennen laitteen puhdistamista.
- Älä käytä laitetta, jos sen johto tai pistoke on vaurioitunut tai jos laitteessa on toimintahäiriö tai se on vaurioitunut millään tavalla.
- Muiden kuin laitteen valmistajan suosittelemien lisävarusteiden käyttö voi aiheuttaa tulipalon, sähköiskun tai henkilövahinkoja.
- Älä käytä ulkona.
- Älä anna johdon roikkua pöydän tai tason reunan yli tai koskettaa kuumia pintoja.
- Älä aseta kuumalle kaasu- tai sähköpolttimelle tai sen lähelle tai kuumennettuun uuniin.
- Kytke aina pistoke ensin laitteeseen ja sitten johto pistorasiaan. Irrota laite kytkemällä jokin säätönuppi pois päältä ja irrottamalla sitten pistoke pistorasiasta.
- Älä käytä laitetta muuhun kuin suunniteltuun käyttöön.
- Ole äärimmäisen varovainen hävittäessäsi kuumaa höyryä.
- Tämä laite on tarkoitettu vain kotitalouskäyttöön.
3. Pakkauksen sisältö
Tarkista pakkauksen sisältö purkamisen yhteydessä varmistaaksesi, että kaikki osat ovat mukana ja vahingoittumattomia.
Kuva: All components included in the KEENSTAR 20Bar Espresso Machine package. This includes the main unit, portafilter with handle, single and double shot filters, coffee spoon with tamper, and a removable drip tray. The water tank and steam nozzle are also visible.
- KEENSTAR 20Bar Espresso Machine Main Unit
- Portafilterin kahva
- 1-Shot Filter Basket
- 2-Shot Filter Basket
- Kahvilusikka T:lläamper
- Irrotettava tippakaukalo
- Käyttöopas
4. Tuote ohiview
Tutustu espressokoneesi eri osiin.

Kuva: Edessä view of the KEENSTAR 20Bar Espresso Machine, showcasing its sleek stainless steel design and key operational areas.
- Vesisäiliö: Detachable, 1.1 Liter capacity. Located at the back of the machine.
- Ohjauspaneeli: Intuitive touch screen for selecting brew options (Espresso, Americano, Espresso Cool, Steam, ON/OFF, 2X Espresso).
- Portafilter: Säilyttää jauhettua kahvia hauduttamista varten.
- Höyrysauva: For frothing milk for lattes and cappuccinos. Features a 360-degree rotation.
- Tippakaukalo: Irrotettava helppoa puhdistamista varten.
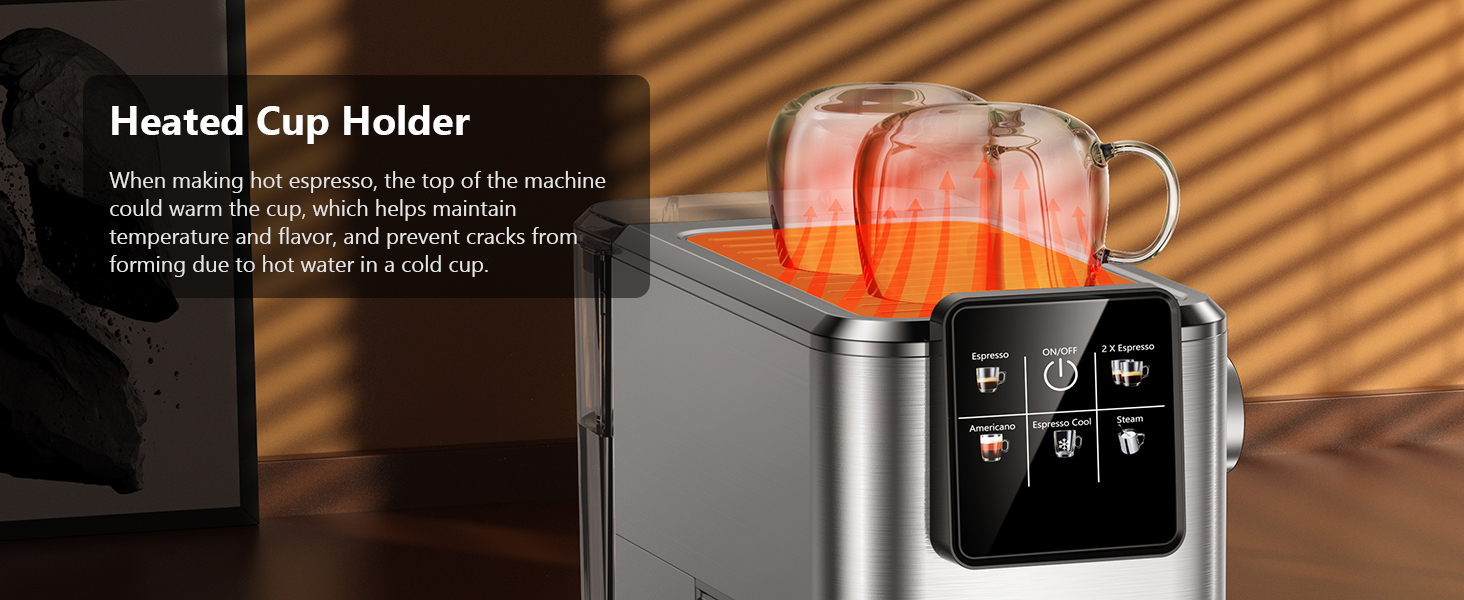
- Heated Cup Holder: Located on top of the machine to warm cups, maintaining coffee temperature.
5. Asennus
5.1 Initial Use and Priming
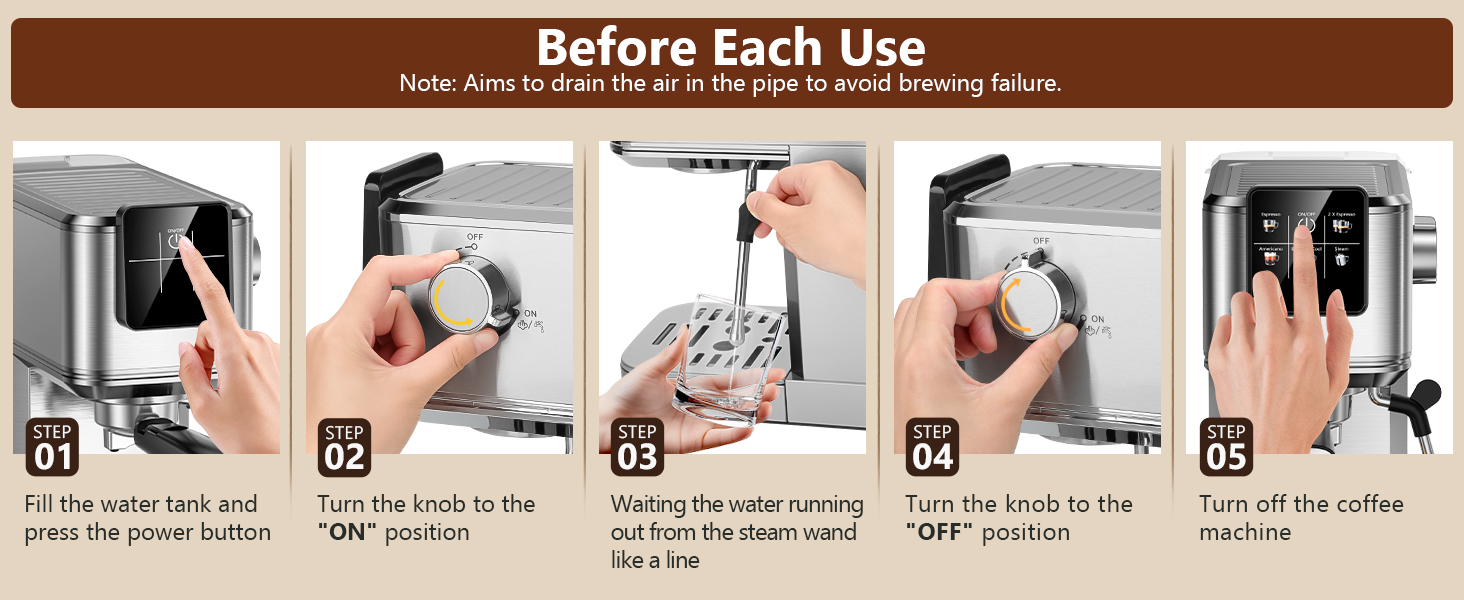
Before first use, or if the machine has not been used for a long time, it is essential to prime the system to ensure proper operation and remove any air from the pipes.
- Fill the water tank with fresh water and place it back into the machine. Ensure the tank cover is properly closed.
- Plug the machine into a power outlet. The ON/OFF button on the touch screen will illuminate.
- Press the ON/OFF button to turn on the machine. The indicator lights will blink as the machine preheats.
- Once the indicator lights are steady, the machine is ready.
- Aseta tyhjä kuppi höyrysauvan alle.
- Turn the steam knob to the "ON" position. Water will run out from the steam wand like a line. Let it run for about 10-15 seconds to purge air.
- Turn the steam knob to the "OFF" position.
- Press the ON/OFF button to turn off the machine. The machine is now primed and ready for use.

Kuva: Visual steps for priming the espresso machine before its first use or after a period of inactivity. This process drains air from the internal pipes.
5.2 vesisäiliön täyttö
The water tank has a maximum capacity of 1200ml. Do not exceed the maximum fill line to prevent overflow.
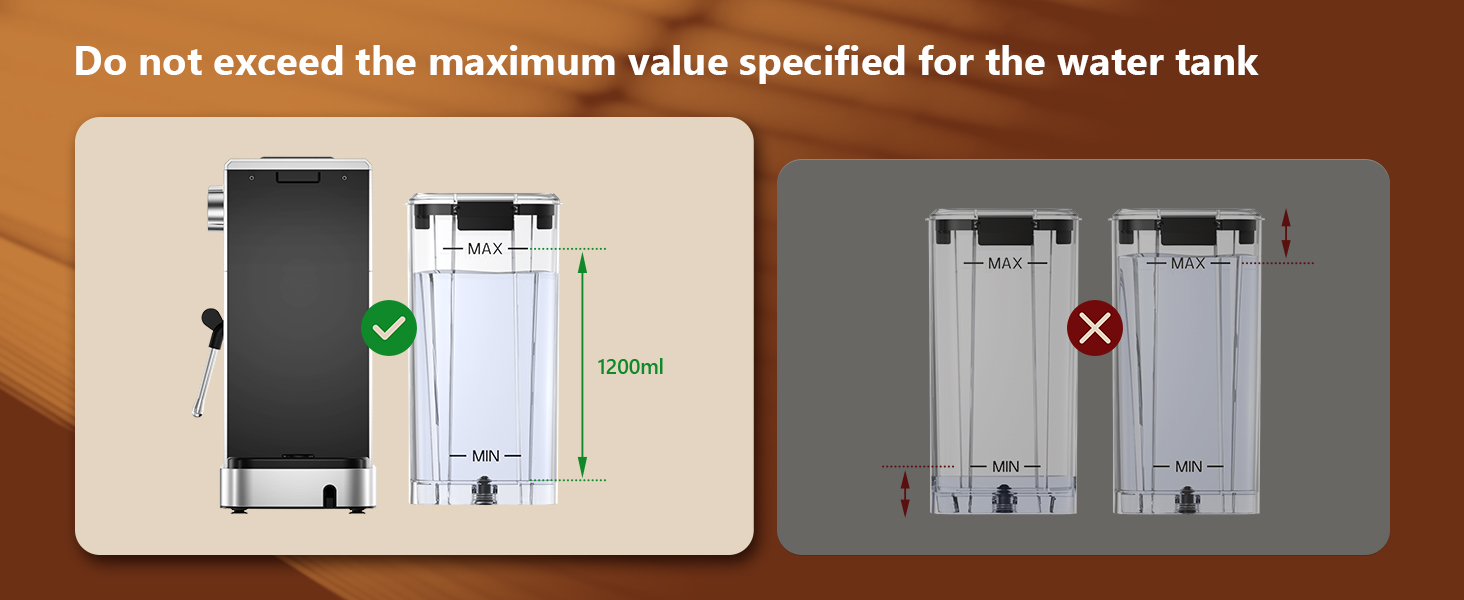
Kuva: Guidance on filling the water tank, indicating the 1200ml maximum fill level to avoid overfilling.
6. Käyttöohjeet
6.1 Espresson valmistus
The machine features a 20-bar pressure system and pre-soak technology for rich espresso extraction.
- Ensure the steam knob is set to the "OFF" position before brewing coffee.
- Fill the water tank with fresh water and press the ON/OFF button to power on. Wait for the indicator to become steady, signifying preheating is complete.
- Select the appropriate filter basket (1-shot or 2-shot) and place it into the portafilter.
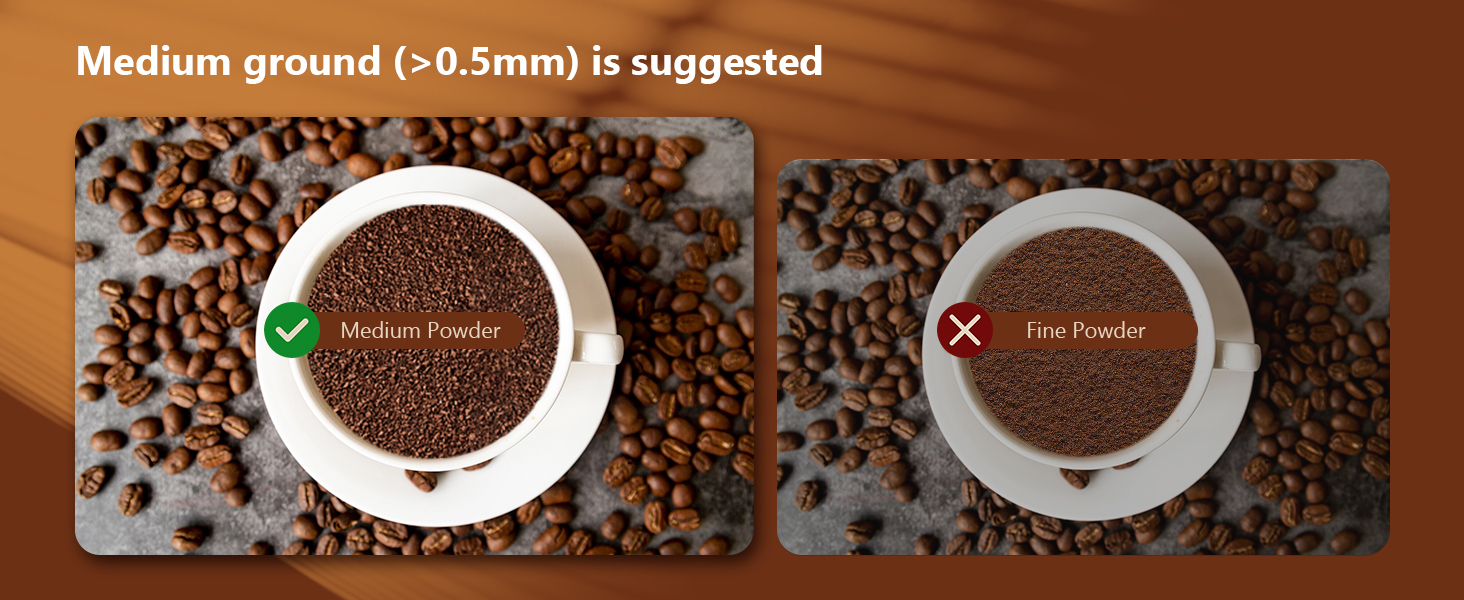
- Add ground coffee to the filter basket. Use medium ground coffee (greater than 0.5mm) for optimal results.
- Tamp the ground coffee firmly and evenly using the coffee tamper.
- Attach the portafilter to the machine, ensuring it is fully locked into place.
- Place your cup(s) on the drip tray beneath the portafilter.
- Select "Espresso" for a single shot or "2 X Espresso" for a double shot on the touch screen. The machine will begin brewing.
- Kun keittäminen on valmis, laite pysähtyy automaattisesti.

Kuva: Step-by-step visual instructions for brewing espresso, from preparing the machine to the final extraction.
Kuva: Illustration demonstrating the correct way to lock the portafilter before brewing to prevent leaks and ensure proper extraction.

Kuva: Recommended coffee grind size (medium, >0.5mm) for optimal espresso extraction, contrasting it with fine ground coffee.
6.2 Making Cold Brew Espresso
This machine offers a rapid cold brew function, producing smooth cold brew in as little as 10 minutes.
- Ensure the water tank is filled with iced water for the cold brew function.
- Prepare the portafilter with ground coffee as described in Section 6.1.
- Attach the portafilter to the machine and place a cup underneath.
- Select "Espresso Cool" on the touch screen. The machine will begin the cold brew process.
- Enjoy your rapid cold brew espresso.

Kuva: The espresso machine preparing cold brew, emphasizing the requirement for iced water in the tank.
6.3 Maidon vaahdotus
The powerful steam wand allows you to create creamy microfoam for lattes and cappuccinos.
- Fill the water tank with fresh water and press the ON/OFF button to power on.
- Press the "Steam" button on the touch screen to preheat the steam function. The indicator will blink during preheating and become steady when ready.
- After preheating, turn the steam knob to the "ON" position to release any remaining water in the pipe before frothing.
- Insert the steam nozzle approximately 1 inch into the surface of your milk.
- Gradually turn the steam knob to increase steam until the desired foam consistency is achieved.
- Once finished, turn the steam knob to the "OFF" position and clean the steam wand immediately.
Kuva: Visual instructions for frothing milk, detailing the steps from preheating to creating microfoam.
7. Huolto ja puhdistus
Säännöllinen puhdistus varmistaa espressokoneesi pitkän käyttöiän ja optimaalisen suorituskyvyn.
- Yleinen puhdistus: Pyyhi koneen ulkopinta mainoksellaamp kangas. Älä käytä hankaavia puhdistusaineita tai hankausaineita.
- Tippakaukalo: The removable drip tray should be emptied and cleaned regularly.
- Portafilter ja suodatinkorit: Poista portafilter jokaisen käyttökerran jälkeen ja hävitä käytetyt kahvinporot. Huuhtele portafilter ja suodatinkori juoksevan veden alla.
- Höyrysauva: Pyyhi höyrysuutin heti maidon vaahdottamisen jälkeenamp cloth to prevent milk residue from drying. Purge steam briefly to clear any internal blockages.
- Vesisäiliö: Puhdista vesisäiliö säännöllisesti miedolla pesuaineella ja huuhtele huolellisesti.
- Kalkinpoisto: Depending on water hardness, descale the machine every 2-3 months. Follow the instructions provided with a suitable descaling solution.

Kuva: Important cleaning instruction: All accessories must be washed by hand and are not dishwasher safe.
8. Vianmääritys
Katso tästä osiosta yleisiä ongelmia ja niiden ratkaisuja.
| Ongelma | Mahdollinen syy | Ratkaisu |
|---|---|---|
| Kahvia ei tule / Virtaus on hidas |
|
|
| Water leaks from portafilter edge |
|
|
| Höyrysuutin ei tuota höyryä |
|
|
| Kahvi ei ole tarpeeksi kuumaa |
|
|
9. Tekniset tiedot
- Merkki: KEENSTAR
- Mallin nimi: JH-C5210
- Pressure System: 20 baaria
- Teho: 1350W
- Vesisäiliön tilavuus: 1.1 Liters (37oz)
- Tuotteen mitat: 11.8" S x 12.6" L x 5.5" K
- Tuotteen paino: 4.6 puntaa
- Materiaali: Ruostumaton teräs
- Erikoisominaisuus: Programmable, Touch Screen, Milk Frother, Hot & Rapid Cold Brew
- Kahvin syöttötyyppi: Jauhettu kahvi
- Suodattimen tyyppi: Uudelleenkäytettävä
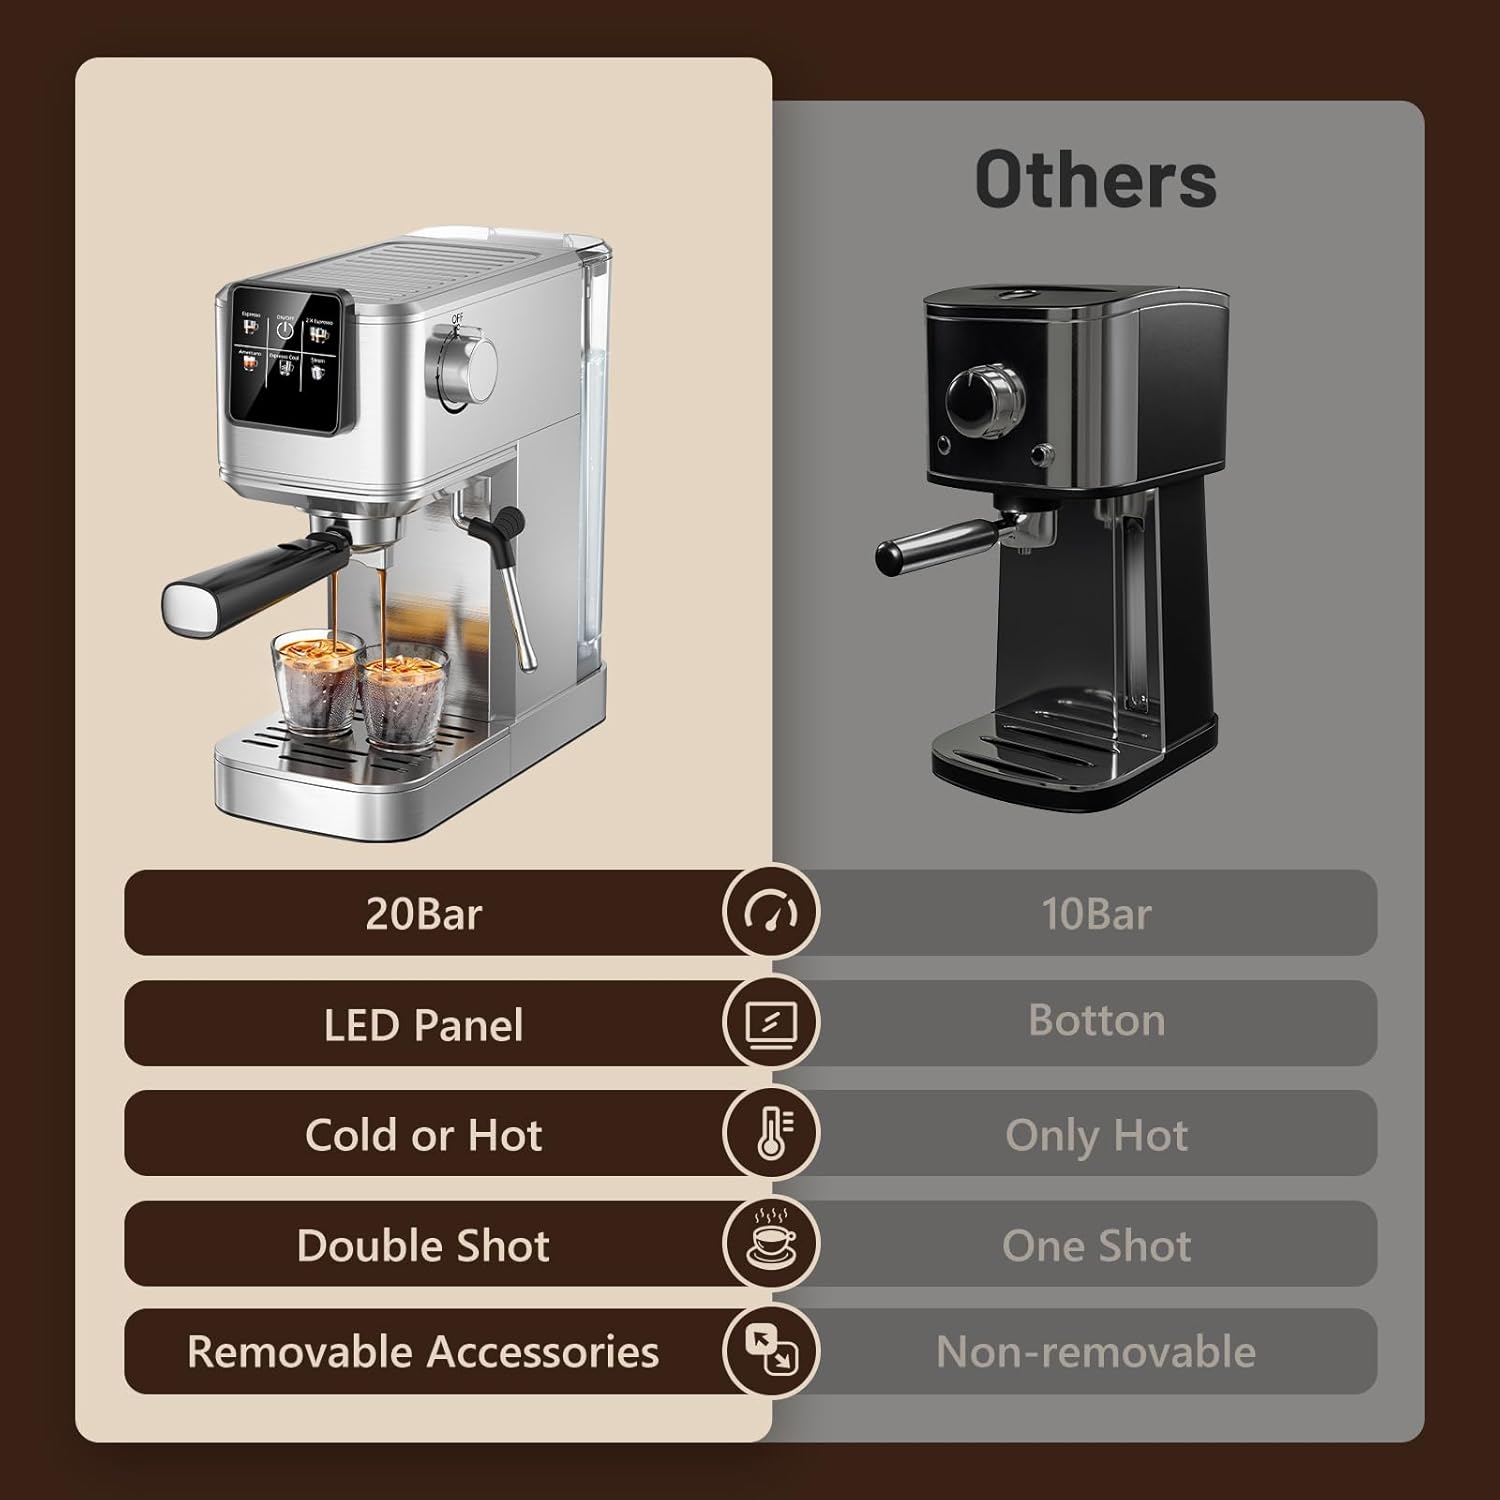
Kuva: Feature comparison of the KEENSTAR machine, emphasizing its 20Bar pressure, LED panel, and versatility for hot and cold beverages.

Kuva: Dimensions of the KEENSTAR espresso machine, indicating its compact size.
10. Takuu ja tuki
For warranty information or technical support, please refer to the contact details provided on the product packaging or visit the official KEENSTAR websivusto. Säilytä ostokuittisi mahdollisten takuuvaatimusten varalta.