Johdanto
This manual provides comprehensive instructions for the TERUNSOUl Dashcam Hardwiring Kit. This kit is designed to provide continuous power to your dashcam, enabling 24-hour parking monitoring and offering low-voltage protection for your vehicle's battery. It supports input voltages from 12V to 24V and delivers a stable 5V/3A output via a Type-C interface, ensuring compatibility with a wide range of dashcams.
Pakkauksen sisältö
Varmista, että pakkauksessasi on kaikki alla luetellut tuotteet:
- Dashcam Hardwire Kit (with USB-C Power Connector)
- 4x Piggy Back Fuse Taps/Cable
- 4x sulakkeet
- Fuse Puller/Removal Tool
- Voitage Mittari
- Pry-työkalu

Kuva: Yliview of the Dashcam Hardwiring Kit components.
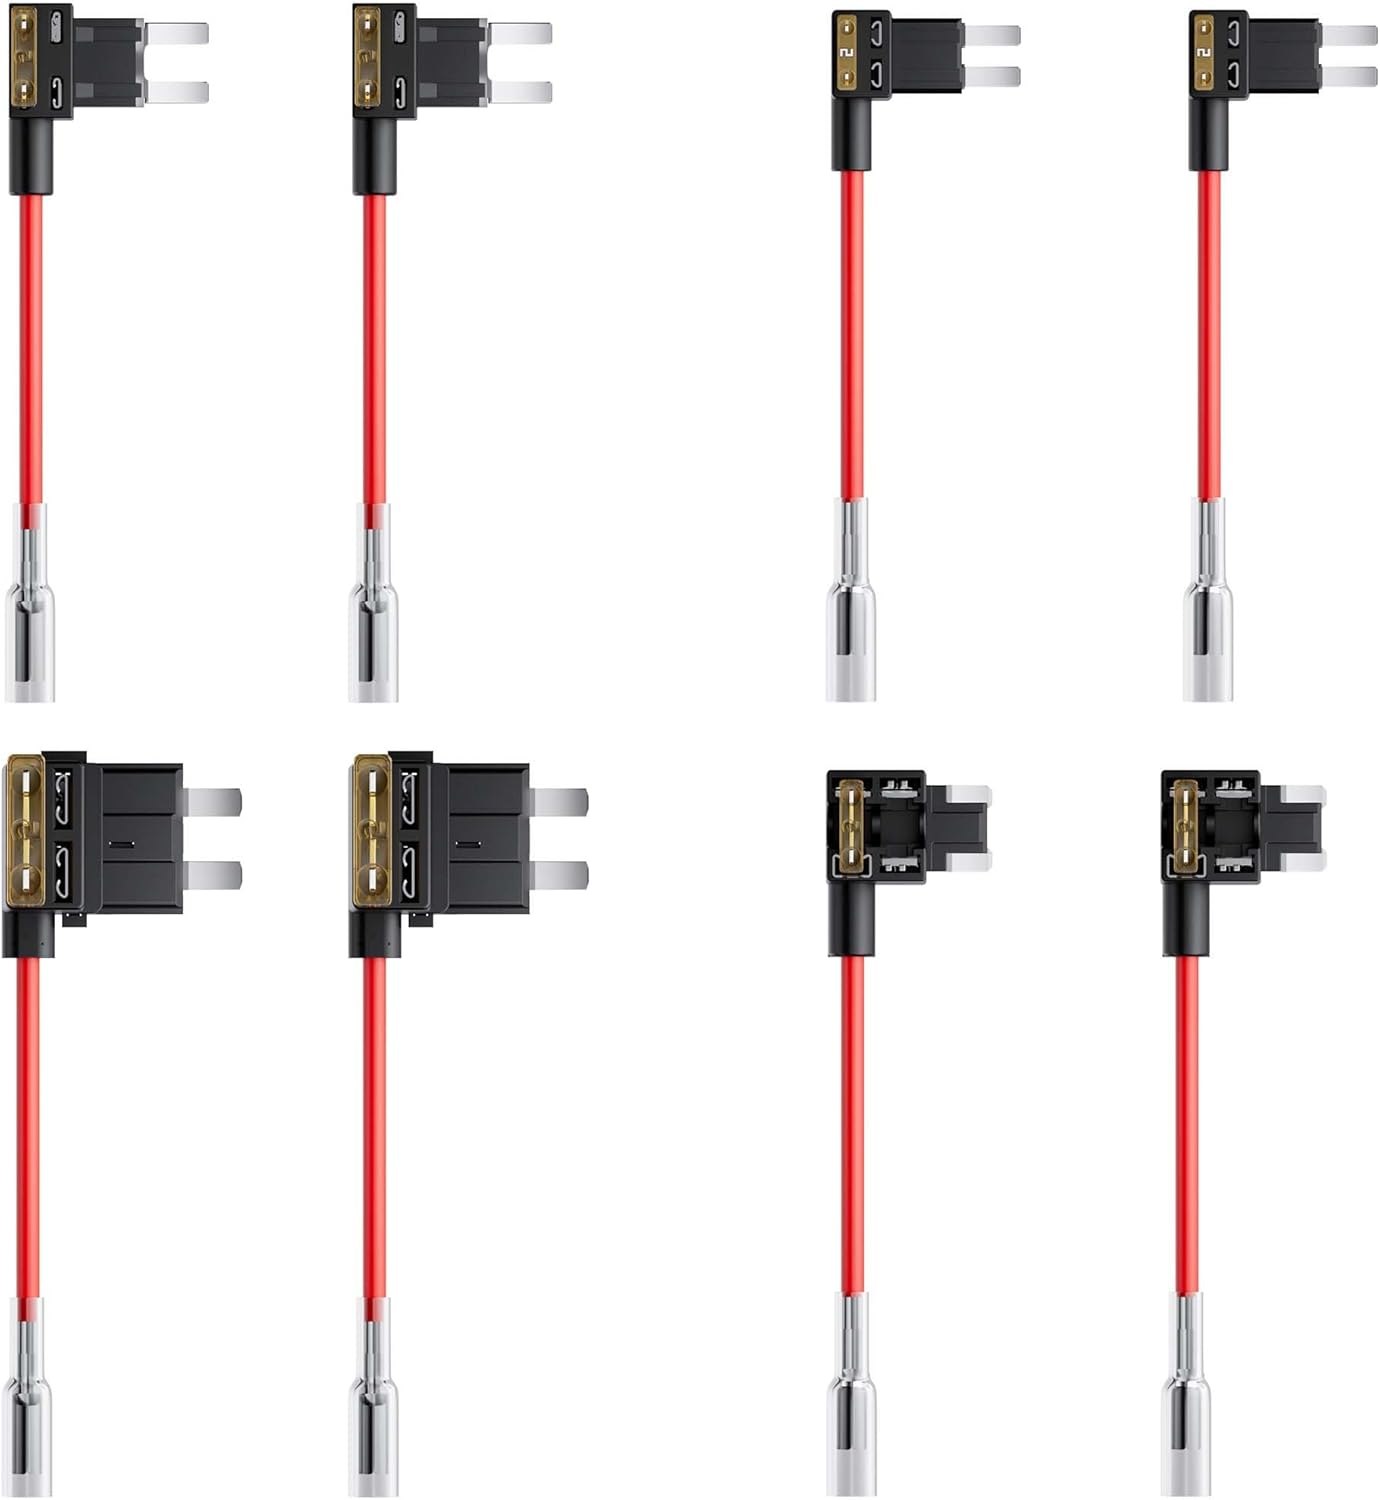
Kuva: Yksityiskohtainen view of the included fuse adapters.
Tekniset tiedot
| Merkki | TERUNSOUl |
| Mallin nimi | Dashcam Voltage Reducer Cable |
| Tulo Voltage | 12V - 24V |
| Lähtövirta | 5V/3A (Maximum) |
| Käyttöliittymä | Tyyppi-C |
| Low Voltage Suojaus | Adjustable (11V-12V cut-off) |
| Overvoltage Suojaus | Activates when voltage ylittää 30V |
| Tuotteen mitat | 6" S x 2" L x 2" K |
| Tuotteen paino | 150 grammaa |
| Yhteensopivat laitteet | Dashcams with Type-C interface (e.g., TERUNSOUl D016, FW983A) |
Asennus ja asennus
Proper installation is crucial for the functionality of the hardwiring kit, especially for parking monitoring and battery protection features. Follow these steps carefully:
1. Compatibility and Overview
The hardwiring kit is designed for dashcams requiring a 5V/3A Type-C power input. It is compatible with 12V to 24V vehicle electrical systems.

Image: USB Type-C compatibility and V3F step-down box details.
2. Asennusvaiheet
The installation process involves connecting the hardwire kit to your vehicle's fuse box. Use the included pry tool to neatly tuck cables into interior crevices.

Image: Visual guide for installation steps 1-3.
- Decide a Mounting Location: Choose a location for your dashcam that provides a clear view and does not obstruct your driving visibility. Ensure the chosen spot allows for discreet cable routing.
- Locate the Vehicle's Fuse Box: Refer to your vehicle's owner's manual or manufacturer's website to find the fuse box location. It is typically found under the dashboard, in the engine bay, or in the trunk. Use the pry tool to open any covers if necessary.
- Determine Correct Fuse Slots: You will need to identify two fuse slots:
- One for jatkuva teho (yellow wire connection): This slot provides power even when the vehicle is off.
- One for ACC power (red wire connection): This slot provides power only when the vehicle's ignition is on.

Image: Visual guide for installation steps 4-6.
- Install an Add-A-Fuse Tap:
- If using a previously identified fuse slot that has an existing fuse, insert that existing fuse into the lower empty slot of the add-a-fuse tap.
- If there is no existing fuse in your chosen slot, simply install the new fuse (provided) into the empty slot of the add-a-fuse tap.
- Fit Red & Yellow Fuse Taps: Connect the red wire of the hardwire kit to the ACC power fuse tap and the yellow wire to the constant power fuse tap. Insert these into the identified fuse slots. Turn your car keys to the ACC position and use the voltmeter to confirm incoming voltage through the ACC fuse slot. For the constant power slot, the voltmeter should show voltage regardless of ignition status.
- Locate a Ground Point: Connect the black wire of the hardwire kit to a metal chassis grounding screw or bolt. Ensure the connection is secure to prevent improper dashcam function or power issues.
3. Voitage Protection Features
The hardwiring kit includes built-in protection mechanisms:
- Low Voltage Suojaus: When the vehicle's battery voltage drops below a configurable threshold (default 11V-12V), the kit automatically cuts off power to the dashcam to prevent battery drain.
- Overvoltage Suojaus: Jos tulo voltage exceeds 30V, the system activates overvoltage protection to safeguard the dashcam and the kit itself.
- Ylijännitesuoja: The kit incorporates surge protection to guard against lightning current or overcurrent events.

Image: Low Voltage and Surge Protection diagram.
Käyttöohjeet
1. Pysäköinninvalvonta 24 tuntia vuorokaudessa
Once correctly installed, the hardwiring kit provides continuous power to your dashcam, enabling its parking surveillance features. This allows the dashcam to record events such as collision detection or time-lapse surveillance even when the vehicle's engine is off.

Image: 24-Hour Parking Monitor functionality.
2. Adjusting Low Voltage Suojaus
Matala voltage cut-off threshold can be adjusted to suit your vehicle's battery requirements. The V3F step-down box has a voltage readout and two buttons (+/-) for adjustment. The recommended minimum voltage cut-off is 11.8VDC for a 12VDC battery system and 23.6VDC for a 24VDC battery system.
- Press and hold the buttons for 3 seconds to activate the LED.
- Use the +/- buttons to adjust the cut-off voltage.
- Kun olet asettanut voltage, wait until the LED flashes 3 times to confirm your setting.

Kuva: Vol.tage Cut-Off settings to prevent battery drain.
Huolto
The TERUNSOUl Dashcam Hardwiring Kit requires minimal maintenance. Periodically check the connections to the fuse box and the ground point to ensure they remain secure. Ensure the cables are not pinched or exposed to excessive heat or moisture. If you notice any signs of wear or damage to the cables or the step-down box, discontinue use and contact customer support.
Vianetsintä
- Dashcam not receiving power:
- Check all fuse connections. Ensure the add-a-fuse taps are correctly installed and the fuses are intact.
- Verify the ground connection is secure and on a clean, unpainted metal surface.
- Confirm that the selected fuse slots provide constant and ACC power as intended using the voltage mittari.
- Ensure the USB-C connection to the dashcam is firm.
- Pysäköinninvalvonta ei toimi:
- Ensure the yellow wire (constant power) is correctly connected and receiving power when the vehicle is off.
- Check your dashcam's settings to ensure parking mode is enabled and configured correctly.
- Dashcam turns off prematurely:
- This may indicate the low voltage protection is activating. Check your vehicle's battery health.
- Review alhainen voltage cut-off setting on the V3F step-down box. Adjust it to a lower, but safe, threshold if necessary (refer to the 'Adjusting Low Voltage Protection' section).
- Fuse blows repeatedly:
- Ensure the correct fuse rating is used for the add-a-fuse tap.
- Inspect the wiring for any shorts or damage.
- Jos ongelma jatkuu, ota yhteyttä asiakastukeen.
Takuu ja tuki
This TERUNSOUl Dashcam Hardwiring Kit is covered by a 1 VUODEN TAKUU ostopäivästä lukien. Tämä takuu kattaa valmistusvirheet ja normaalissa käytössä ilmenevät toimintahäiriöt.
For any questions, concerns, or warranty claims, please contact our customer service team. Provide your product model number (B0FQ5CLRBG) and a detailed description of the issue for efficient support.