
TOOLTOP TT-ET14S
TOOLTOP ET14S User Manual
2-in-1 Thermal Imager & Multimeter
1. Johdanto
The TOOLTOP ET14S is a versatile 2-in-1 device combining a high-resolution thermal imager with a full-featured AC/DC current voltage multimeter. Designed for professionals and enthusiasts, it offers precise measurements and clear thermal imaging for various applications, including pipeline heating inspection, electronic circuit analysis, and general electrical diagnostics. Its compact design and intuitive interface make it an essential tool for efficient and accurate work.
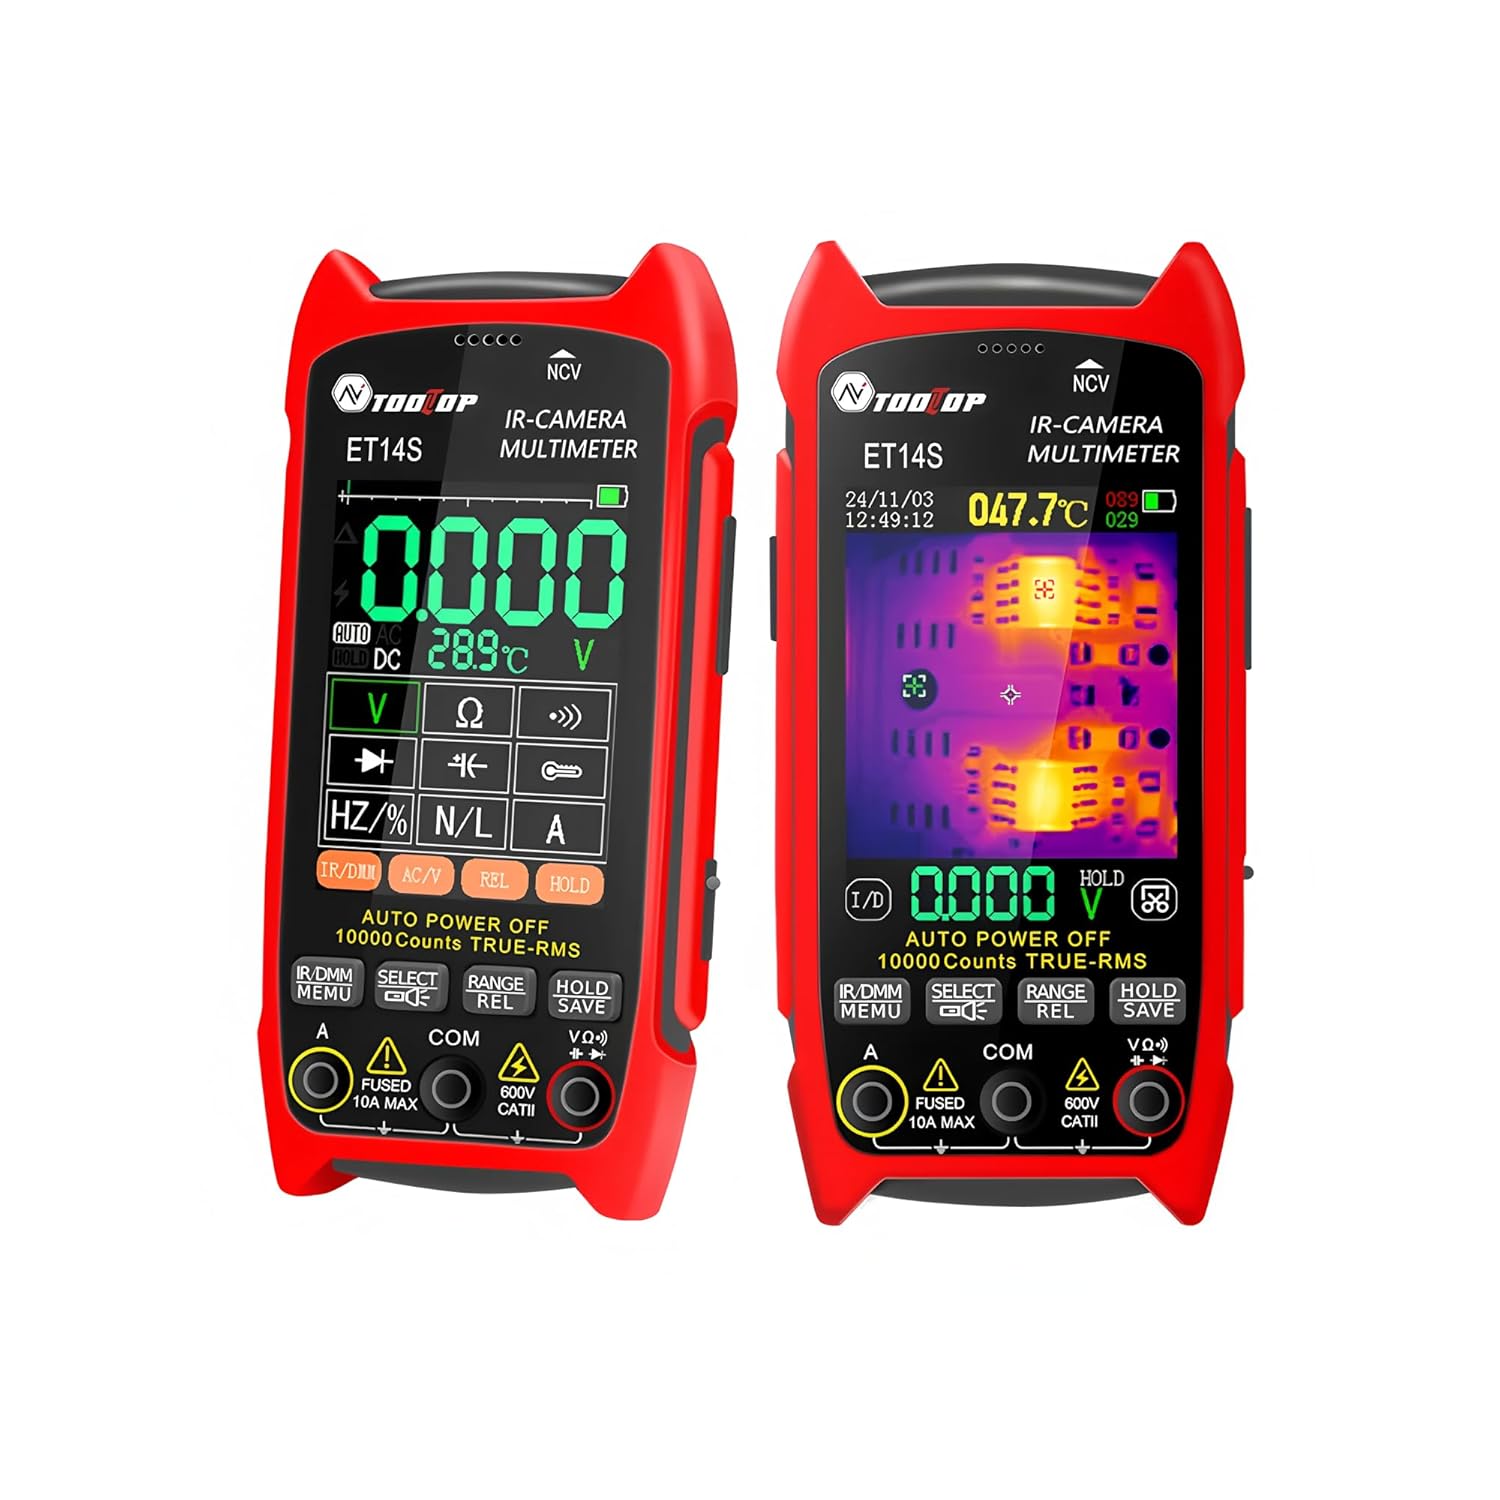
This manual provides detailed instructions on how to set up, operate, and maintain your ET14S device. Please read it thoroughly before use to ensure safe and optimal performance.
2. Turvallisuustiedot
Noudata aina seuraavia turvaohjeita henkilövahinkojen ja laitteen vaurioitumisen välttämiseksi:
- Älä yritä korjata tai muokata laitetta. Jätä kaikki huoltotyöt pätevän henkilöstön tehtäväksi.
- Do not operate the device in explosive atmospheres or in the presence of flammable gases or fumes.
- Ensure proper polarity when connecting test leads to avoid damage to the device or the circuit under test.
- Katkaise aina virta piiristä ennen resistanssin, kapasitanssin tai diodin mittaamista.
- Ole varovainen, kun työskentelet voltagyli 30 V AC RMS, 42 V huippu tai 60 V DC, koska ne aiheuttavat sähköiskun vaaran.
- Pidä laite kuivana. Älä altista sitä sateelle tai kosteudelle.
- Clean the device only with a dry, soft cloth. Do not use abrasive cleaners or solvents.
3. Mitä laatikossa on
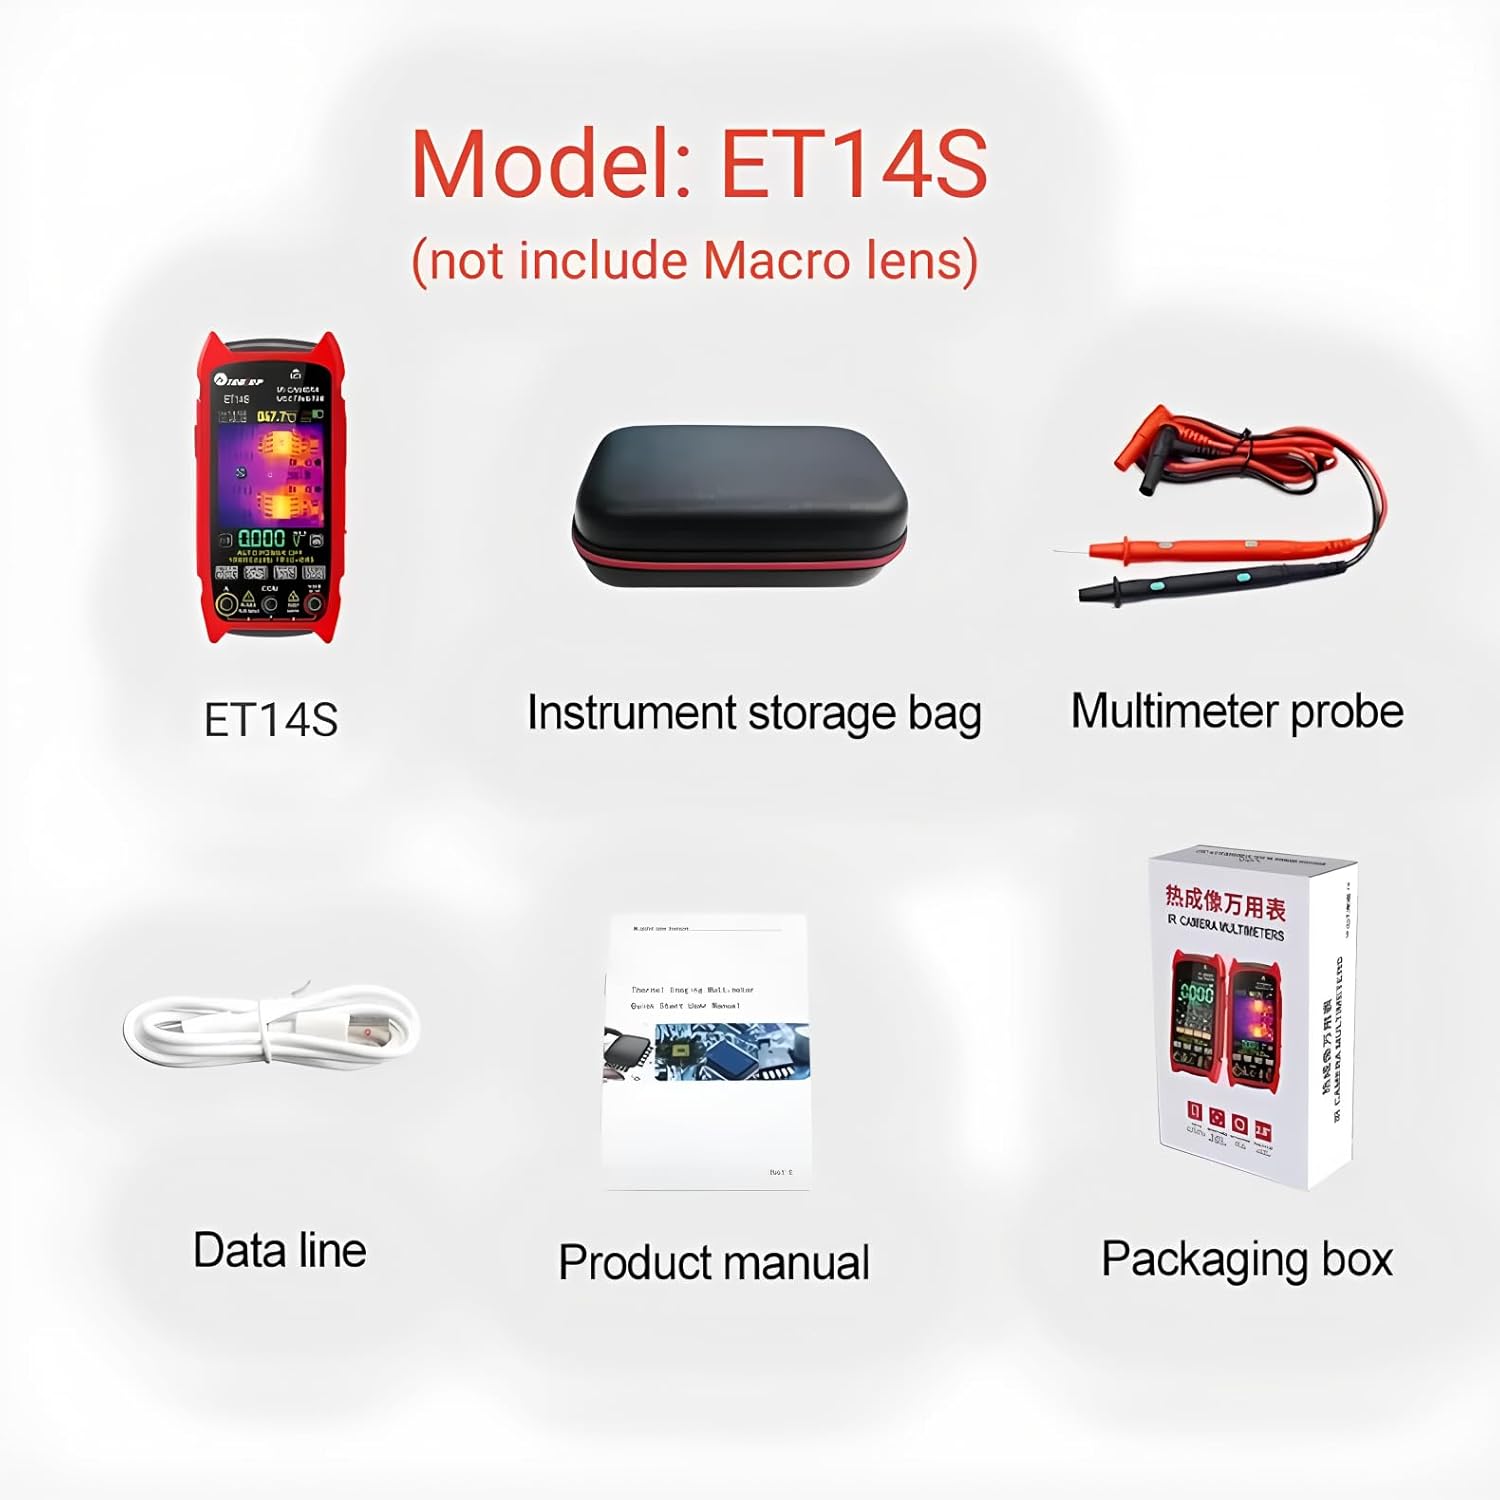
Avattuasi pakkauksen tarkista, että kaikki alla luetellut osat ovat mukana ja hyvässä kunnossa:
- ET14S Thermal Imager & Multimeter
- Instrumenttien säilytyspussi
- Multimeter probe
- Datalinja (USB-kaapeli)
- Product manual (this document)
- Pakkauslaatikko
4. Asennus
4.1 Akun asennus ja lataaminen
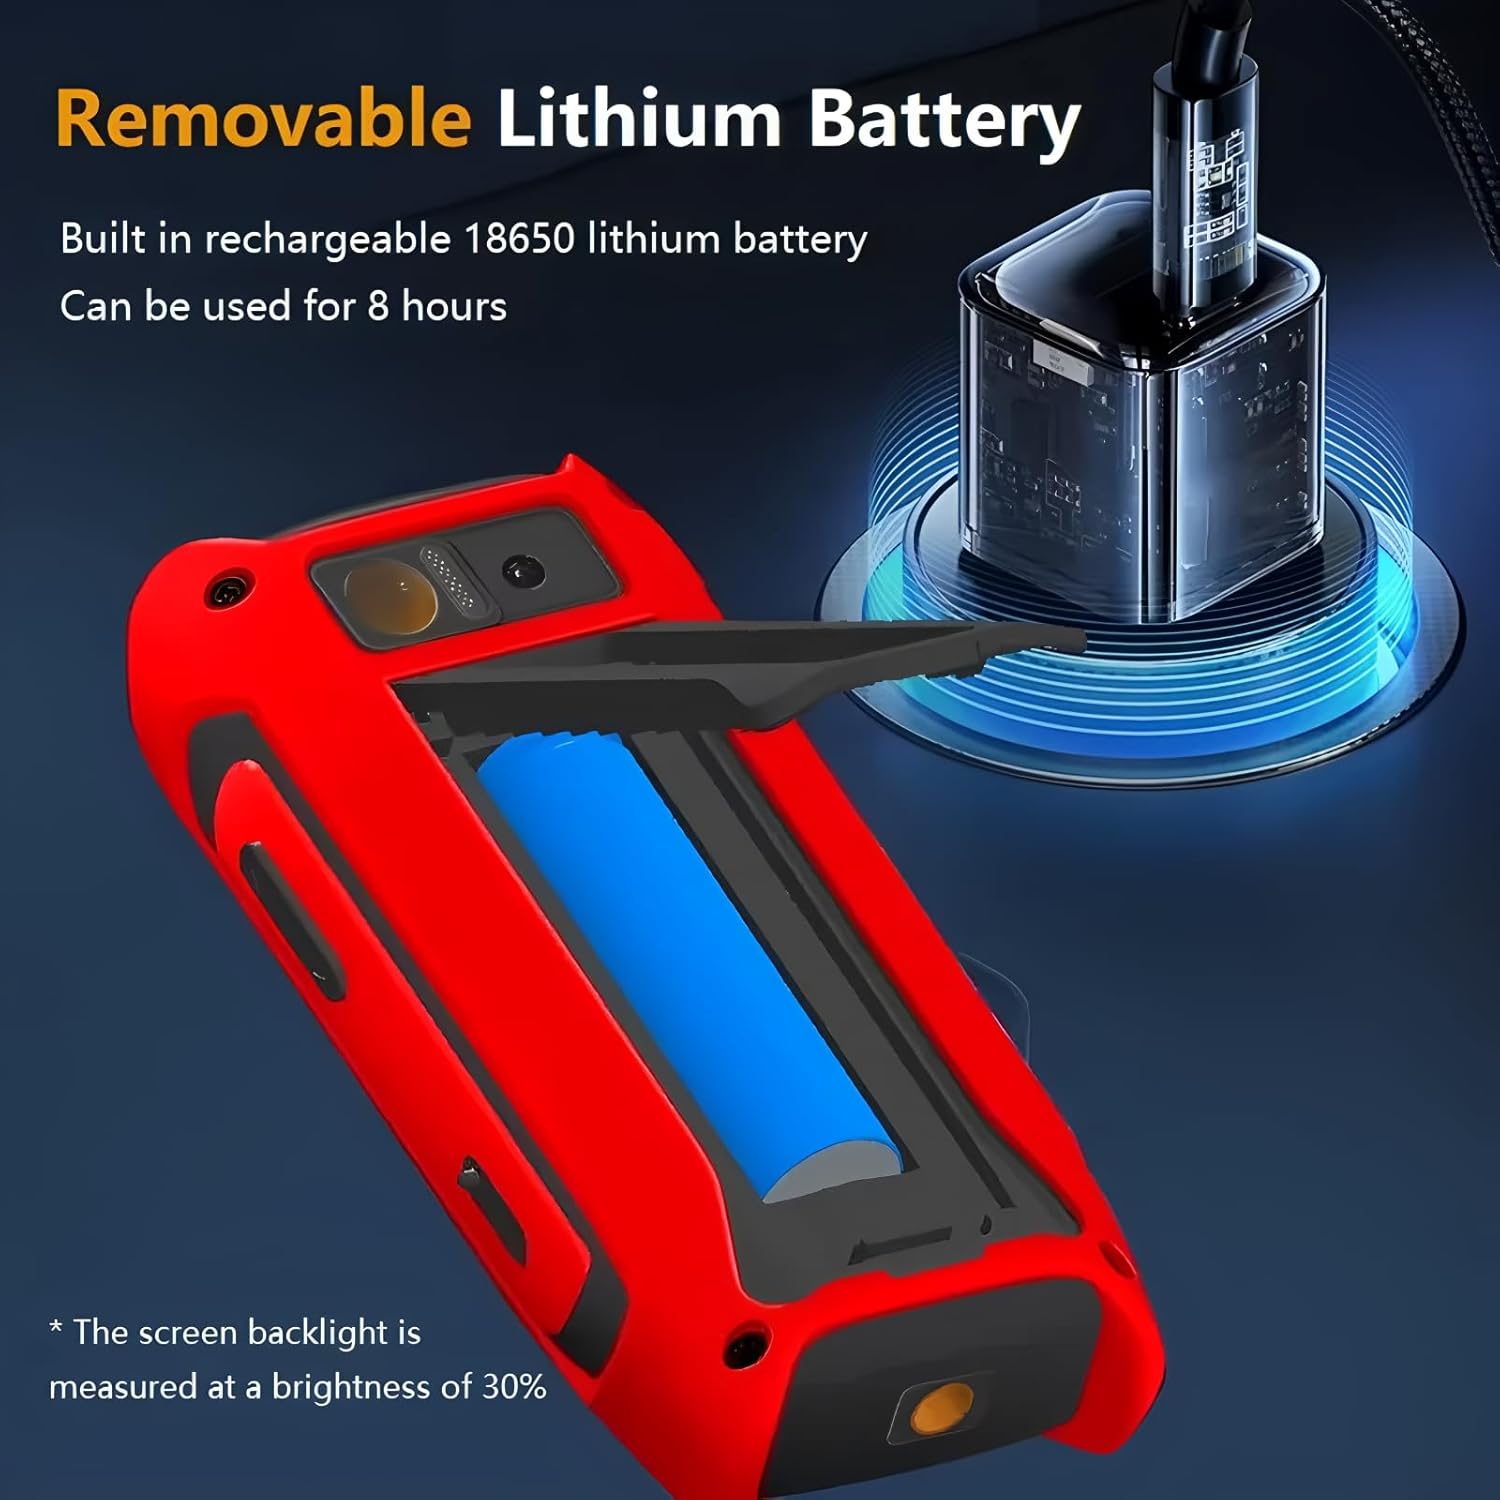
The ET14S is powered by a built-in rechargeable 18650 lithium battery. Before first use, ensure the battery is fully charged.
- Paikanna laitteen takaosassa oleva paristolokeron kansi.
- Open the cover and insert the 18650 battery, ensuring correct polarity.
- Connect the provided USB data cable to the device's charging port and the other end to a standard USB power adapter (not included) or a computer USB port.
- The charging indicator on the screen will show the charging status. A full charge typically takes several hours and provides up to 8 hours of continuous use (measured at 30% screen brightness).
4.2 Ensimmäinen käynnistys
To power on the device, press and hold the power button located on the side until the screen illuminates. The device will boot up and display the main interface, typically starting in multimeter mode.
5. Käyttöohjeet
5.1 Yleinen käyttö
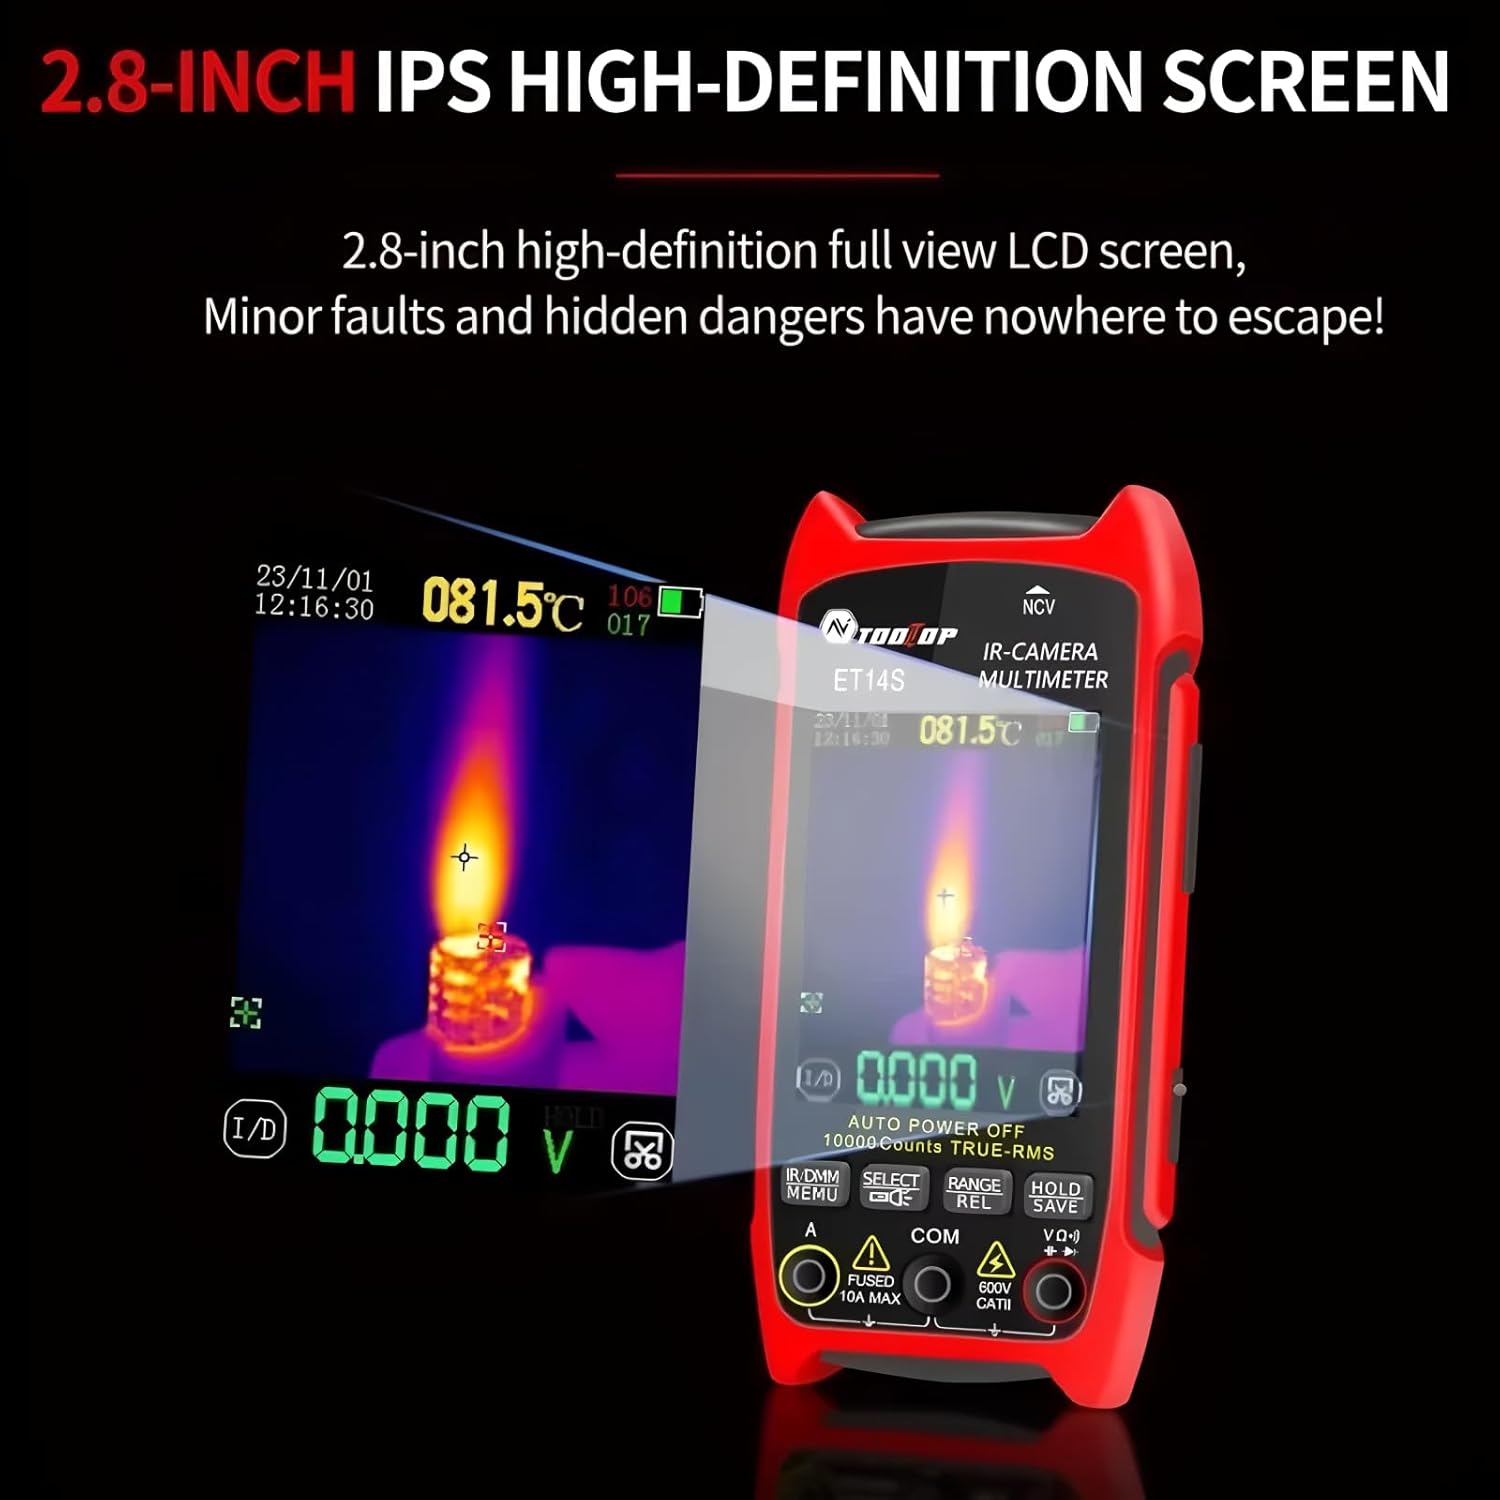
The ET14S features a 2.8-inch IPS high-definition full-view LCD screen for clear display of measurements and thermal images. Navigation is primarily done using the buttons below the screen.
5.2 Lämpökuvaustila
The thermal imager features an ISR 240x240 resolution with a 25Hz image capture frequency, providing detailed thermal insights. The temperature range is -20℃ to +550℃.
- To switch to thermal imaging mode, press the dedicated IR/DMM button.
- The screen will display a thermal image, with temperature readings and a crosshair indicating the measurement point.
- Adjust emissivity settings if necessary for accurate temperature readings on different surfaces. Refer to the on-screen menu for this setting.

5.3 Yleismittaritila
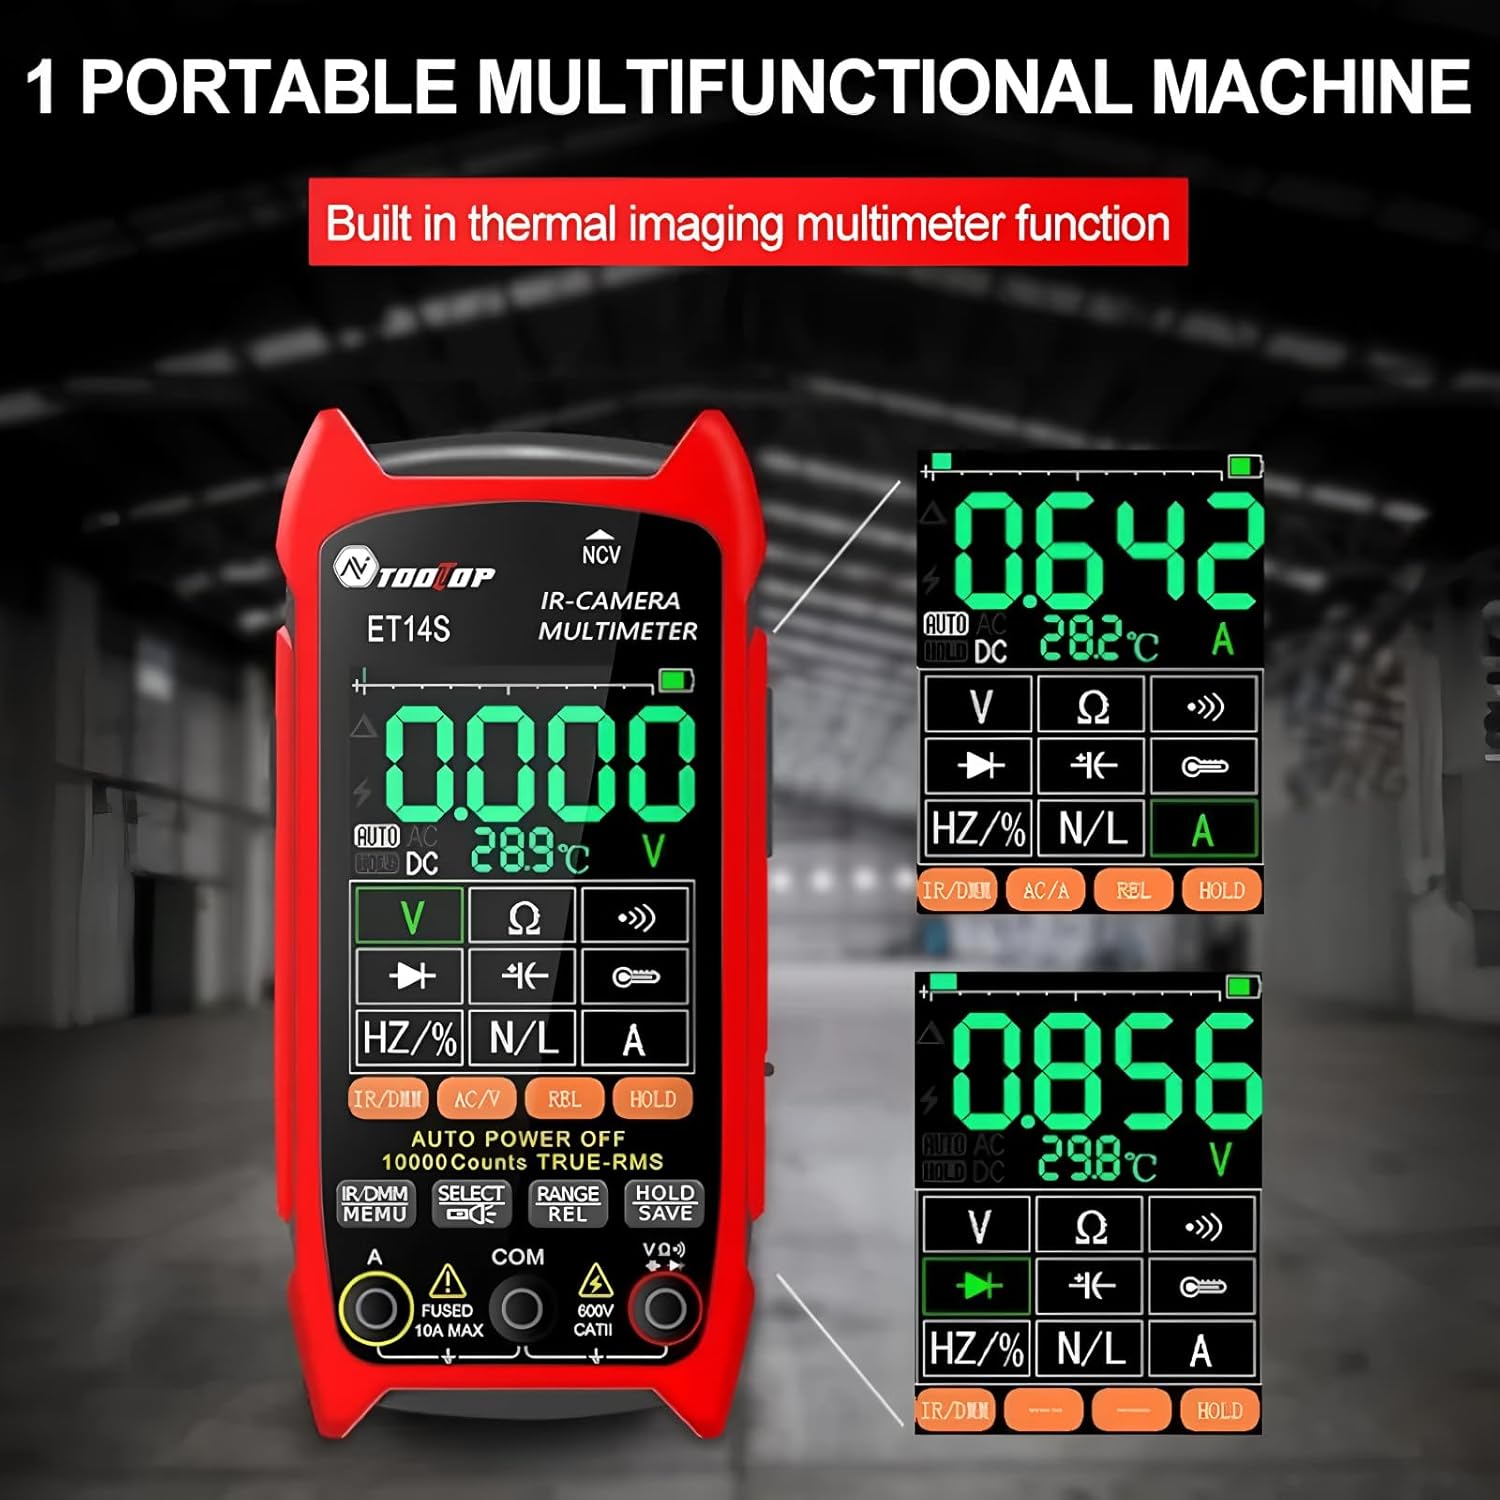
The integrated multimeter is a 9999 counts True RMS device, capable of measuring AC/DC current, voltage, resistance, capacitance, frequency, and performing diode and continuity tests.
- To switch to multimeter mode, press the IR/DMM button.
- Connect the multimeter probes to the appropriate input jacks (VΩHz, COM, A).
- Use the function buttons (V, Ω, Hz/%, A) to select the desired measurement type. The device supports auto-ranging.
- For specific functions like AC/DC selection or relative measurement, use the AC/A and REL buttons.
5.4 Optional Macro Lens Usage
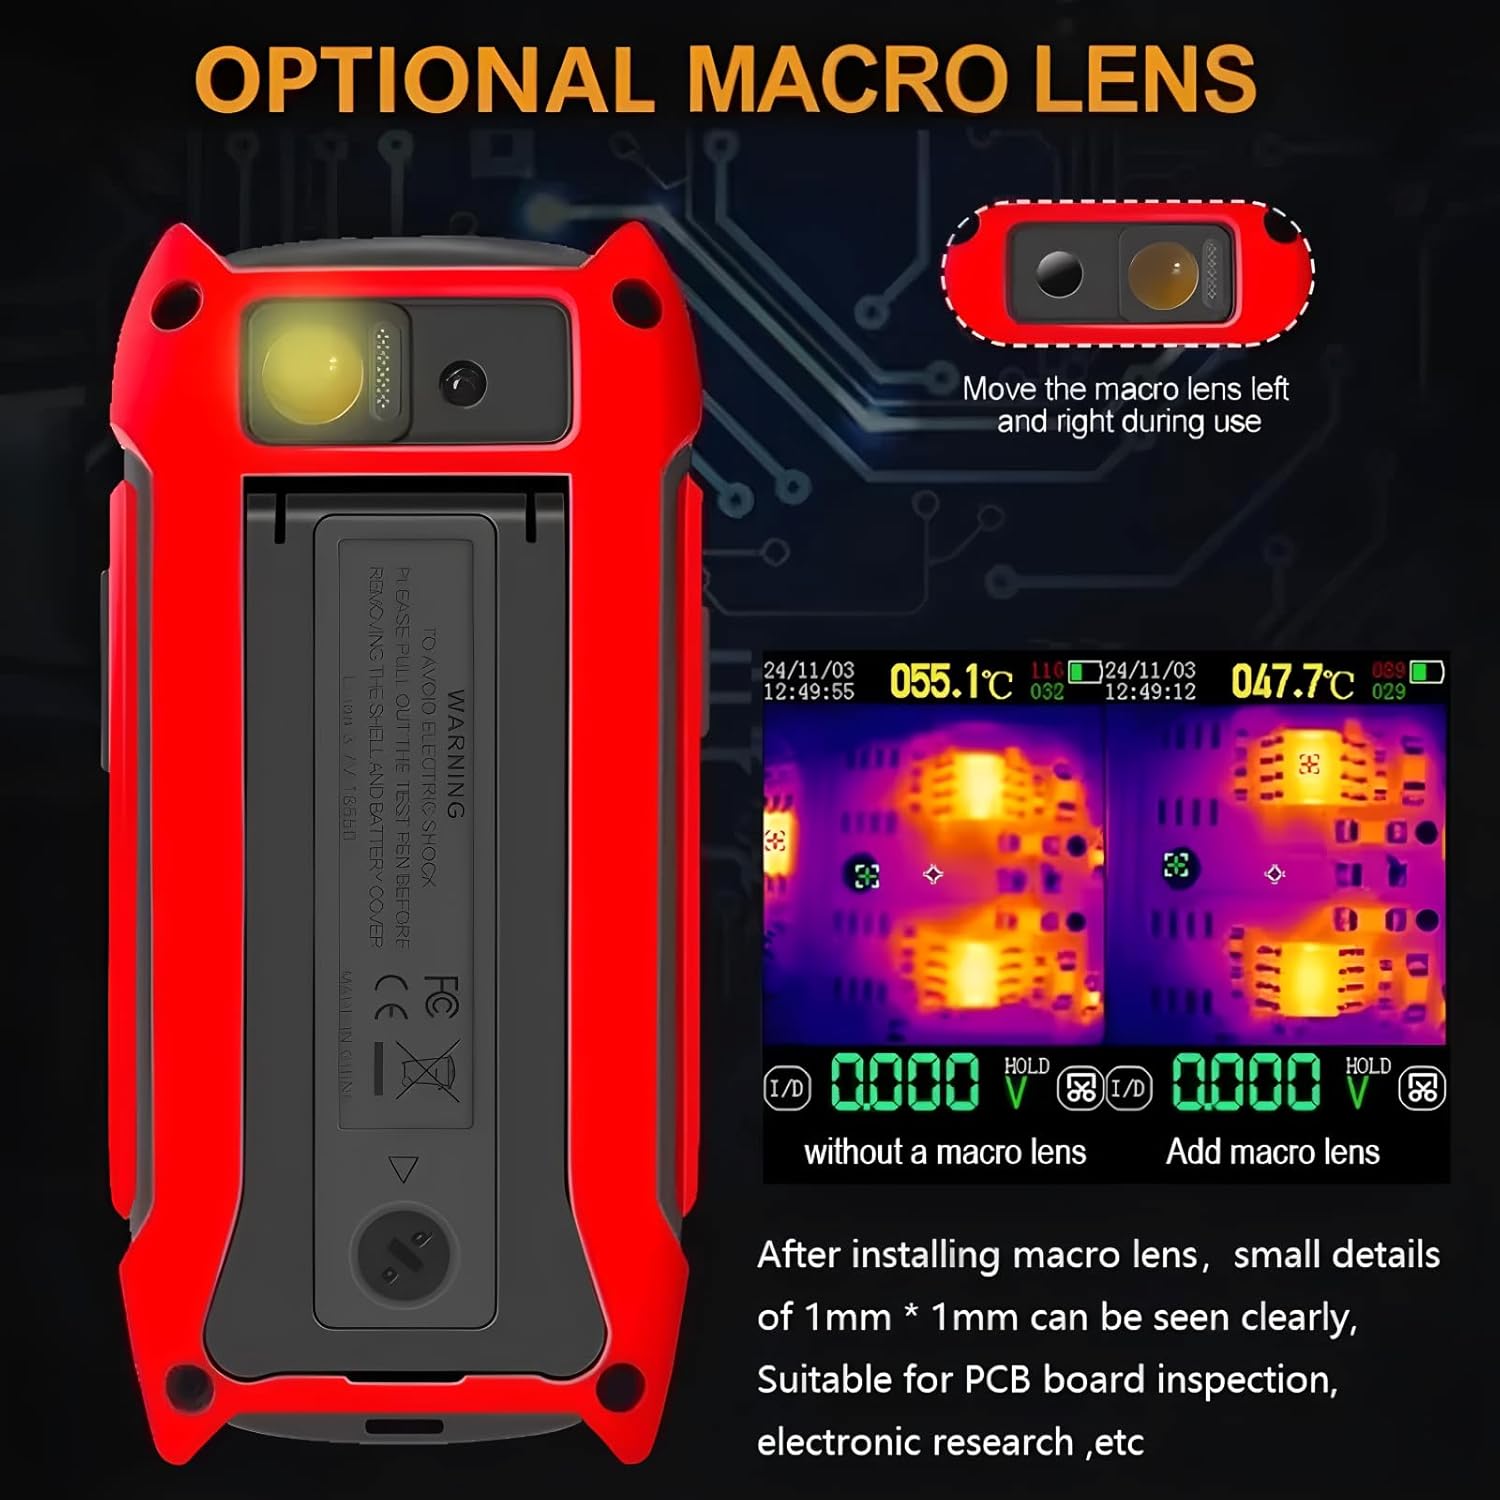
An optional macro lens can be attached to the device for inspecting small details, such as those on PCB boards. This enhances the thermal imaging capability for electronic research and repair.
- To install the macro lens, align it with the camera module on the back of the device and slide it into place.
- Ensure the lens is securely seated.
- When using the macro lens, small details of 1mm * 1mm can be clearly seen.
5.5 Wide Applications Range
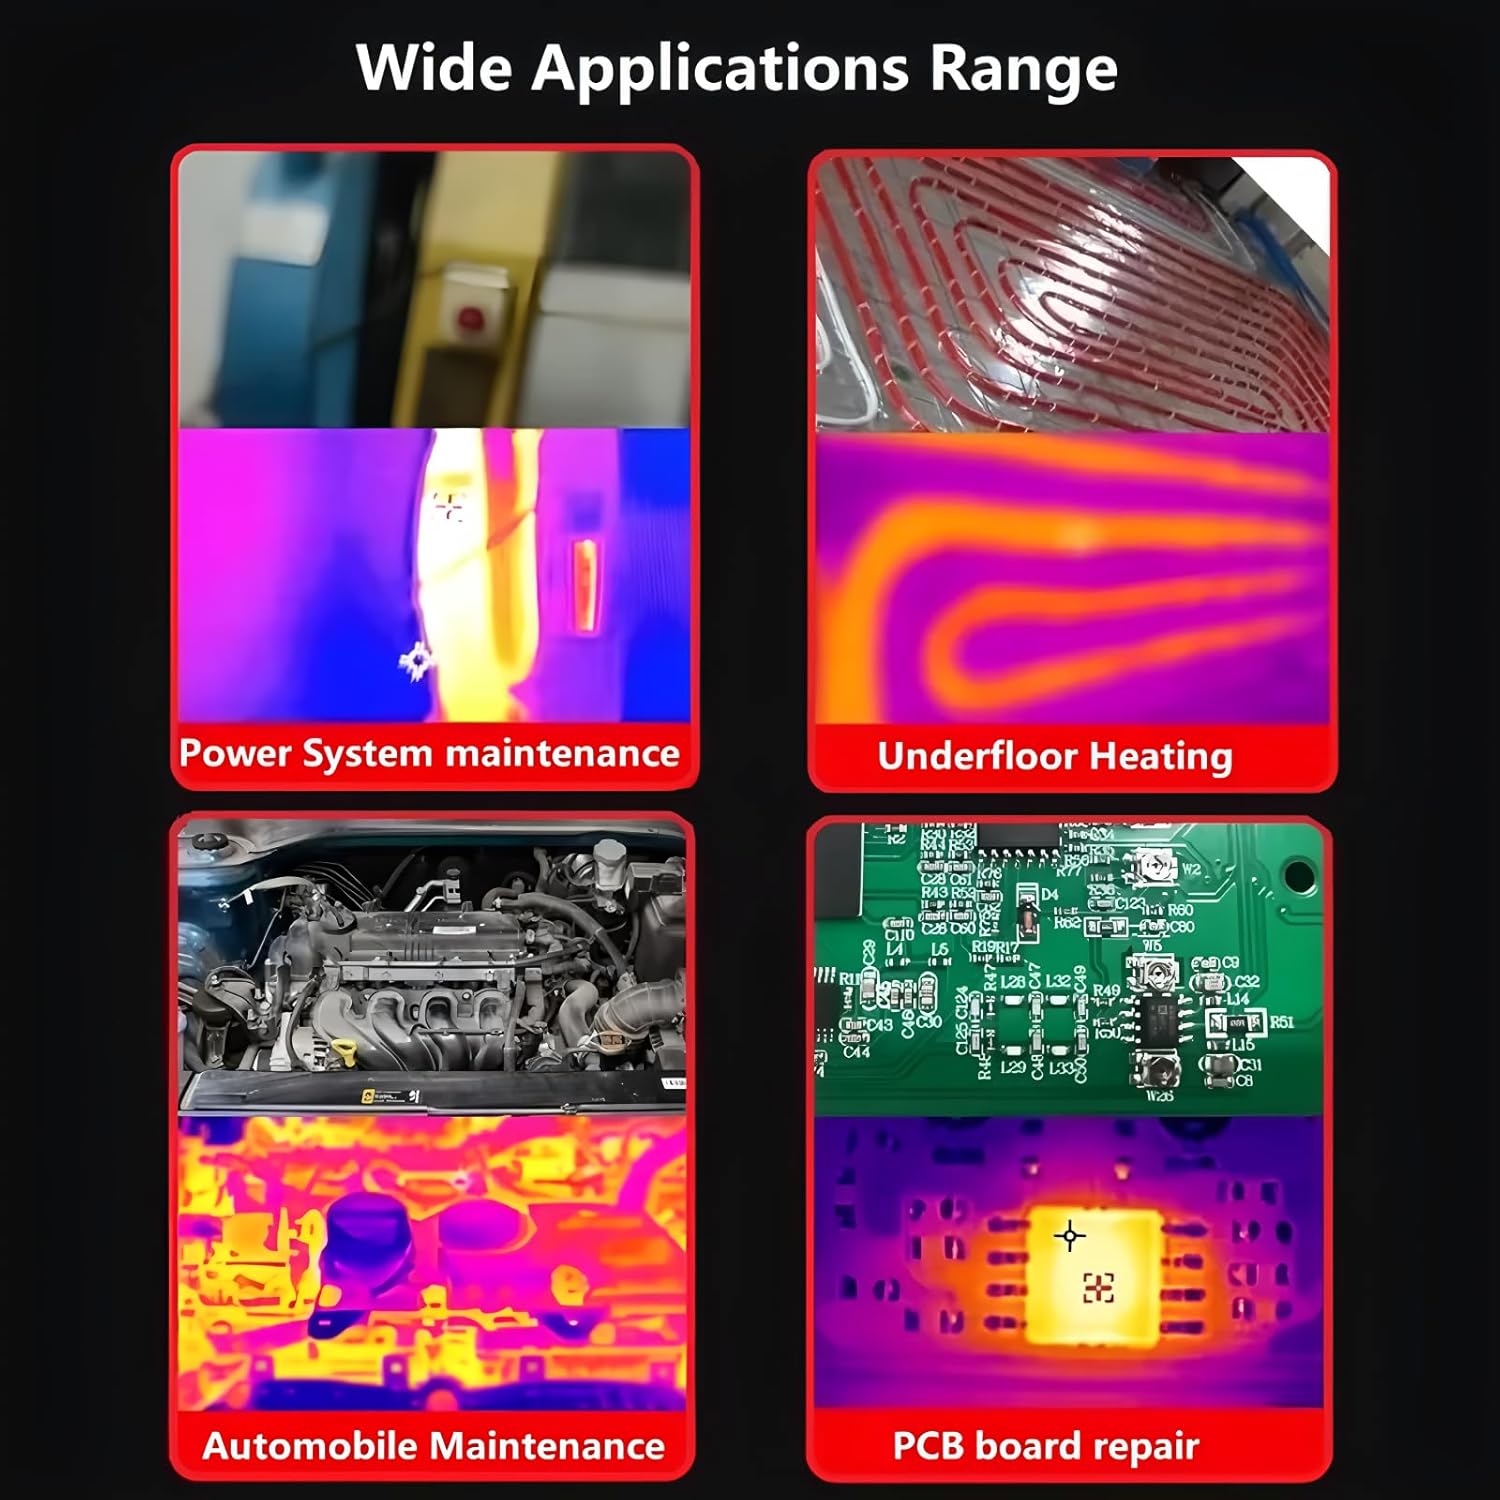
The ET14S is suitable for a variety of applications due to its dual functionality:
- Power System Maintenance: Tunnista ylikuumentuneet komponentit tai vialliset liitännät.
- Underfloor Heating Inspection: Locate heating elements and identify blockages or leaks.
- Auton huolto: Diagnose electrical issues, check engine component temperatures.
- PCB Board Repair: Pinpoint hot spots on circuit boards for efficient troubleshooting.
6. Huolto
6.1 Puhdistus
To ensure the longevity and accuracy of your ET14S, follow these cleaning guidelines:
- Wipe the device's exterior with a soft, dry cloth.
- Pinttyneeseen likaan, hieman damp voidaan käyttää miedolla saippualla kostutettua liinaa ja sen jälkeen kuivaa liinaa.
- Älä käytä hankaavia puhdistusaineita, liuottimia tai voimakkaita kemikaaleja, sillä ne voivat vahingoittaaasing tai näyttö.
- Keep the thermal lens and multimeter input jacks free of dust and debris. Use a soft brush or compressed air if necessary.
6.2 Varastointi
When not in use, store the ET14S in a cool, dry place, away from direct sunlight and extreme temperatures. Use the provided instrument storage bag to protect it from dust and physical damage.
7. Vianmääritys
If you encounter issues with your ET14S, refer to the table below for common problems and their solutions:
| Ongelma | Mahdollinen syy | Ratkaisu |
|---|---|---|
| Laite ei käynnisty | Low battery or battery not installed correctly. | Charge the battery or ensure it is correctly inserted with proper polarity. |
| Epätarkat lämpötilalukemat | Incorrect emissivity setting; lens dirty; object too far. | Adjust emissivity; clean the thermal lens; move closer to the object. |
| Multimeter readings are unstable or zero | Loose probe connection; incorrect function selected; circuit not powered. | Ensure probes are securely connected; select the correct measurement function; verify the circuit is live if measuring voltage/nykyinen. |
| Screen is dim or flickering | Akku vähissä; näyttöasetukset. | Charge the battery; check display brightness settings in the menu. |
8. Tekniset tiedot
Below are the key technical specifications for the TOOLTOP ET14S:
| Ominaisuus | Erittely |
|---|---|
| Mallinumero | TT-ET14S |
| Lämpökameran resoluutio | ISR 240x240 pixels |
| Kuvankaappauksen taajuus | 25 Hz |
| Lämpötila-alue | -20 ℃ ~ +550 ℃ (-4 ℉ ~ +1022 ℉) |
| Lämpötilan tarkkuus | ±2℃ tai ±2% |
| Mittaustarkkuus | 0.1 ℃ |
| Yleismittarin lukemat | 9999 counts True RMS |
| Näyttöruutu | 2.8-inch IPS High-Definition LCD |
| Akun tyyppi | Ladattava 18650 litiumparisto |
| Jatkuva käyttöaika | Up to 8 hours (at 30% screen brightness) |
| Virtalähde | Paristokäyttöinen |
| Tuotteen paino | 1 kilogramma (2.2 paunaa) |
| Pakkauksen mitat | 7.87 x 5.91 x 3.94 tuumaa |
| Sertifikaatit | CE, RoHS |
Tärkeimmät ominaisuudet:
- ISR240x240 Thermal Camera, Upgraded imaging pixels of 240x240 and 25hz image capture frequency.
- High-precision Multimeter, 9999 counts True RMS multimeter.
- Up to 8 hours of continuous use. The universal 18650 battery design.
- Compact and Portable, with a 2.8-inch large screen and innovative stand design.
- Temperature range: -20℃ ~ +550℃; Accuracy: ±2℃or±2%; Measurement resolution: 0.1℃/0.1℉.
9. Takuu ja tuki
TOOLTOP products are manufactured to high quality standards. For warranty information, technical support, or service inquiries, please refer to the contact details provided on the product packaging or visit the official TOOLTOP website. Please have your model number (TT-ET14S) and purchase date ready when contacting support.
Ask a question about this manual
Ask about setup, troubleshooting, compatibility, parts, safety, or missing instructions. Manuals+ will review the question and use this page’s manual context to help answer it.