
1. Johdanto
This manual provides detailed instructions for the installation, operation, and maintenance of your GeeekPi 12.6 Inch IPS LCD Touch Screen Monitor (Model EP-0190). This monitor features a 1920x515 FHD resolution, IPS panel for wide viewing angles, 10-point multi-touch functionality, and built-in dual speakers. It is designed for various applications, including use as a secondary monitor for CPU/GPU monitoring in PC cases like the Hyte Y60.
2. Turvallisuustiedot
- Do not expose the monitor to rain or moisture to prevent fire or electric shock hazards.
- Vältä sijoittamasta näyttöä suoraan auringonpaisteeseen tai lämmönlähteiden lähelle.
- Use only the power adapter and cables specified by the manufacturer.
- Do not attempt to disassemble or modify the monitor. Refer all servicing to qualified personnel.
- Pidä näyttö poissa voimakkaista magneettikentistä.
- Varmista näytön ympärillä asianmukainen tuuletus ylikuumenemisen estämiseksi.
3. Pakkauksen sisältö
Varmista, että pakkauksessasi on kaikki alla luetellut tuotteet. Jos jokin tuote puuttuu tai on vaurioitunut, ota yhteyttä jälleenmyyjään.
- GeeekPi 12.6 Inch IPS LCD Touch Screen Monitor (EP-0190)
- Mini HD Cable
- MicroUSB Cable (for touch screen and power)
- Ristiruuvimeisseli
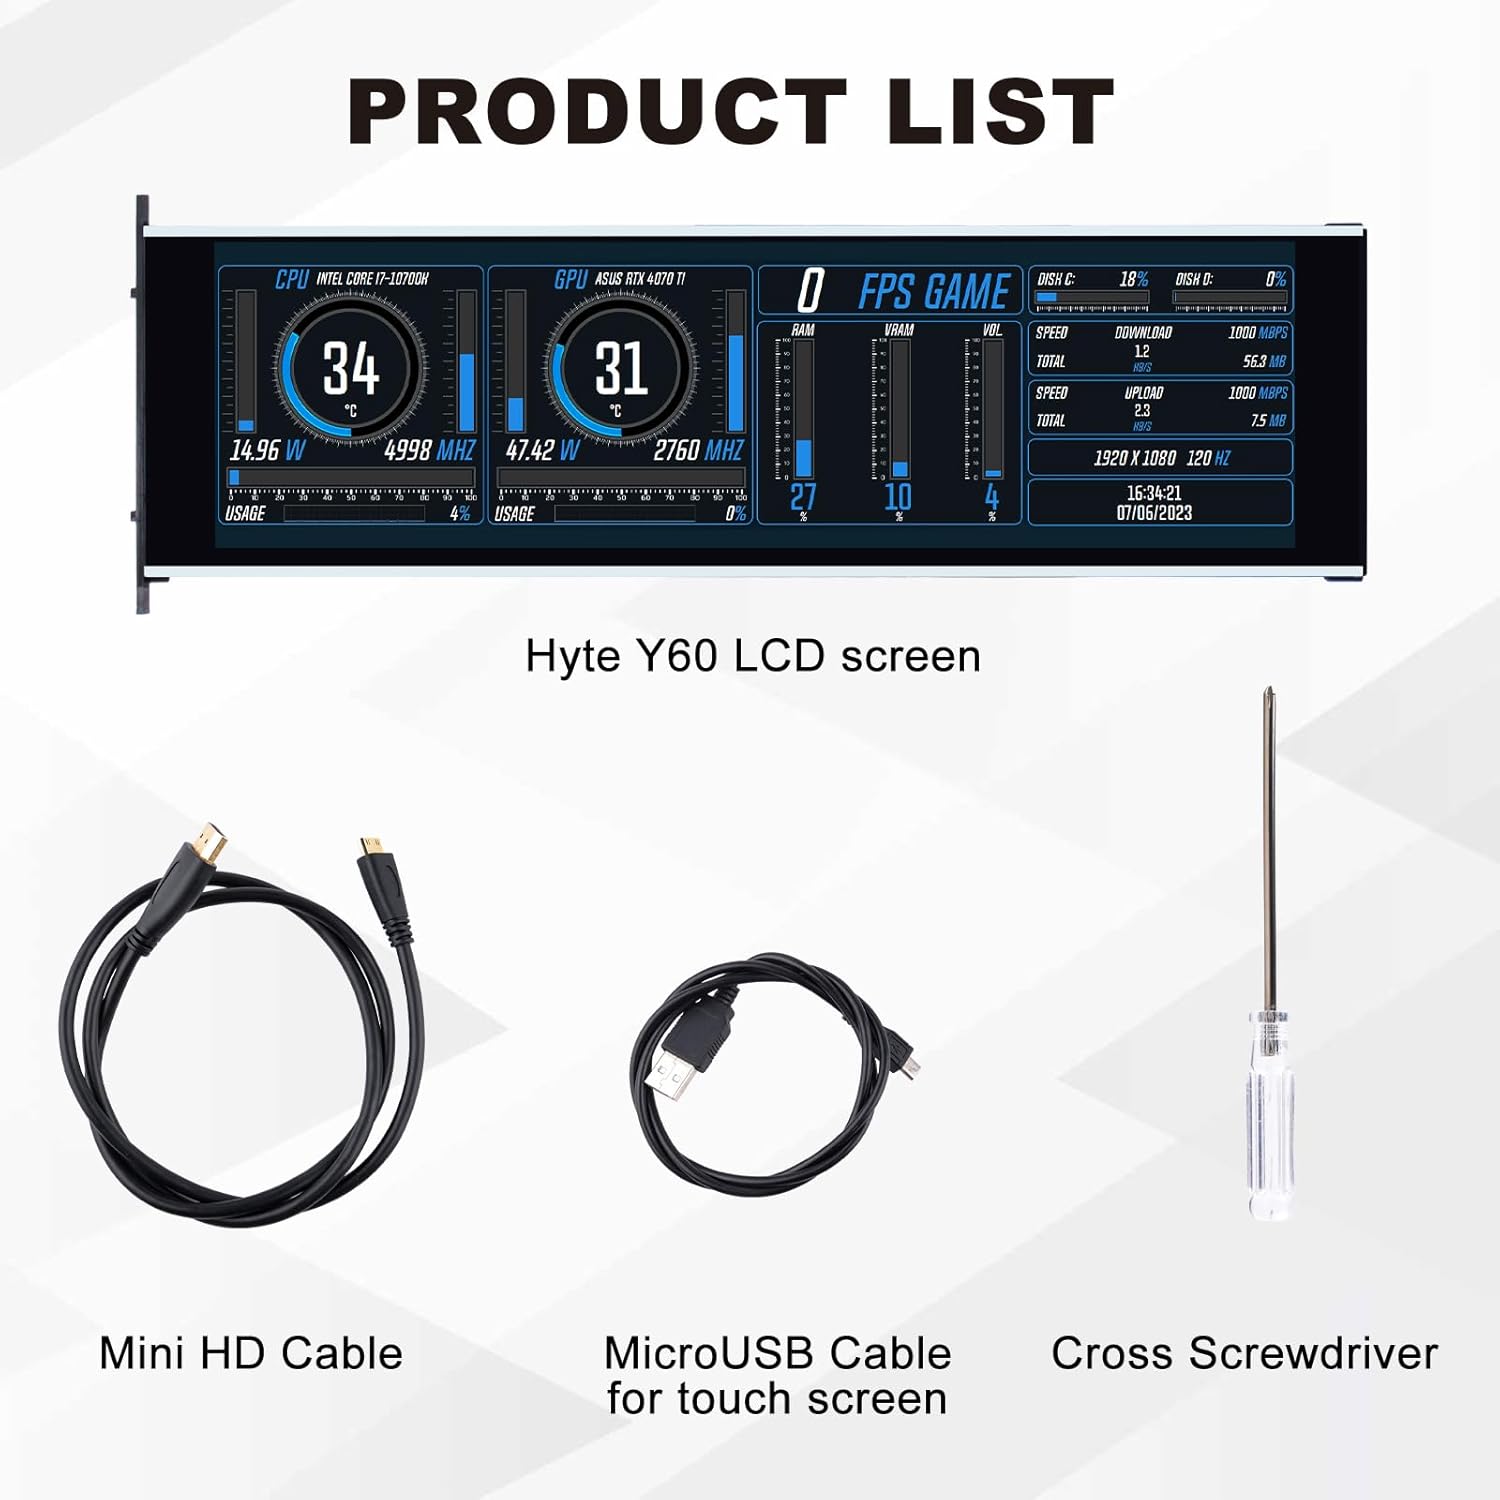
Image: Contents of the product package, including the monitor, Mini HD cable, MicroUSB cable, and a cross screwdriver.
4. Tuote ohiview
Tutustu näytön osiin ja liitäntöihin.

Image: Diagram illustrating the dimensions, rear panel, and side panel connections of the GeeekPi 12.6 Inch monitor. Key features include HDMI inputs, 3.5mm audio out, DC power inputs, and control buttons (OSD menu, navigators, power).
4.1. Rear Panel Controls and Ports
- OSD-valikkopainike: Avaa näyttövalikon.
- Left Navigator: Navigates left within menus or decreases values.
- Right Navigator: Navigates right within menus or increases values.
- Input Sources Selection Button: Switches between HDMI 1 and HDMI 0 inputs.
- Virta päälle/pois -painike: Kytkee näytön päälle tai pois päältä.
4.2. Side Panel Interfaces
- HDMI1 Input: Primary HDMI video input.
- HDMI0 Input: Secondary HDMI video input.
- 3.5 mm äänilähtö: Ulkoisten kaiuttimien tai kuulokkeiden kytkemiseen.
- DC Input 5V and Touch Signal (MicroUSB): Provides power to the monitor and transmits touch data to the connected device.
- DC Input (5V-12V): Vaihtoehtoinen virransyöttö.
- Speaker OUT: Integrated speaker output.
5. Asennus
Follow these steps to set up your GeeekPi 12.6 Inch monitor.
5.1. Physical Installation (Hyte Y60 PC Case)
This monitor is specifically designed to fit the Hyte Y60 PC case. The installation process involves removing the existing glass panel and securing the monitor in its place.
- Carefully remove the screws securing the side glass panel of your Hyte Y60 PC case.
- Gently detach the glass panel.
- Position the GeeekPi monitor into the designated slot within the PC case.
- Secure the monitor using the provided screwdriver. No additional screws are typically required as it utilizes the existing mounting points.
- Varmista, että näyttö on tukevasti paikallaan ja vakaa.

Image: Step-by-step visual guide for installing the GeeekPi 12.6 Inch monitor into a Hyte Y60 PC case, showing screw removal and monitor placement.
5.2. Liitännät
- Videoliitäntä: Connect one end of the Mini HD cable to the HDMI input on the monitor (HDMI1 or HDMI0) and the other end to an available HDMI port on your computer's graphics card or other video source.
- Touch and Power Connection: Connect the MicroUSB cable to the "DC Input 5V and Touch Signal" port on the monitor. Connect the other end of the MicroUSB cable to a USB-A port on your computer. This cable provides both power to the monitor and enables the touch functionality.
- Alternative Power (Optional): If the USB-A port does not provide sufficient power, or if you prefer a dedicated power source, connect a 5V-12V DC power adapter (not included) to the dedicated "DC Input (5V-12V)" port.
- Äänilähtö (valinnainen): If you wish to use external speakers or headphones, connect them to the 3.5mm Audio Out port.
6. Käyttöohjeet
6.1. Virta päälle/pois
Paina Virta ON/OFF-painike located on the rear panel to turn the monitor on or off.
6.2. OSD-valikon navigointi
The On-Screen Display (OSD) menu allows you to adjust various display settings.
- Paina OSD-valikkopainike avataksesi OSD-valikon.
- Käytä Left Navigator ja Right Navigator buttons to browse through menu options.
- Paina OSD-valikkopainike again to select an option or enter a sub-menu.
- Use the navigator buttons to adjust values or select settings.
- Poistuaksesi OSD-valikosta, siirry kohtaan 'Poistu' tai odota, että valikko aikakatkaistaan.
6.3. Tulolähteen valinta
To switch between HDMI inputs, press the Input Sources Selection Button takapaneelissa.
6.4. Kosketusnäytön toiminnallisuus
The monitor supports up to 10-points of multi-touch. Once the MicroUSB cable is connected to your computer, the touch functionality should be automatically recognized by Windows 7/8/10 and macOS systems without additional drivers. You can use touch gestures as you would on a tablet or smartphone.
6.5. Näytön suunta
The monitor supports both horizontal and vertical screen display settings. You may need to adjust the display orientation within your operating system's display settings (e.g., Windows Display Settings or macOS System Preferences) to match your desired physical orientation.
7. Huolto
7.1. Näytön puhdistaminen
- Always turn off the monitor and disconnect it from the power source before cleaning.
- Käytä pehmeää, nukkaamatonta liinaa kevyesti dampvedellä tai hankaamattomalla näytönpuhdistusaineella.
- Älä suihkuta puhdistusainetta suoraan näytölle.
- Vältä voimakkaiden kemikaalien, alkoholin tai ammoniakkipohjaisten puhdistusaineiden käyttöä, sillä ne voivat vahingoittaa näytön pintaa.
7.2. Yleinen hoito
- Keep the monitor in a clean, dry environment.
- Vältä raskaiden esineiden asettamista näytön päälle.
- Älä tuki tuuletusaukkoja.
8. Vianmääritys
Jos kohtaat ongelmia näytön kanssa, katso seuraavat yleiset ongelmat ja ratkaisut.
| Ongelma | Mahdollinen syy | Ratkaisu |
|---|---|---|
| Ei kuvaa näytöllä | No power; Incorrect input source; Loose video cable | Ensure power cable is connected and monitor is on. Press the Input Sources Selection Button to cycle inputs. Check HDMI cable connection. |
| Kosketusnäyttö ei vastaa | MicroUSB cable not connected; Faulty USB port | Ensure the MicroUSB cable is securely connected to both the monitor and the computer. Try a different USB port on your computer. |
| Image is distorted or incorrect resolution | Incorrect display settings on computer | Adjust display resolution and scaling settings in your computer's operating system to 1920x515. |
| Ei ääntä sisäänrakennetuista kaiuttimista | Audio output not selected; Volume too low | Ensure the monitor is selected as the audio output device in your computer's sound settings. Increase volume via OSD menu or computer. |
9. Tekniset tiedot
Detailed technical specifications for the GeeekPi 12.6 Inch IPS LCD Touch Screen Monitor (EP-0190).

Image: A table summarizing the key specifications of the GeeekPi 12.6 Inch monitor, including size, resolution, refresh rate, brightness, display type, speakers, and interfaces.
| Ominaisuus | Erittely |
|---|---|
| Merkki | GeeekPi |
| Mallinumero | EP-0190 |
| Näytön koko | 12.6 tuumaa |
| Resoluutio | 1920 x 515 (FHD) |
| Näytön tyyppi | IPS LCD |
| Kuvasuhde | 16:9 (Effective) |
| Päivitystaajuus | 60 Hz |
| Kirkkaus | 250 nittiä |
| Kontrastisuhde | 1200:1 |
| Viewkulma | 178 astetta |
| Vastausaika | 3 millisekuntia |
| Kosketusnäyttö | 10-Points Multi-Touch (Capacitive) |
| Sisäänrakennetut kaiuttimet | Yes, Dual Speakers |
| Yhteydet | 2x Mini HDMI, 1x MicroUSB (for touch & power), 1x 3.5mm Audio Out, 1x DC Power Input (5-12V) |
| Virransyöttö | 5 Volts (DC) via MicroUSB or dedicated DC input |
| Tuotteen mitat (S x L x K) | 1.5D x 30.5W x 9.9H senttimetriä |
| Tuotteen paino | 1.09 kiloa |
10. Takuu ja tuki
GeeekPi products are covered by a standard manufacturer's warranty. For specific warranty terms and conditions, please refer to the documentation provided with your purchase or visit the official GeeekPi website. For technical support, troubleshooting assistance, or to report issues, please contact GeeekPi customer service through their official channels or the retailer from whom you purchased the product.