
1. Johdanto
Thank you for choosing the Mecer 23.8 Inch Full HD LED Monitor. This manual provides essential information for setting up, operating, and maintaining your monitor. Please read it thoroughly before use to ensure proper functionality and longevity of your device.
This monitor features a 23.8-inch Full HD (1920 x 1080) display, offering crisp and clear visuals. It incorporates TFT LED panel technology for energy efficiency and vibrant colors, with a 16:9 aspect ratio suitable for widescreen viewing. Connectivity options include VGA and HDMI, making it compatible with various devices. Built-in speakers provide basic audio, and wide 178° viewing angles ensure comfortable use. With a 2ms response time, it is suitable for general computing and multimedia consumption.
2. Turvallisuustiedot
- Virtalähde: Käytä ainoastaan näytön mukana toimitettua virtalähdettä. Varmista, että pistorasia on maadoitettu asianmukaisesti.
- Ilmanvaihto: Älä tuki tuuletusaukkoja. Jätä näytön ympärille riittävästi tilaa asianmukaisen ilmankierron varmistamiseksi ja ylikuumenemisen estämiseksi.
- Sijoitus: Place the monitor on a stable, flat surface. Avoid placing it in direct sunlight, near heat sources, or in environments with excessive dust or humidity.
- Puhdistus: Disconnect the power cord before cleaning. Use a soft, dry cloth for the screen and a slightly damp cloth for the casing. Vältä hankaavien puhdistusaineiden tai liuottimien käyttöä.
- Nestealtistus: Keep liquids away from the monitor. If liquid enters the monitor, disconnect power immediately and contact qualified service personnel.
- purkaminen: Älä yritä purkaa tai korjata näyttöä itse. Jätä kaikki huoltotyöt pätevän huoltohenkilöstön tehtäväksi.
3. Pakkauksen sisältö
Tarkista pakkauksen sisältö varmistaaksesi, että kaikki osat ovat mukana:
- Mecer 23.8 Inch LED Monitor
- Näytön jalusta (jalusta ja kaula)
- Virtalähde ja kaapeli
- HDMI kaapeli
- VGA-kaapeli
- Käyttöopas (tämä asiakirja)
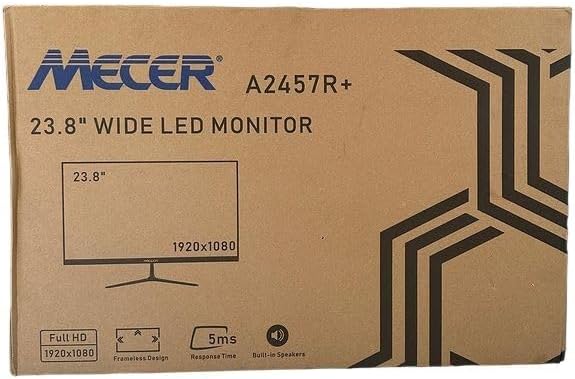
Kuva 3.1: The monitor packaging box, indicating the model A2457R+ and key features like 23.8" display, Full HD 1920x1080 resolution, frameless design, 5ms response time, and built-in speakers.
4. Asennus
4.1. Näytön jalustan kokoaminen
- Poista näytön ja jalustan osat varovasti pakkauksesta.
- Kiinnitä jalustan kaula näyttöpaneeliin kohdistamalla kielekkeet ja painamalla sitä lujasti, kunnes se napsahtaa paikalleen.
- Attach the stand base to the stand neck, securing it with the provided screw (usually hand-tightened).
- Aseta koottu näyttö vakaalle ja tasaiselle alustalle.

Kuva 4.1: Edessä view of the Mecer 23.8 Inch LED Monitor with its stand assembled, ready for connection.
4.2. Yhdistäminen tietokoneeseen
The monitor supports both HDMI and VGA connections. Choose the appropriate cable for your computer.
- HDMI-liitäntä: Connect one end of the HDMI cable to the HDMI port on your computer's graphics card and the other end to the HDMI port on the monitor. HDMI transmits both video and audio signals.
- VGA-liitäntä: Connect one end of the VGA cable to the VGA port on your computer's graphics card and the other end to the VGA port on the monitor. VGA transmits only video signals.

Kuva 4.2: Takaosa view of the Mecer 23.8 Inch LED Monitor, showing the input ports including HDMI and VGA, as well as the power input.
4.3. Virtaliitäntä
- Connect the power adapter cable to the DC IN port on the back of the monitor.
- Liitä verkkolaite pistorasiaan.
5. Käyttöohjeet
5.1. Virta päälle / pois
Press the power button, typically located on the bottom right side or rear of the monitor, to turn the monitor on or off. The power indicator light will illuminate when the monitor is on.
5.2. Tulolähteen valinta
If you have multiple devices connected, you may need to manually select the input source. Use the monitor's control buttons (usually located near the power button) to navigate to the input selection menu and choose between HDMI or VGA.
5.3. On-Screen Display (OSD) -valikko
The OSD menu allows you to adjust various display settings. Use the monitor's control buttons to:
- Avaa OSD -valikko.
- Navigate through menu options (e.g., Brightness, Contrast, Color Settings, Input Source).
- Adjust values or select options.
- Poistu OSD-valikosta.
Yleisiä säädettäviä asetuksia ovat:
- Kirkkaus/kontrasti: Säädä kokonaisluminanssia ja eroa vaaleiden ja tummien alueiden välillä.
- Väriasetukset: Adjust color temperature, RGB values, or select preset color modes.
- Kuvasuhde: Change between 16:9, 4:3, or other available options.
- Audio: Adjust volume for the built-in speakers.
5.4. Sisäänrakennetut kaiuttimet
The monitor includes built-in speakers for basic audio output. If using an HDMI connection, audio will be transmitted automatically. For VGA connections, ensure your computer's audio output is configured correctly. Adjust the volume through the OSD menu or your computer's operating system.
6. Huolto
6.1. Näytön puhdistaminen
- Irrota aina näyttö pistorasiasta ennen puhdistamista.
- Näyttö: Pyyhi näyttö varovasti pehmeällä, nukkaamattomalla liinalla. Pinttyneisiin tahroihin hankaa kevyestiampen the cloth with water or a specialized screen cleaner (ensure it's alcohol-free and ammonia-free) and wipe carefully. Do not spray liquid directly onto the screen.
- Casing: Pyyhi näyttö pehmeällä, kuivalla liinalla.asing. Tarvittaessa hieman damp liinaa voidaan käyttää, ja sen jälkeen kuivaa liinaa.
6.2. Varastointi
Jos näyttöä säilytetään pitkään, irrota kaikki kaapelit, pakkaa se alkuperäispakkaukseensa (jos saatavilla) ja säilytä sitä viileässä, kuivassa paikassa, poissa suorasta auringonvalosta ja äärimmäisistä lämpötiloista.
7. Vianmääritys
Jos kohtaat ongelmia näytön kanssa, katso seuraavat yleiset ongelmat ja ratkaisut:
- Ei virtaa:
- Varmista, että virtajohto on kytketty kunnolla näyttöön ja pistorasiaan.
- Varmista pistorasian toiminta kytkemällä siihen toinen laite.
- Tarkista, toimiiko virtalähde oikein.
- Ei signaalia:
- Ensure the video cable (HDMI or VGA) is securely connected to both the monitor and the computer.
- Verify that the correct input source is selected on the monitor (via the OSD menu).
- Check if your computer is powered on and outputting a video signal.
- Kokeile eri videokaapelia, jos sellainen on saatavilla.
- Kuva on epäselvä tai vääristynyt:
- Varmista, että näytön resoluutio on asetettu tietokoneen näyttöasetuksissa natiiviresoluutiolle (1920 x 1080).
- Adjust the monitor's OSD settings for brightness, contrast, and sharpness.
- For VGA connections, use the 'Auto Adjust' function in the OSD menu if available.
- Ei ääntä sisäänrakennetuista kaiuttimista:
- Varmista, että näytön äänenvoimakkuutta ei ole mykistetty tai asetettu liian alhaiseksi näyttövalikossa.
- Tarkista tietokoneesi äänilähtöasetuksista, että näyttö on valittu toistolaitteeksi.
- If using VGA, ensure your computer's audio is routed to an external speaker system, as VGA does not carry audio.
8. Tekniset tiedot
| Ominaisuus | Erittely |
|---|---|
| Merkki | Mecer |
| Mallinumero | A2457R+ |
| Näytön koko | 23.8 tuumaa |
| Resoluutio | 1920 x 1080 pikseliä (Full HD) |
| Näytön tyyppi | LED (TFT LED Panel) |
| Kuvasuhde | 16:9 |
| Vastausaika | 2 millisekuntia |
| Päivitystaajuus | 75 Hz |
| Viewkulmat | 178° vaakasuunnassa / 178° pystysuunnassa |
| Yhteydet | 1x HDMI, 1x VGA |
| Sisäänrakennetut kaiuttimet | Kyllä |
| Väri | Musta |
| Tuotteen mitat (S x L x K) | 560D x 42W x 410H millimetres |
| Erikoisominaisuudet | High performance intelligent multi-frequency scanning, Micro Computer digital technology control, no radiation, no glare, Comply with VESA DPMS international power saving regulation, Support DDC 1/2B and Windows PNP Plug and Play |
9. Takuu ja tuki
This Mecer monitor comes with a 1 vuoden rajoitettu takuu ostopäivästä lukien. Säilytä ostokuitti takuuvaatimuksia varten.
For technical support, service, or warranty inquiries, please contact your retailer or the authorized Mecer service center in your region. Do not attempt to repair the product yourself, as this may void your warranty.