
1. Johdanto
This manual provides detailed instructions for the installation, operation, and maintenance of the CONTIA DH48J-11A Digital Counter Relay. Please read this manual thoroughly before using the device to ensure proper function and safety.
2. Tuote ohiview
The DH48J-11A is an 11-pin digital counter relay designed for industrial applications requiring precise event counting. It features a digital display, various input signal options, and a reset function.
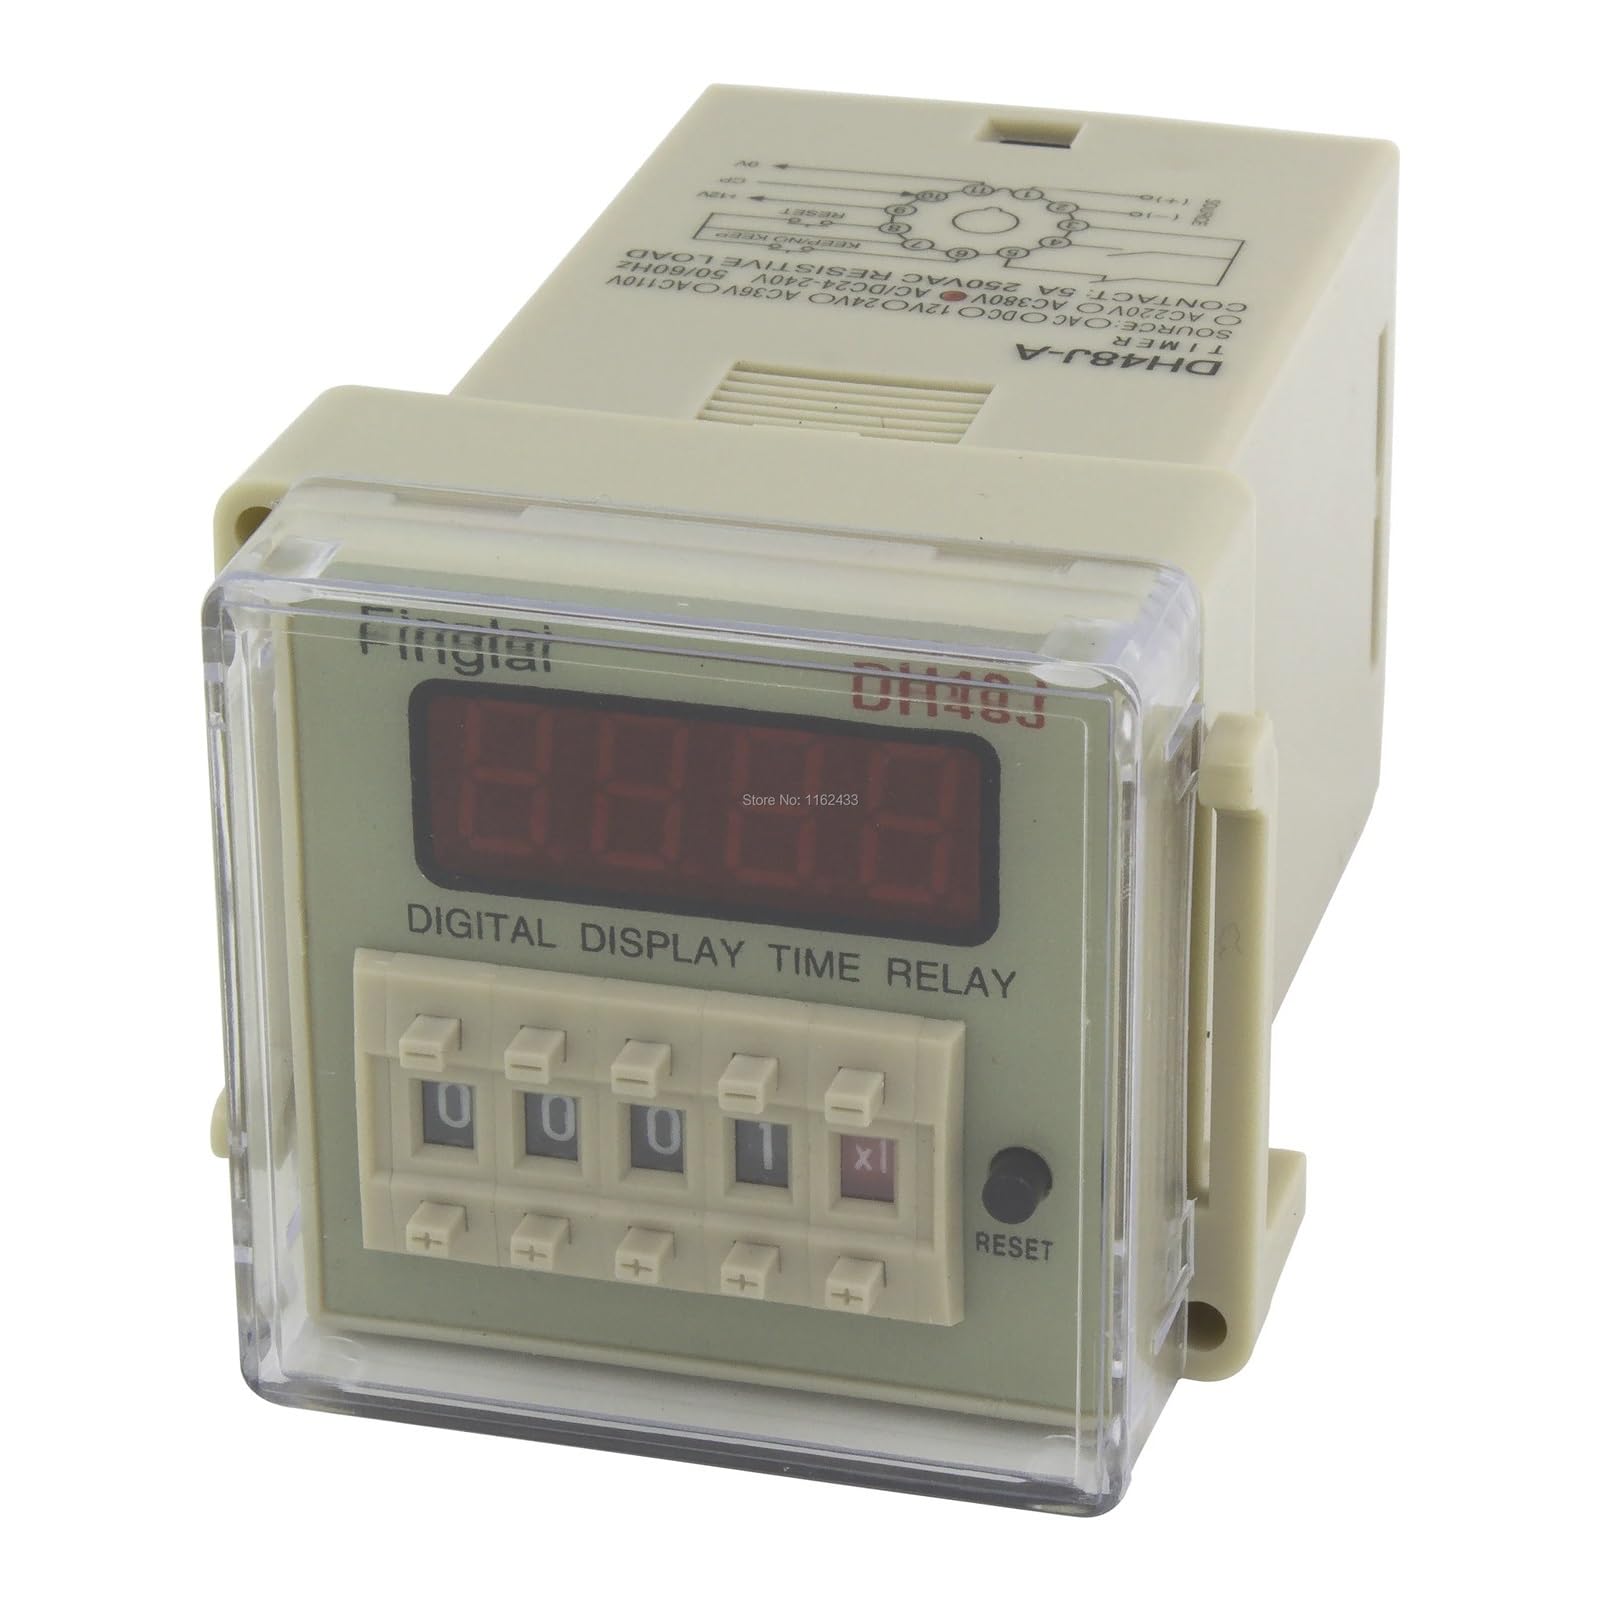
Kuva 2.1: Etuosa view of the DH48J-11A Digital Counter Relay, showing the 4-digit display and dial switches for setting.
3. Ominaisuudet
- Digital 4-digit display for clear count indication.
- Supports various input signals: contact, level, and NPN type sensors.
- Multiple supply voltage options: 110V, 220V, 380V AC; 12V, 24V AC/DC; 24-240V AC/DC.
- Up and down counting modes with magnification settings (x1, x10, x100).
- Built-in reset function.
- No-power memory for up to 10 years (for DH48J-11A model).
- SPDT control form with high contact rating.
- Compact external dimensions (48x48x97 mm).
4. Mallimuunnelmat
The DH48J series includes several models with specific input signal capabilities:
- DH48J-8: Designed for input from relays, limit switches, etc. Includes a reset function.
- DH48JA: Optimized for proximity sensors, photoelectric sensors, etc.
- DH48J-11A: Versatile model accepting input from relays, limit switches, and various sensors. Includes a reset function and 10-year no-power memory.
5. Tekniset tiedot
| Parametri | Erittely |
|---|---|
| Mallinumero | DH48J series (DH48J-11A) |
| Supply Voltage | 110, 220, 380 Vac (50/60 Hz); 12Vac/Vdc, 24Vac/Vdc; 24-240VAC/DC |
| Toimintatila | Up Counting, Down Counting |
| Laskenta-alue | 1-9999 (with magnification up to x100, total 1-999900 events) |
| Tulosignaali | Contact, Level, Sensor (NPN type) |
| Max. Counting Speed | 30 cps (counts per second) |
| Min. Counting Pulse | 15 ms |
| No-power Memory | 10 years (for DH48J-11A) |
| Control Form | SPDT (yksinapainen kaksoisheitto) |
| Yhteydenottoluokitus | 5A@250Vac, 7A@24Vdc |
| Mekaaninen käyttöikä | 1 x 10⁷ toiminnot |
| Sähköinen käyttöikä | 1 x 10⁵ toiminnot |
| Virrankulutus | 5W max |
| Asetusmenetelmä | Valitse kytkin |
| Indikaatiomenetelmä | 8-segment 4-digital display |
| Ulkoiset mitat | 48 x 48 x 97 mm (Leveys x Korkeus x Syvyys) |
| Perforate Dimensions | 46 x 46 mm |
| Laskentavirhe | 1-numero |
| Nollaa aika | 0.05s |
| Virran nollaus | 1s |
| Dielektrinen lujuus | 2000Vac, 50/60Hz for 1 minute |

Figure 5.1: Diagram illustrating external and perforate dimensions, and a sequence diagram for the DH48J-11A.
6. Asennus ja johdotus
The DH48J-11A counter relay is designed for panel mounting. A compatible 11-pin relay socket (e.g., PF113A) is recommended for installation.
6.1 Pin-määritys

Kuva 6.1: Takaosa view of the DH48J-11A, illustrating the 11-pin base for socket connection.
6.2 Kytkentäkaavio
Refer to the diagram below for correct wiring connections. Ensure power is disconnected before performing any wiring.

Figure 6.2: Wiring diagram for the DH48J-A series, applicable to DH48J-11A. This diagram shows connections for power source, input signal (CP), reset, and relay contacts.
Tärkeimmät yhteydet:
- Virtalähde: Connect the appropriate AC or DC voltage to the designated pins (e.g., pins 2 and 7 for 220VAC, or as indicated on the unit for other voltages).
- Input Signal (CP): Connect your counting signal source (contact, level, or NPN sensor) to the CP input pin (e.g., pin 10).
- Palauta: Connect a momentary switch to the Reset pin (e.g., pin 9) to clear the current count.
- Relelähtö: The SPDT relay contacts are typically available on pins 1, 3, 4, 5, 6, 8. Refer to the diagram for specific Normally Open (NO) and Normally Closed (NC) configurations.
- +12V / 0V: These pins (e.g., pins 8 and 11) may provide auxiliary power for external sensors if applicable to your model.
Caution: Incorrect wiring can damage the device or lead to unsafe conditions. Always verify connections against the diagram and local electrical codes.
7. Käyttö
7.1 Setting the Count Value and Magnification
The DH48J-11A uses dial switches on the front panel to set the target count value and magnification factor (x1, x10, x100). Adjust these dials to your desired settings. The 4-digit display will show the current count.
- Magnification (x1, x10, x100): This setting determines how many input events are required for the display to increment by one unit. For example, if set to x10, the display will increment by 1 after 10 input signals.
- Laskualue: The counter can display values from 1 to 9999. With magnification, the total countable events can reach 999900.
7.2 Counting Modes
- Up Counting: The display increments with each detected input signal, based on the set magnification.
- Down Counting: The display decrements with each detected input signal, based on the set magnification.
7.3 Nollaustoiminto
To reset the counter to zero, press the 'RESET' button on the front panel or activate the external reset input (pin 9). The reset time is approximately 0.05 seconds.
7.4 Power Reset
Upon power-up, the counter performs a power reset, which takes approximately 1 second before normal operation resumes.
8. Huolto
The DH48J-11A Digital Counter Relay is designed for reliable operation with minimal maintenance. Follow these guidelines:
- Pidä laite puhtaana ja vapaana pölystä ja kosteudesta.
- Varmista riittävä ilmanvaihto ylikuumenemisen estämiseksi.
- Regularly inspect wiring connections for tightness and signs of wear.
- Avoid exposing the device to strong vibrations or corrosive environments.
9. Vianmääritys
If the counter is not functioning as expected, consider the following common issues:
- Ei näyttöä/ei virtaa: Tarkista virtalähteen voltage and wiring connections. Ensure the correct voltage variant of the counter is being used.
- Not Counting: Verify the input signal source and its connection to the CP pin. Ensure the input signal type (contact, level, NPN sensor) is compatible with the DH48J-11A. Check the minimum counting pulse duration (15ms).
- Incorrect Count: Review the magnification setting on the dial switches. Ensure the input signal is clean and free from noise that could cause false counts.
- Reset Not Working: Check the connection to the reset pin or the functionality of the front panel reset button.
- Relelähtö ei aktivoidu: Confirm that the count has reached the set target value. Check the relay output wiring and the load connected to it.
Jos ongelma jatkuu, ota yhteyttä pätevään teknikkoon tai asiakastukeen.
10. Takuu ja tuki
For information regarding warranty coverage, technical support, or service, please refer to the product packaging or contact your vendor. Keep your purchase receipt for warranty claims.