
Johdanto
This manual provides detailed instructions for the installation, operation, and maintenance of the CONTIA STC-8080A+ LED Digital Thermostat Temperature Controller. This device is designed for precise temperature regulation in various applications, including incubators, offering both heating and cooling control capabilities. Please read this manual thoroughly before use to ensure proper function and safety.
Turvallisuustiedot
- Varmista virtalähteen voltage matches the controller's requirements (e.g., DC12V, DC24V, AC110-220V). Incorrect voltage voi vahingoittaa laitetta.
- All wiring should be performed by qualified personnel to prevent electrical hazards.
- Do not expose the controller to excessive moisture or extreme temperatures outside its operating range.
- Pidä laite poissa syttyvistä materiaaleista.
- Disconnect power before performing any wiring, maintenance, or troubleshooting.
- The sensor lead and power cord must not be in contact with each other to avoid interference or damage.
Tuote loppuview
Dimensions and Physical Layout

Kuva: Etu ja sivu view of the STC-8080A+ controller, illustrating its compact design and key dimensions for installation. The unit measures approximately 75mm x 34.5mm (front panel) with a depth of 85.5mm.
Näyttö ja ohjauspaneeli

Kuva: Close-up of the STC-8080A+ display and control buttons. The large LED display shows the current temperature. Buttons include 'Set', 'Up', 'Down', and 'Rst' (Reset).
Merkkivalojen toiminnot
| Merkkivalo | Osavaltio | Ominaisuudet |
|---|---|---|
| Defr | Normaalisti päällä | Defrost output active |
| Viileä | Normaalisti päällä | Compressor output active |
| Viileä | Vilkkuu | Compressor output delay active |
| Sarja | Normaalisti päällä | Parameter modification mode |
Tekniset tiedot
- Virtalähde: 12VDC (for this model), also available in 24VDC or 110-220VAC +10%/-15%, 50/60Hz
- Machine Power Consumption: 3W
- Mittausalue: -50 °C - 99 °C
- Lämpötilan säätöalue: -40 °C - 50 °C
- Lämpötilan resoluutio: 1 °C
- Anturin tyyppi: NTC-anturi
- Mittaustarkkuus: ±1°C for -40°C to 50°C, otherwise unspecified
- Front Panel Protection Level: IP64
- Refrigeration Output Contact Capacity: 7A/220VAC
- Defrost Output Contact Capacity: 7A/220VAC
- Työympäristön lämpötila: 0 °C - 60 °C
- Varastointilämpötila: -30 °C - 75 °C
- Työympäristön kosteus: 20 % - 85 % (ei tiivistyvä)
- Tuotteen paino: 50 grammaa
Asennus ja johdotus
Kytkentäkaavio
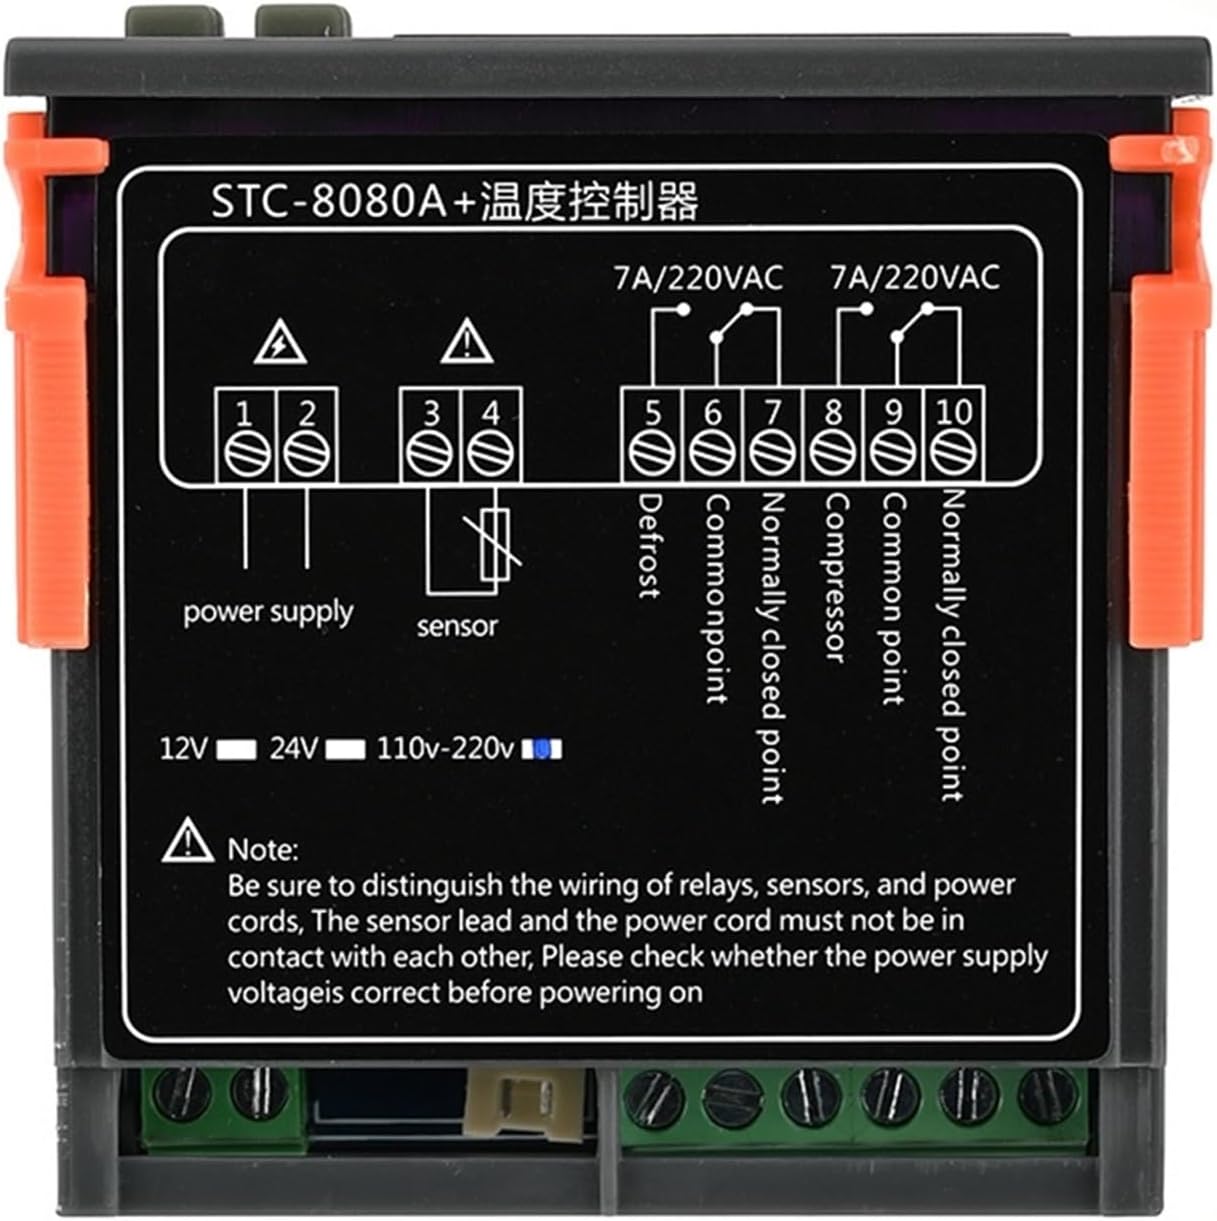
Kuva: Comprehensive wiring diagram showing connections for power supply, NTC sensor, defrost output, and compressor output. Note the different power supply options (12V, 24V, 110-220V).
Wiring Terminal Overview
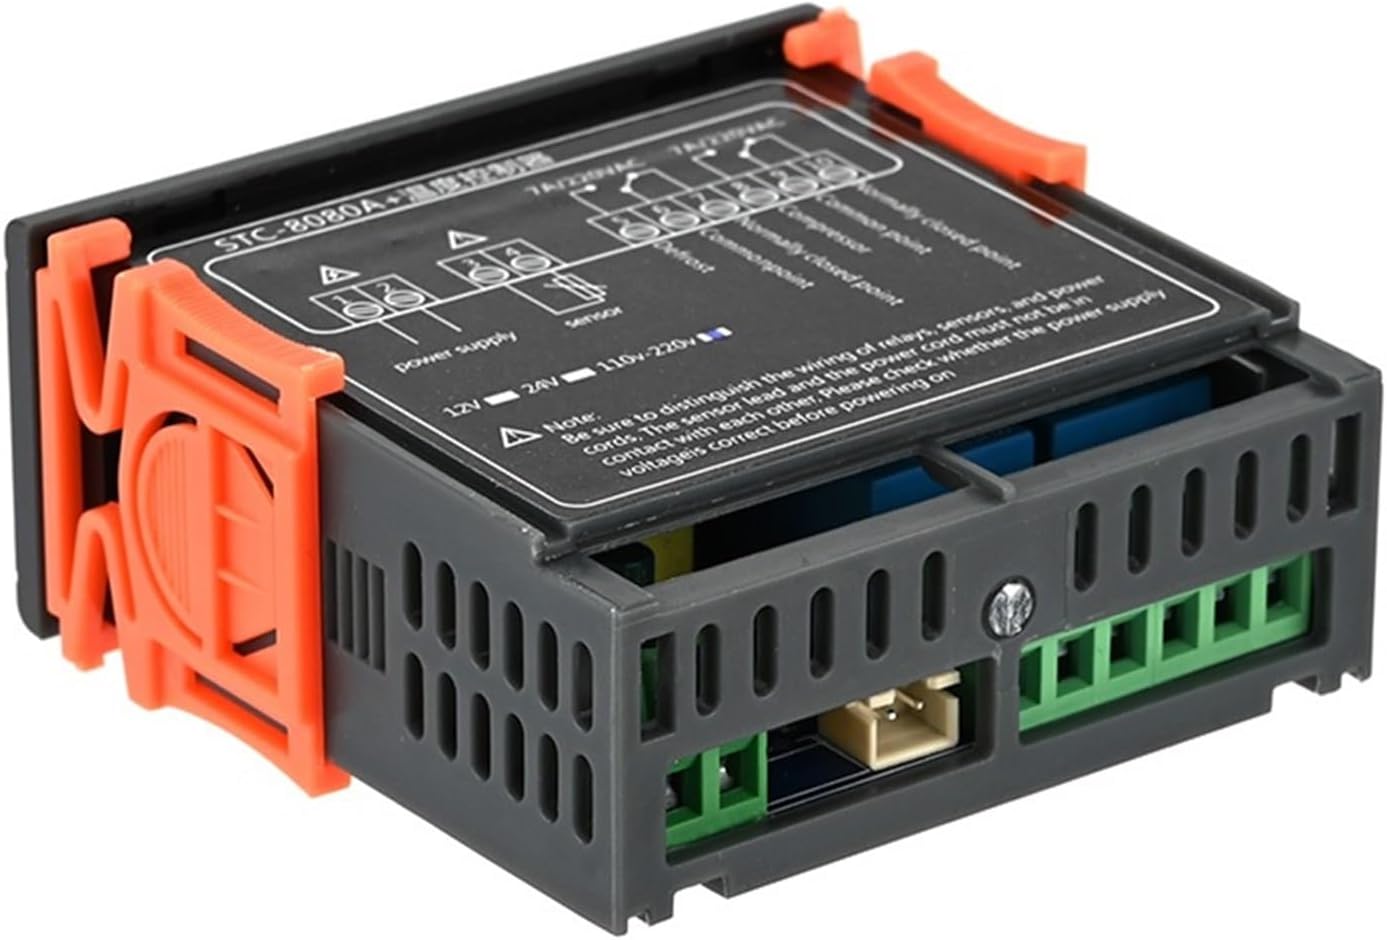
Kuva: Sivu view of the controller revealing the terminal block for electrical connections. This view helps in identifying the physical location of each wiring point.
Johdotusohjeet
- Virtalähde: Connect the appropriate power supply (12VDC for this model) to terminals 1 and 2 as indicated in the wiring diagram. Ensure the voltage matches your unit's specification.
- NTC anturi: Connect the NTC temperature sensor to terminals 3 and 4. The sensor lead and power cord must be kept separate to prevent interference.
- Defrost Output: Connect the defrosting equipment to terminals 5 (Defrost) and 6 (Common Point).
- Compressor Output: Connect the compressor or cooling equipment to terminals 7 (Compressor) and 8 (Common Point).
- Tärkeä huomautus: Always verify the power supply voltage is correct before powering on the device. Distinguish the wiring of relays, sensors, and power cords carefully.
Käyttöohjeet
Lämpötilan asetus
- Paina Sarja painiketta kerran view nykyinen asetettu lämpötila.
- While the set temperature is displayed, use the Up (▲) tai Alas (▼) buttons to adjust the desired temperature value.
- Paina Sarja button again to save the new setting and exit. If no button is pressed for a few seconds, the setting will automatically save and exit.
Defrosting/Cooling Dual Output Control

Kuva: The controller display indicating active defrosting or cooling functions, often accompanied by water droplets to symbolize defrosting. This image highlights the dual control capability.
- When the defrosting time setting is not 0, the manual defrosting function is enabled.
- To display the set defrosting time: Paina Rst avain.
- To display the set defrosting cycle: Paina Sarja painiketta kerran.
Parameter Modification Mode
To enter parameter modification mode, press and hold the Sarja button for several seconds until the display changes. Use the Up ja Alas buttons to navigate through parameters and adjust their values. Press Sarja again to confirm and move to the next parameter, or hold Sarja poistuaksesi.
Huolto
- Puhdistus: Regularly wipe the front panel with a soft, dry cloth. Do not use abrasive cleaners or solvents. Ensure no liquid enters the device.
- Anturin hoito: Pidä NTC-anturi puhtaana ja vapaana roskista. Vältä anturikaapelin taivuttamista tai vahingoittamista.
- Liitännät: Tarkista säännöllisesti kaikki johtoliitännät varmistaaksesi, että ne ovat tukevasti kiinni ja että niissä ei ole korroosiota.
- Ilmanvaihto: Varmista riittävä ilmanvaihto ohjaimen ympärillä ylikuumenemisen estämiseksi.
Vianetsintä
| Ongelma | Mahdollinen syy | Ratkaisu |
|---|---|---|
| Ohjain ei käynnisty | Ei virtalähdettä; Väärä äänenvoimakkuustage; Loose wiring | Check power connection; Verify voltage matches unit; Secure all wiring. |
| Lämpötilalukema on epätarkka | Faulty sensor; Sensor not properly connected; Sensor exposed to extreme conditions | Check sensor wiring; Replace sensor if damaged; Ensure sensor is in appropriate environment. |
| Heating/Cooling output not working | Incorrect temperature setting; Output wiring issue; Relay failure | Adjust set temperature; Check output wiring; Consult a technician if relay is suspected. |
| Näytössä näkyy virhekoodi | Sensor fault; Internal error | Check sensor connection; Power cycle the device; Refer to specific error code documentation if available. |
Takuu ja tuki
For warranty information and technical support, please refer to the product packaging or contact your retailer. Keep your purchase receipt as proof of purchase. For further assistance, you may also visit the CONTIA official websivustolla tai ota yhteyttä asiakaspalveluun.