1. Johdanto
This manual provides comprehensive instructions for the installation, operation, and maintenance of your Vivotek ND9426P Network Video Recorder (NVR). The ND9426P is a 16-channel, 2-bay embedded NVR with Power over Ethernet (PoE) capabilities and integrated Artificial Intelligence (AI) features, designed for robust surveillance applications. Please read this manual thoroughly before using the device to ensure proper setup and functionality.
2. Turvallisuustiedot
- Ensure the NVR is installed in a well-ventilated area to prevent overheating.
- Käytä vain laitteen mukana toimitettua virtalähdettä.
- Älä altista NVR-laitetta vedelle, kosteudelle tai äärimmäisille lämpötiloille.
- Avoid placing heavy objects on top of the NVR.
- Katkaise virta ennen minkään huolto- tai asennustoimenpiteen suorittamista.
- Anna kaikki huoltotoimenpiteet pätevän henkilöstön tehtäväksi.
3. Pakkauksen sisältö
Varmista, että pakkauksessasi on kaikki alla luetellut tuotteet. Jos jokin tuote puuttuu tai on vaurioitunut, ota välittömästi yhteyttä myyjään.
- Vivotek ND9426P NVR Unit
- Virtalähde
- USB Mouse
- Pika-asennusopas
- HDD Mounting Screws
4. Fyysinen ylitysview
Familiarize yourself with the front and rear panels of the Vivotek ND9426P NVR.
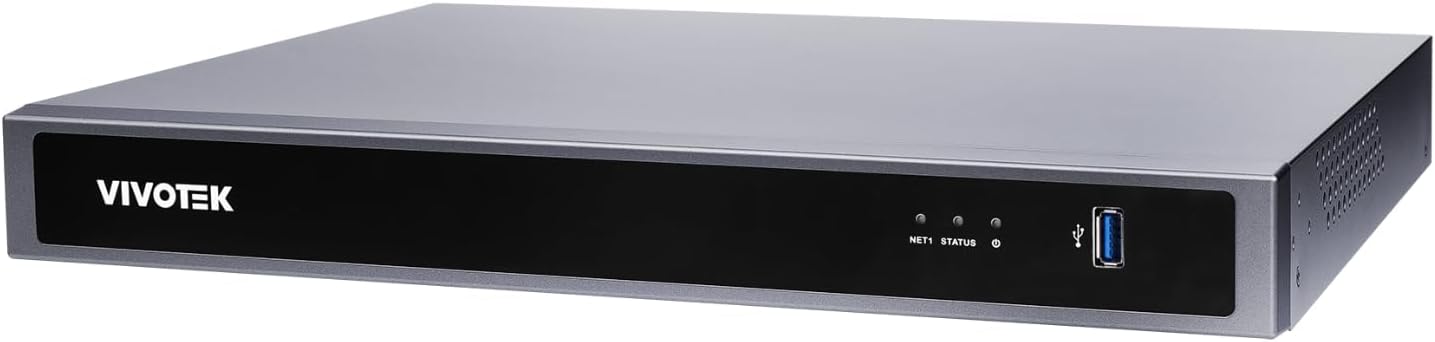
Figure 1: Front Panel of Vivotek ND9426P NVR. This image displays the front of the NVR unit, featuring the VIVOTEK brand logo on the left, two small indicator LEDs labeled "NET1" and "STATUS" in the center, and a blue USB 3.0 port on the right. The overall casing is a dark gray metallic finish.
4.1 Etupaneeli
- VIVOTEK Logo: Osoittaa tuotemerkin.
- NET1 LED: Network activity indicator for LAN port 1.
- TILA -LED: Järjestelmän tilan ilmaisin.
- USB 3.0 -portti: For connecting a USB mouse, keyboard, or external storage devices.
4.2 Takapaneeli (tyypillinen kokoonpano)
While not pictured, the rear panel typically includes the following ports:
- PoE Ports (x16): RJ-45 ports for connecting IP cameras and providing power.
- LAN-portti: RJ-45 port for connecting the NVR to your local network.
- HDMI-lähtö: Näytön tai näytön liittämistä varten.
- VGA-lähtö: Näytön tai näytön liittämistä varten.
- Äänen sisään/ulos: Ulkoisten äänilaitteiden liittämiseen.
- USB 2.0 Portit: Lisä-USB-portit oheislaitteille.
- Tehon syöttö: Virtalähteen liittämiseen.
- Maadoitusliitin: Turvamaadoitusta varten.
5. Asennus
5.1 Laitteiston asennus
- Kiintolevyn asennus:
Irrota NVR-laitteen c-koteloasing to access the internal bays. Mount up to two 3.5-inch SATA hard drives using the provided screws. Reattach the casing turvallisesti.
- Yhdistä IP-kamerat:
Connect your PoE-enabled IP cameras to the NVR's PoE ports using Ethernet cables. The NVR will provide power and data connectivity.
- Connect Display and Mouse:
Connect a monitor to the NVR's HDMI or VGA output port. Connect the USB mouse to one of the NVR's USB ports.
- Verkkoyhteys:
Kytke NVR-laitteen LAN-portti verkkoreitittimeen tai kytkimeen Ethernet-kaapelilla.
- Virta päälle:
Kytke virtalähde NVR-laitteen virtalähteeseen ja kytke se sitten pistorasiaan. NVR käynnistyy automaattisesti.
5.2 Alkukokoonpano
- Upon first boot, the NVR will guide you through a setup wizard. Follow the on-screen instructions.
- Set a strong password for the administrator account. This is crucial for security.
- Määritä verkkoasetukset (DHCP tai staattinen IP-osoite).
- Etsi ja lisää yhdistettyjä IP-kameroita.
- Aseta päivämäärä, aika ja aikavyöhyke.
6. NVR-laitteen käyttö
6.1 Käyttöliittymän navigointi
- Elää View: Access real-time video feeds from all connected cameras. Use the mouse to select camera views and layouts.
- Toisto: Review tallennettu footage. Navigate through timelines, search by date/time, and export video clips.
- Tallennusasetukset: Configure recording schedules (continuous, motion-triggered, event-based) and video quality for each camera.
- Tapahtumien hallinta: Set up alerts for motion detection, tampering, or AI-triggered events. Configure notification methods (e.g., email, push notifications).
- Järjestelmäasetukset: Manage user accounts, network configurations, storage, and system logs.
6.2 Tekoälyn ominaisuudet
The Vivotek ND9426P integrates advanced AI capabilities to enhance surveillance efficiency. These features may include:
- Älykäs liikkeentunnistus: Differentiates between human/vehicle movement and environmental factors to reduce false alarms.
- Tunkeutumisen havaitseminen: Defines specific areas for monitoring and triggers alerts upon unauthorized entry.
- Linjan ylityksen havaitseminen: Detects when an object crosses a predefined virtual line.
- Refer to the NVR's on-screen interface or the detailed software manual for specific AI feature configuration.
7. Huolto
- Laiteohjelmistopäivitykset: Regularly check the VIVOTEK website for firmware updates to ensure optimal performance and security. Follow the provided instructions carefully for updating.
- Tietojen varmuuskopiointi: Varmuuskopioi säännöllisesti tärkeät tallennetut ruokatiedostottagulkoisiin tallennuslaitteisiin (esim. USB-asemaan, verkkotallennustilaan) tietojen menetyksen estämiseksi.
- Järjestelmälokit: Review system logs regularly for any error messages or unusual activity that may indicate a problem.
- Puhdistus: Keep the NVR unit clean and free from dust. Use a soft, dry cloth. Do not use liquid cleaners or aerosols. Ensure ventilation openings are not obstructed.
8. Vianmääritys
| Ongelma | Mahdollinen syy | Ratkaisu |
|---|---|---|
| Ei videolähtöä näytöllä | Löysä kaapeliliitäntä, väärä tulolähde näytössä, NVR ei ole päällä. | Check HDMI/VGA cable connections. Ensure monitor is set to correct input. Verify NVR power. |
| Kamerat eivät näy | Camera not powered, network issue, incorrect camera settings. | Check camera power and Ethernet cables. Verify network connectivity. Ensure cameras are added and configured correctly in NVR settings. |
| NVR-laitteeseen ei pääse verkon kautta | Network cable disconnected, incorrect IP address, firewall blocking access. | Check LAN cable. Verify NVR's IP address and network settings. Adjust firewall rules if necessary. |
| Tallennus ei toimi | Hard drive not installed/initialized, recording schedule not set, insufficient storage. | Ensure HDD is installed and formatted. Check recording schedules. Verify available storage space. |
9. Tekniset tiedot
| Malli | ND9426P |
| Merkki | VIVOTEK |
| Kanavien lukumäärä | 16 |
| HDD-paikat | 2 (3.5" SATA) |
| PoE-portit | 16 |
| Yhteystekniikka | Ethernet, USB |
| Tuotteen paino | 1 kiloa (2.2 puntaa) |
| Pakkauksen mitat | 0.39 x 0.39 x 0.39 tuumaa (L x L x K) |
Note: Specifications are subject to change without notice. For the most current information, please refer to the official VIVOTEK product page.
10. Takuu ja tuki
VIVOTEK products are covered by a limited warranty. For detailed warranty terms and conditions, please refer to the warranty card included with your product or visit the official VIVOTEK websivusto.
For technical support, product inquiries, or service requests, please contact your local VIVOTEK dealer or visit the VIVOTEK support portal online. Have your product model and serial number ready when contacting support.
- VIVOTEK Official Websivusto: www.vivotek.com
- Tukiportaali: Katso webalueellisten tukiyhteystietojen sivusto.