1. Johdanto
Thank you for choosing the Conentool 21V Cordless Impact Drill/Driver Kit. This tool is designed for various drilling and screwdriving tasks in wood, metal, plastics, and masonry. Please read this manual carefully before operating the tool to ensure safe and efficient use. Keep this manual for future reference.

Image 1.1: The Conentool 21V Cordless Impact Drill/Driver Kit, including the drill, two 2500mAh batteries, charger, and a variety of drill bits and accessories in a carrying case.
2. Yleiset turvallisuusohjeet
VAROITUS: Lue kaikki tämän sähkötyökalun mukana toimitetut turvallisuusvaroitukset, ohjeet, kuvat ja tekniset tiedot. Kaikkien alla lueteltujen ohjeiden noudattamatta jättäminen voi aiheuttaa sähköiskun, tulipalon ja/tai vakavan vamman.
2.1 Työalueen turvallisuus
- Pidä työalue puhtaana ja hyvin valaistuna. Sotkuiset tai tummat alueet aiheuttavat onnettomuuksia.
- Älä käytä sähkötyökaluja räjähdysvaarallisissa tiloissa, kuten syttyvien nesteiden, kaasujen tai pölyn lähellä. Sähkötyökalut luovat kipinöitä, jotka voivat sytyttää pölyn tai höyryt.
- Pidä lapset ja sivulliset loitolla käyttäessäsi sähkötyökalua. Häiriöt voivat johtaa siihen, että menetät hallinnan.
2.2 Sähköturvallisuus
- Sähkötyökalujen pistokkeiden on vastattava pistorasiaa. Älä koskaan muuta pistoketta millään tavalla.
- Vältä kehon koskettamista maadoitettuihin pintoihin, kuten putkiin, lämpöpatteriin, lieseihin ja jääkaappiin. Sähköiskun vaara on lisääntynyt, jos kehosi on maadoitettu.
- Älä altista sähkötyökaluja sateelle tai märille olosuhteille. Sähkötyökaluun pääsevä vesi lisää sähköiskun vaaraa.
2.3 Henkilöturvallisuus
- Käytä aina silmäsuojaimia. Käytä suojalaseja, suojalaseja tai kasvosuojusta.
- Käytä kuulonsuojaimia, kun käytät työkalua pitkiä aikoja.
- Pukeudu kunnolla. Älä käytä väljiä vaatteita tai koruja. Pidä hiuksesi ja vaatteet poissa liikkuvista osista.
- Pysy valppaana, katso mitä olet tekemässä ja käytä maalaisjärkeä käyttäessäsi sähkötyökalua.
3. Pakkauksen sisältö
Varmista, että pakkauksessasi on kaikki alla luetellut tuotteet. Jos jokin tuote puuttuu tai on vaurioitunut, ota yhteyttä asiakastukeen.
- 1 x Conentool 21V Cordless Impact Drill/Driver
- 2 x 2500 mAh litiumioniakkua
- 1 x akkulaturi
- 1 x Flexible Shaft Extension
- Various Drill Bits (for wood, metal, masonry)
- Various Screwdriver Bits
- Pistorasiaadapterit
- Kantolaukku
- Käyttöopas

Kuva 3.1: Täydellinen syöttövuoroview of the kit contents, including the drill, two batteries, charger, flexible shaft, various drill bits, screwdriver bits, and socket adapters, all neatly arranged.
4. Tuote ohiview
Familiarize yourself with the main components of your drill/driver:
- Chuck: Holds drill bits and screwdriver bits.
- Vääntömomentin säätörengas: Selects the desired torque setting.
- Tilanvalitsinrengas: Switches between screwdriving, drilling, and impact drilling modes.
- Nopeudenvalitsin: Changes between high and low-speed gears.
- Liipaisukytkin: Activates the tool and controls speed (variable speed).
- Eteen-/taaksepäinvalitsin: Muuttaa pyörimissuuntaa.
- LED työvalo: Valaisee työalueen.
- Akkupaketti: Antaa työkalulle virtaa.
- Akun vapautuspainike: Akun irrotukseen.
- Kahva: Ergonominen kahva mukavaan käyttöön.

Kuva 4.1: Sisäinen view highlighting the brushless motor, which provides increased power, efficiency, and a quieter operation with no sparks.
5. Asennus
5.1 Akun lataaminen
The battery pack is not fully charged at the time of purchase. It is recommended to fully charge the battery before first use.
- Liitä laturi tavalliseen pistorasiaan.
- Slide the battery pack onto the charger base. Ensure it clicks into place.
- The charger indicator light will show the charging status. A red light typically indicates charging, and a green light indicates a full charge.
- Kun laturi on ladattu täyteen, irrota laturi pistorasiasta ja irrota akku.

Image 5.1: The battery charger connected to a wall outlet, with a battery pack inserted for charging. The red light indicates charging, and the green light indicates a completed charge.
5.2 Akun asentaminen ja irrottaminen
- Asenna: Kohdista akku työkalun kahvan pohjaan ja liu'uta sitä sisään, kunnes se napsahtaa tukevasti paikalleen.
- Poistaminen: Press the battery release button (usually located at the front of the battery) and slide the battery pack out of the tool.

Kuva 5.2: Leikkauskuva view of the 2500mAh battery pack, illustrating its internal lithium-ion cells and power management system, designed for up to 90 minutes of use per battery.
5.3 Poranterän/ruuvimeisselin terien asentaminen ja irrottaminen
- Asenna: Rotate the chuck counter-clockwise to open the jaws. Insert the desired bit into the chuck as far as it will go. Rotate the chuck clockwise to tighten the jaws firmly around the bit.
- Poistaminen: Kierrä istukkaa vastapäivään löysätäksesi leukoja ja vetääksesi terän ulos.
Ensure the bit is securely fastened to prevent it from slipping during operation.
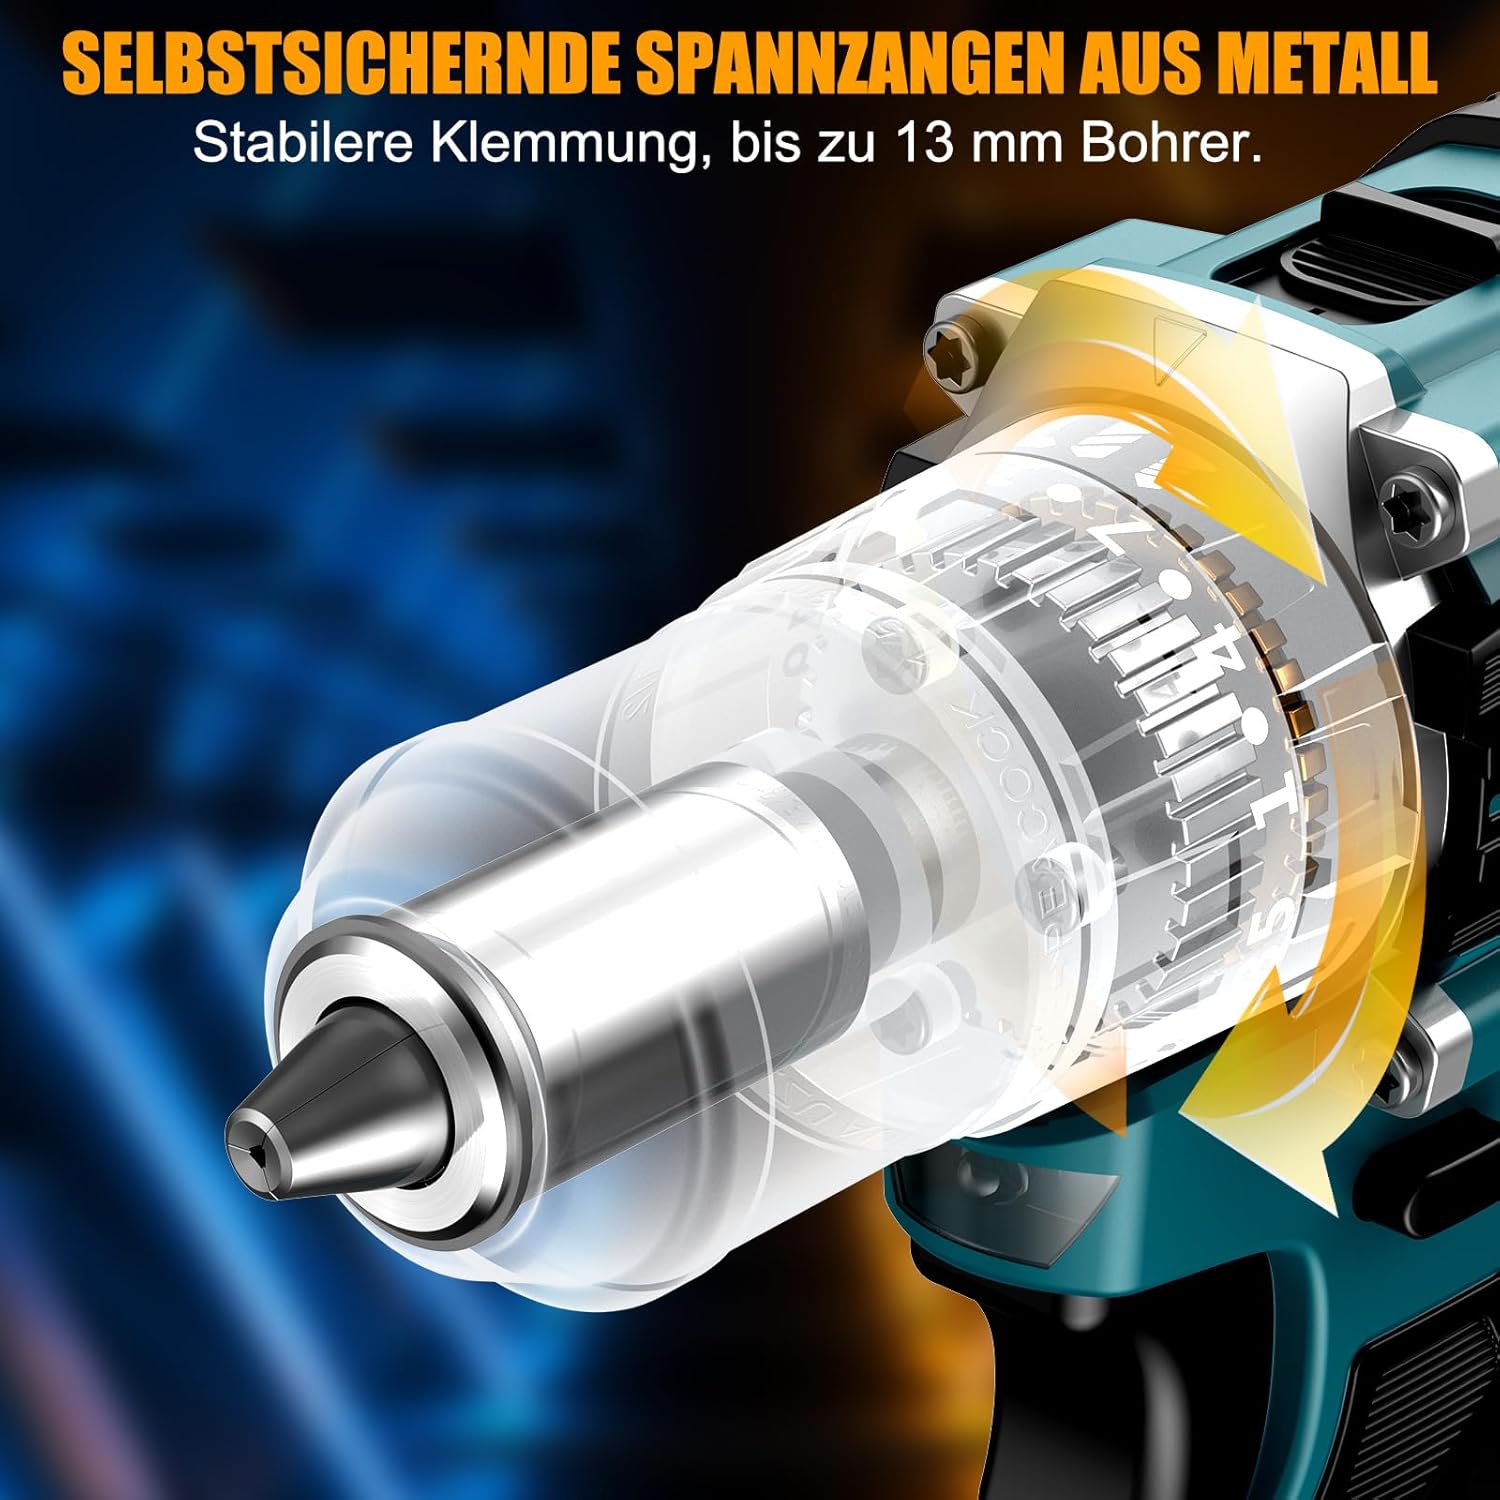
Kuva 5.3: Yksityiskohtainen view of the self-locking metal chuck, demonstrating its stable clamping mechanism capable of holding drill bits up to 13mm securely.
6. Käyttöohjeet
6.1 Virran kytkeminen päälle/pois ja nopeuden säätö
- To turn the tool ON, press the trigger switch. The speed is variable; press the trigger further for higher speed.
- Työkalun sammuttamiseksi vapauta liipaisinkytkin.
- The integrated LED work light will illuminate when the trigger is pressed, providing visibility in dimly lit areas.
6.2 Pyöriminen eteen-/taaksepäin
The forward/reverse selector switch is located above the trigger. Push it to the left for forward rotation (for screwdriving and drilling) and to the right for reverse rotation (for removing screws or freeing jammed bits). Ensure the tool is stopped before changing direction.
6.3 Vaihteen valinta
The drill features a 2-speed gear selector switch on top of the tool:
- Gear 1 (Low Speed, 0-650 RPM): Ideal for high-torque applications like driving large screws or drilling large holes.
- Gear 2 (High Speed, 0-1850 RPM): Suitable for fast drilling in softer materials and smaller diameter holes.
Always select the appropriate gear for the task. Change gears only when the tool is completely stopped.
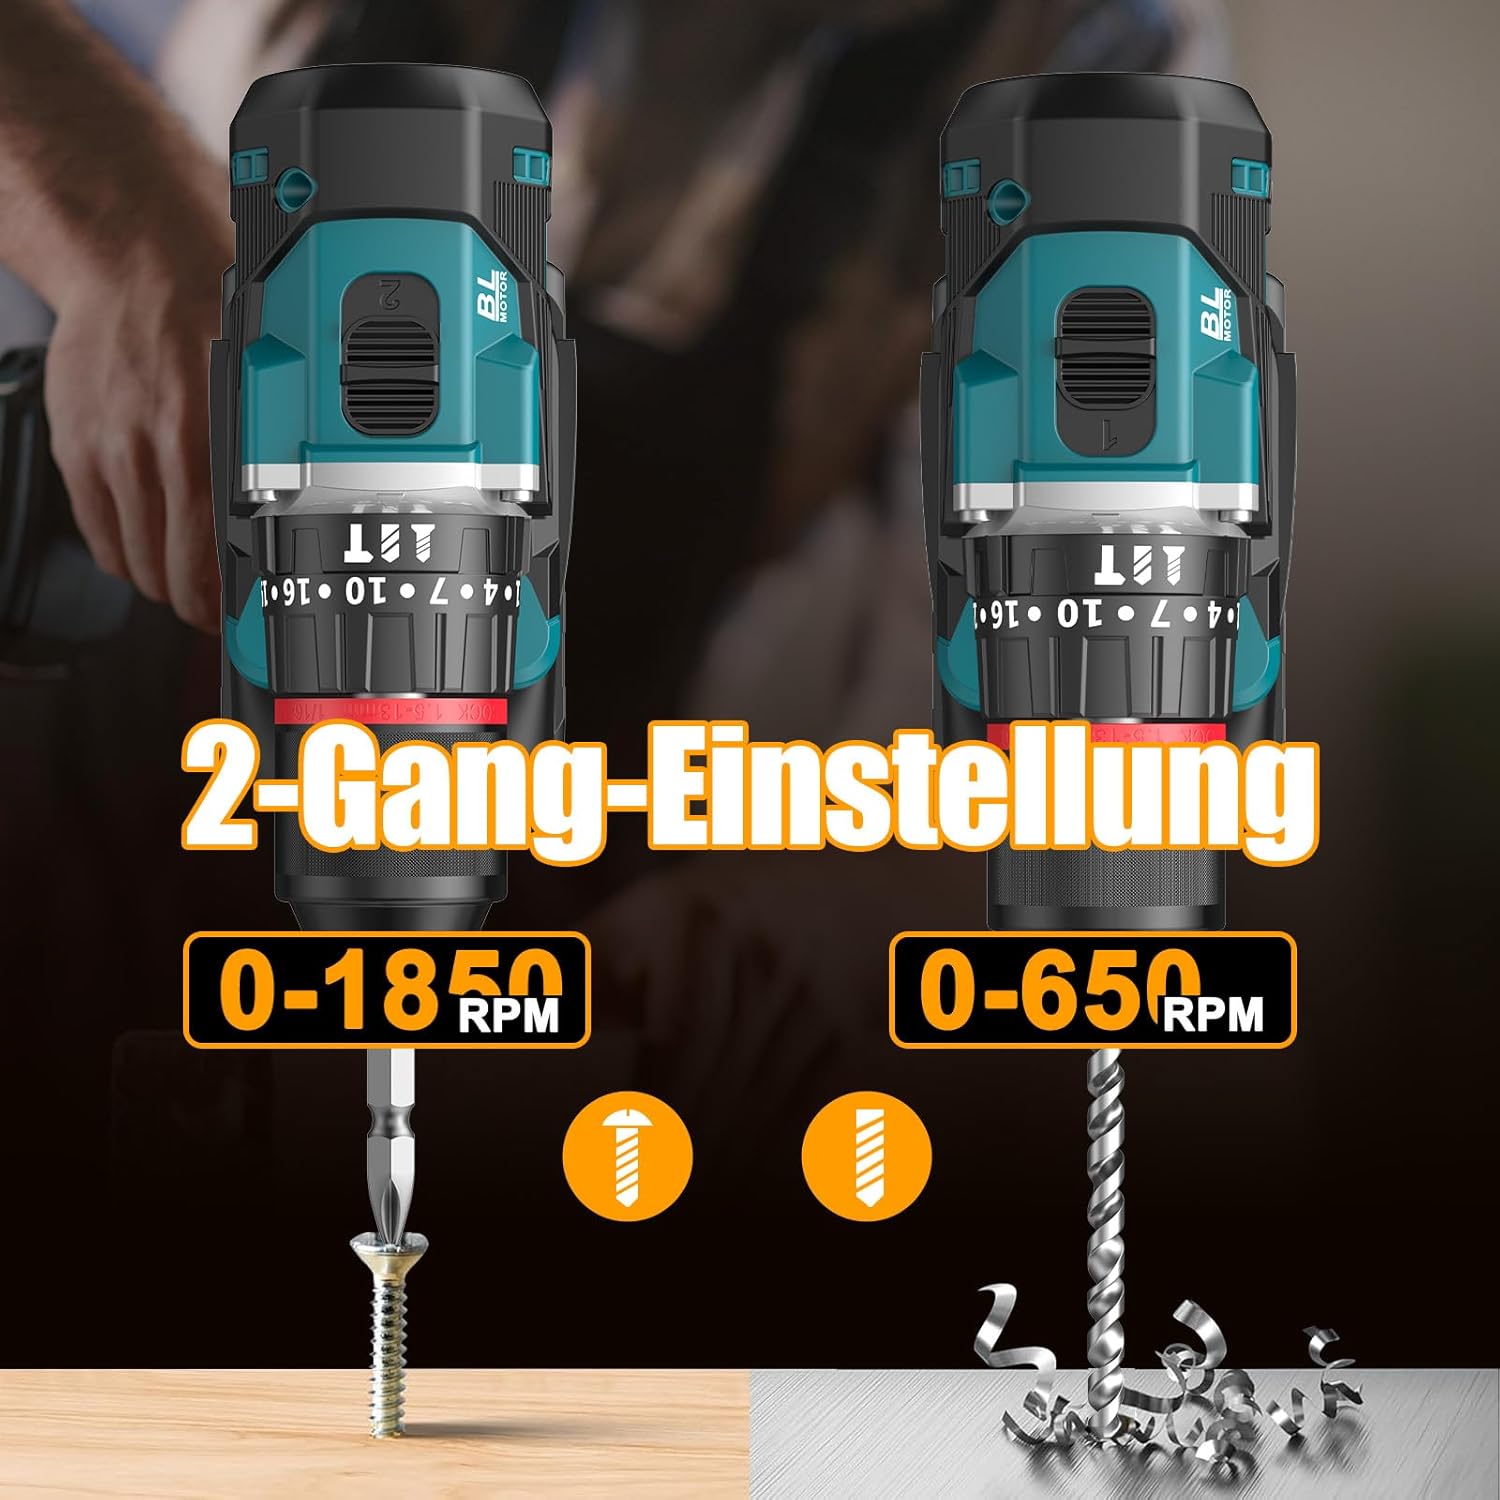
Image 6.1: An illustration demonstrating the two-speed gear settings: Gear 1 (0-650 RPM) for screwdriving and Gear 2 (0-1850 RPM) for drilling, allowing for optimal performance based on the application.
6.4 Vääntömomentin säätö ja tilan valinta
The torque adjustment ring allows you to set the desired torque for screwdriving applications, preventing overtightening or stripping screws. The mode selector ring allows you to switch between different operating modes.
- Screwdriving Mode (Torque Settings 1-35): Use these settings to match the torque to the screw size and material. Lower numbers for smaller screws/softer materials, higher numbers for larger screws/harder materials.
- Poraustila (Poranterän kuvake): For general drilling without impact. The clutch is disengaged, providing maximum torque.
- Iskuporaustila (Vasara -kuvake): For drilling into masonry or concrete, providing a hammering action in addition to rotation.
The drill offers 35+3 settings, including 35 torque settings for screwdriving and 3 modes (screwdriving, drilling, impact drilling).

Image 6.2: A visual representation of the 35+3 torque and mode settings, indicating precise power control and a maximum torque of 55 N.m, suitable for various materials like wood, brick, plastic, and metal.
7. Huolto
7.1 Puhdistus
- Irrota aina akkupakkaus ennen puhdistus- tai huoltotöitä.
- Pidä työkalun tuuletusaukot puhtaina ylikuumenemisen estämiseksi.
- Käytä pehmeää, damp liina työkalun puhdistamiseen casing. Älä käytä voimakkaita kemikaaleja tai hankaavia puhdistusaineita.
7.2 Varastointi
- Säilytä työkalua ja akkuja viileässä, kuivassa paikassa, poissa suorasta auringonvalosta ja kosteudesta.
- Säilytä työkalua kantolaukussa, jotta se on suojattu pölyltä ja vaurioilta.
- Pidä poissa lasten ulottuvilta.

Image 7.1: A person carrying the Conentool drill kit in its durable black carrying case, designed for convenient storage and transport of the tool and its accessories.
7.3 Akun hoito
- Do not store batteries in a discharged state. Recharge them regularly, especially if not used for extended periods.
- Vältä altistamasta akkuja äärimmäisille lämpötiloille.
- Älä yritä purkaa tai muuttaa akkua.
8. Vianmääritys
| Ongelma | Mahdollinen syy | Ratkaisu |
|---|---|---|
| Työkalu ei käynnisty | Akku ei ole ladattu tai se on asennettu väärin. | Varmista, että akku on ladattu täyteen ja asetettu oikein. |
| Alennettu teho tai nopeus | Akun varaus on alhainen. | Lataa akku uudelleen. |
| Terä luistaa istukassa | Istukka ei ole kiristetty riittävästi. | Tighten the chuck firmly around the bit. Ensure the bit shank is clean. |
| Ylikuumeneminen | Tuuletusaukot tukkeutuneet; jatkuva raskas käyttö. | Puhdista tuuletusaukot. Anna työkalun jäähtyä pitkäaikaisen käytön aikana. |
9. Tekniset tiedot
| Ominaisuus | Erittely |
|---|---|
| Mallinumero | ebvc-sd-de |
| Voitage | 21 volttia |
| Akun tyyppi | Litium-ioni |
| Akun kapasiteetti | 2500 mAh (kukin) |
| Maksimi vääntömomentti | 55 Nm |
| Vääntömomentin asetukset | 35 + 3 Modes (Screwdriving, Drilling, Impact Drilling) |
| Kuormittamaton nopeus (vaihde 1) | 0-650 RPM |
| Kuormittamaton nopeus (vaihde 2) | 0-1850 RPM |
| Istukan koko | 13 mm (3/8 inch) Keyless |
| Tuotteen mitat | 35 x 31 x 10 cm |
| Paino (akun kanssa) | 1.5 kiloa |
10. Takuu ja tuki
Conentool products are manufactured to high-quality standards. In the unlikely event of a defect due to material or manufacturing fault, please contact your retailer or Conentool customer service. Please retain your proof of purchase for warranty claims.
For further assistance, technical support, or to inquire about spare parts, please refer to the contact information provided with your purchase or visit the official Conentool websivusto.