
EBTOOLS EBTOOLSpxvk7fmb38
EBTOOLS LGA 1155 Motherboard User Manual
Model: EBTOOLSpxvk7fmb38
Tuote loppuview
The EBTOOLS LGA 1155 Motherboard is designed for desktop PC systems, offering robust performance and extensive connectivity. It features a multiphase power chipset for stable CPU performance and supports 2nd/3rd generation LGA1155 Pin Series Processors. This Mini ITX motherboard provides a high-definition visual experience through its VGA and HD Multimedia Interface outputs.
Keskeisiä ominaisuuksia ovat:
- LGA 1155 CPU-paikka: Designed for stable performance with compatible processors.
- Multiphase Power: Ensures stable and accurate power delivery to the CPU.
- HD Interfaces: Equipped with VGA and HD Multimedia Interface for digital HD video output.
- Channel DDR3: Features a DDR3 memory slot to enhance motherboard performance.
- Laaja liitäntä: Includes 6 USB2.0 interfaces and 4 SATA2.0 interfaces for various peripherals and storage devices.
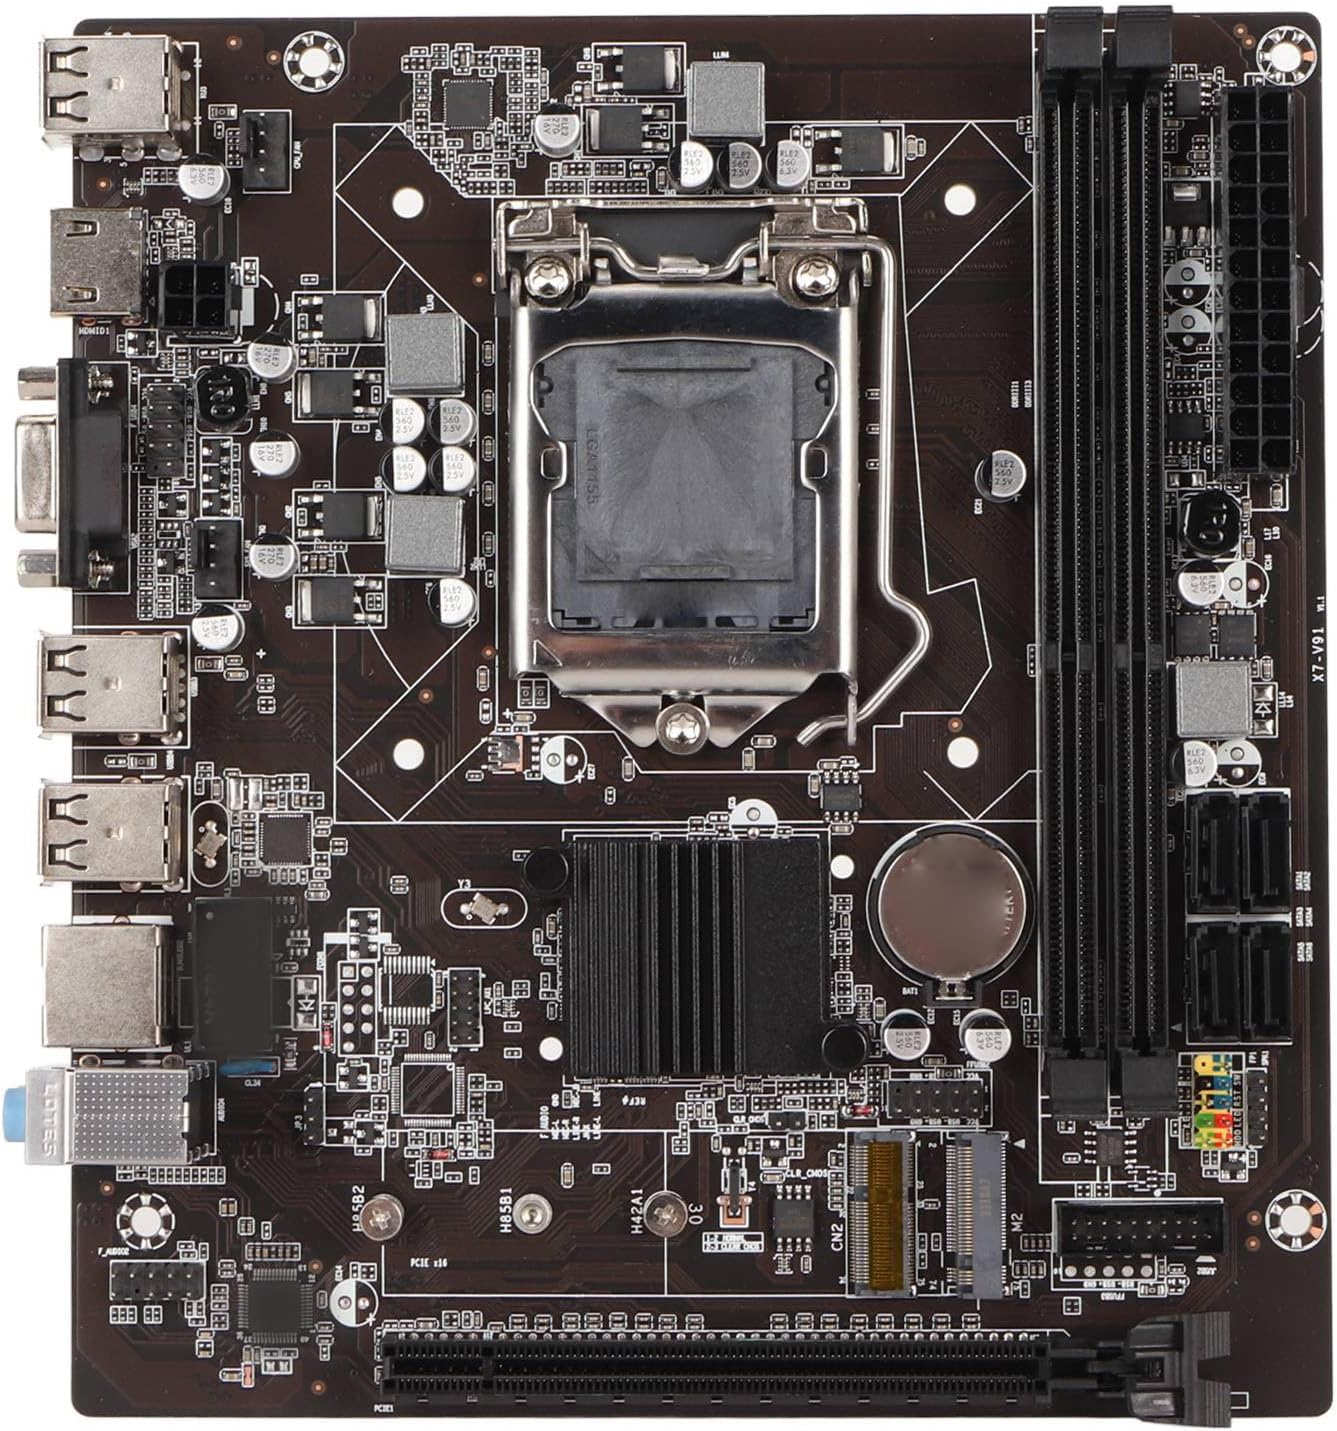
Kuva 1: Ylhäältä alas view of the EBTOOLS LGA 1155 Motherboard, showing the CPU socket, RAM slots, and various ports.
Asennus ja asennus
This section provides instructions for installing your EBTOOLS LGA 1155 Motherboard into a compatible PC case and connecting essential components.
Pakkauksen sisältö
Ennen asennuksen aloittamista varmista, että pakkauksessa on kaikki alla luetellut osat:
- 1 x LGA 1155 Motherboard
- 1 x Metallinen I/O-levy
- 1 x Connecting Wire (likely SATA data cable)

Figure 2: The motherboard alongside its included metal I/O plate and a connecting wire, typically a SATA data cable.
Asennusvaiheet
- Valmistele tapaus: Ensure your PC case is compatible with Mini ITX motherboards. Install the metal I/O plate into the designated slot at the rear of the case.
- Asenna CPU: Carefully open the CPU socket retention arm. Align the triangular marker on your LGA 1155 processor with the corresponding marker on the motherboard's socket. Gently place the CPU into the socket, ensuring it sits flush. Close the retention arm to secure the CPU.
- Asenna CPU-jäähdytin: Apply thermal paste to the CPU (if not pre-applied on the cooler). Mount your compatible LGA 1155 CPU cooler according to its manufacturer's instructions.
- Asenna RAM-muistia: Open the clips on the DDR3 memory slots. Align the notch on your DDR3 RAM module with the key in the slot. Press firmly on both ends of the RAM module until the clips snap into place. This motherboard supports 2 x DDR3 slots.
- Emolevyn asentaminen: Carefully place the motherboard into the PC case, aligning the screw holes on the motherboard with the standoffs in the case. Secure the motherboard with screws.
- Liitä virta: Connect the 24-pin ATX power connector from your power supply to the motherboard. Connect the 4-pin or 8-pin CPU power connector (if applicable) to the motherboard.
- Tallennuslaitteiden liittäminen: Use the provided connecting wire (SATA cable) to connect your SATA storage devices (HDD/SSD) to the SATA2.0 ports on the motherboard. This motherboard has 4 SATA2.0 interfaces.
- Etupaneelin kaapelien kytkentä: Connect the power button, reset button, USB ports, and audio jacks from your PC case's front panel to the corresponding headers on the motherboard. Refer to your case manual for specific pin layouts.
- Laajennuskorttien asentaminen: If using a dedicated graphics card or other expansion cards, insert them into the PCIE X16 slot or other extended interfaces (1 x , 1 x M.2) as needed.
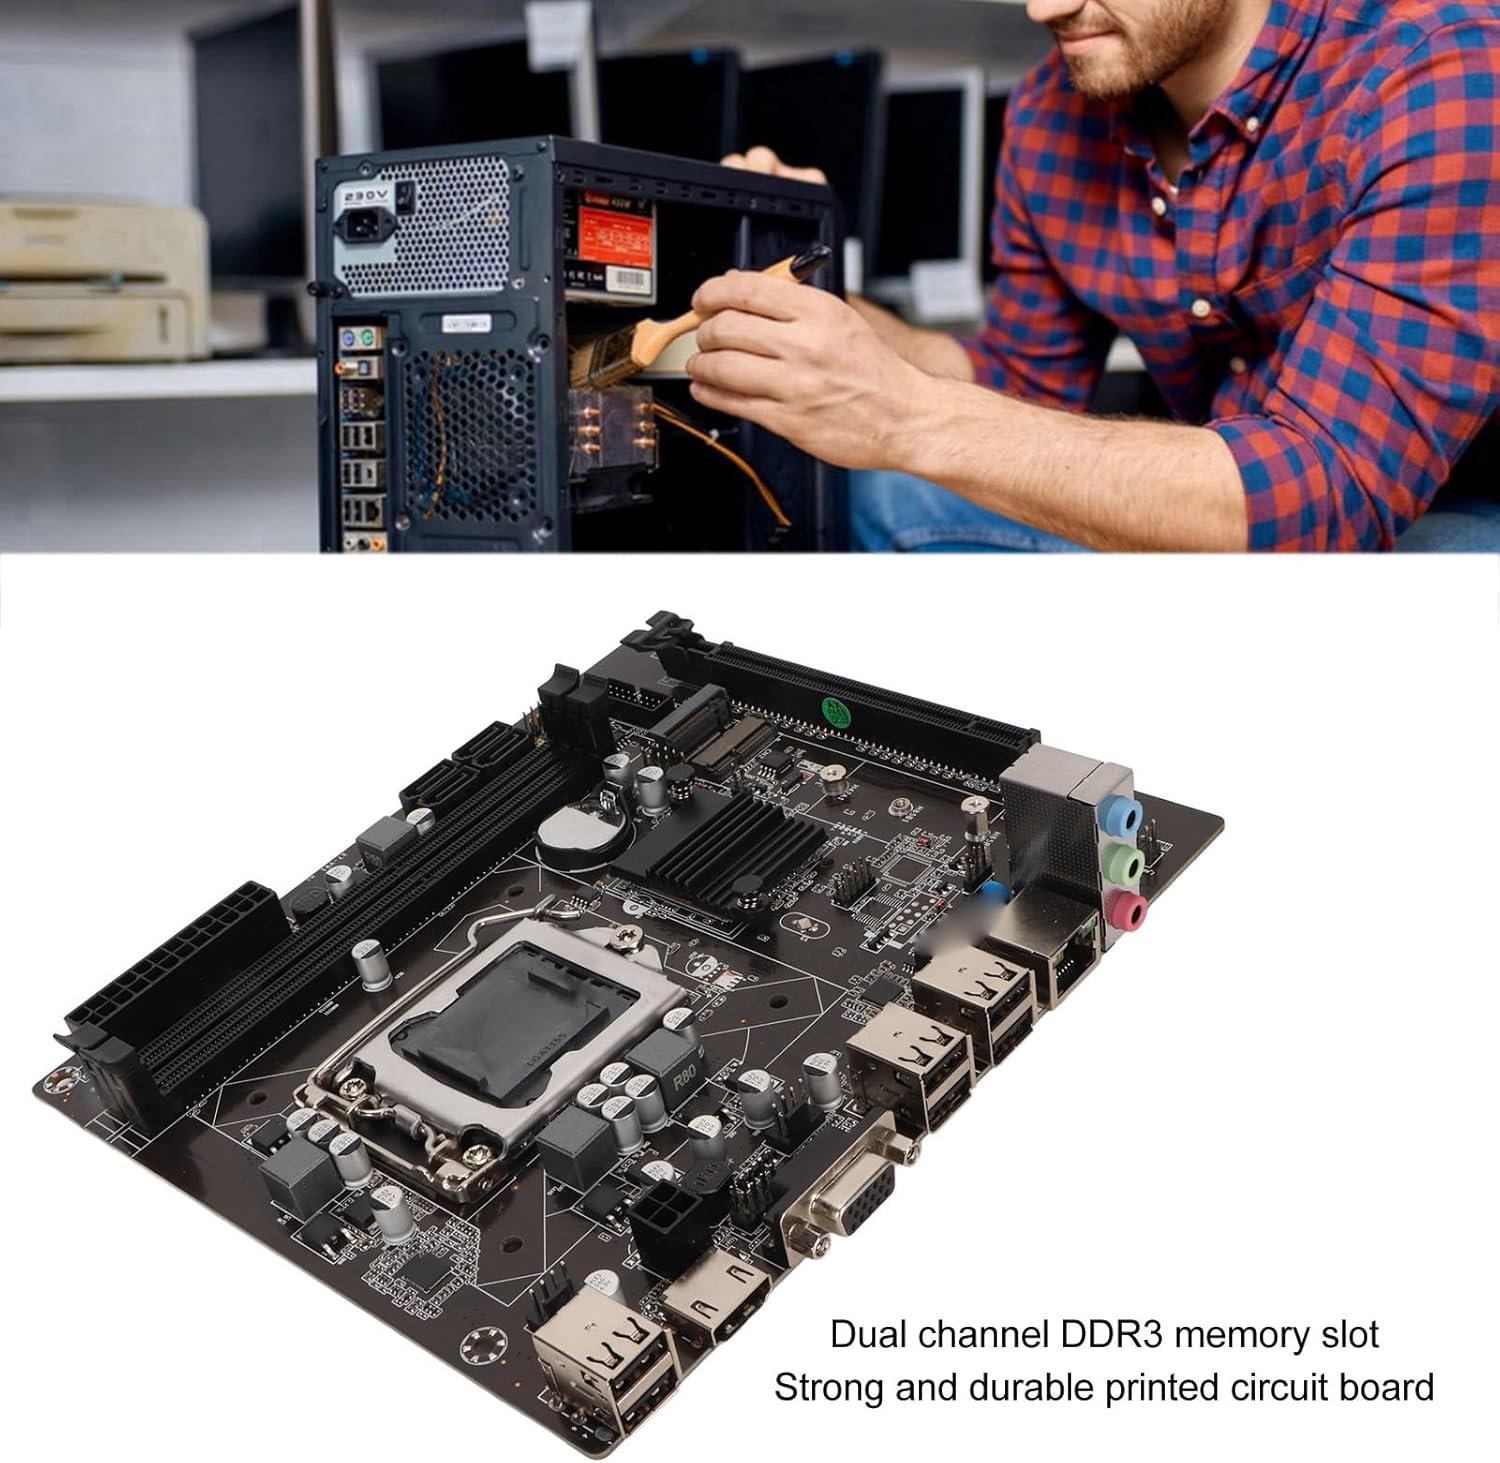
Figure 3: A user performing an installation within a PC case, demonstrating the typical environment for motherboard setup.

Kuva 4: Yksityiskohtainen view of the LGA 1155 CPU socket and adjacent DDR3 memory slots, crucial areas for component installation.
Käyttöohjeet
Once the motherboard and other components are installed, the system is ready for operation. This motherboard supports various operating systems compatible with 2nd/3rd Gen LGA1155 processors.
BIOS/UEFI-määritys
Upon first boot, you may need to enter the BIOS/UEFI setup to configure boot order, system time, and other settings. Typically, you can access the BIOS by pressing DEL or F2 during the initial boot screen.
Ohjaimen asennus
After installing your operating system, it is essential to install the necessary drivers for the motherboard's components, including chipset, network card, and integrated graphics (if used). These drivers are usually provided on a CD/DVD with the motherboard or can be downloaded from the manufacturer's websivusto.
Yhteydet
Utilize the available ports for your peripherals:
- USB 2.0 Portit: For connecting keyboards, mice, external drives, and other USB devices.
- VGA/HD Multimedia Interface: For connecting displays.
- Ethernet-portti: For wired network connectivity (100M Netword Card).
- Ääniliitännät: Kaiuttimille, kuulokkeille ja mikrofoneille.
Huolto
Asianmukainen huolto voi pidentää emolevyn käyttöikää ja varmistaa järjestelmän vakaan suorituskyvyn.
- Pidä se puhtaana: Regularly clean dust from inside your PC case, especially from the motherboard and CPU cooler fins, using compressed air. Dust accumulation can lead to overheating.
- Varmista oikea ilmanvaihto: Make sure your PC case has adequate ventilation and that fans are functioning correctly to prevent heat buildup.
- BIOS-päivitykset: Tarkista säännöllisesti valmistajan webBIOS/UEFI-päivitysten sivusto. Päivitykset voivat parantaa yhteensopivuutta, vakautta ja suorituskykyä. Noudata päivitysohjeita huolellisesti.
- Ohjaimen päivitykset: Pidä järjestelmäohjaimet ajan tasalla varmistaaksesi optimaalisen suorituskyvyn ja yhteensopivuuden uusien ohjelmistojen ja laitteistojen kanssa.
- CMOS-akku: The motherboard uses a CR2032 battery for CMOS settings. If your system consistently loses time or BIOS settings, the battery may need replacement.
Vianetsintä
Tässä osiossa käsitellään yleisiä ongelmia, joita saatat kohdata emolevysi kanssa.
- Ei virtaa/ei käynnistystä:
- Tarkista kaikki virtaliitännät (24-nastainen ATX, suorittimen virta).
- Varmista, että virtalähde on toiminnassa ja kytketty päälle.
- Tarkista etupaneelin virtapainikkeen liitäntä emolevyyn.
- Ei näyttöä:
- Ensure the monitor is connected to the correct video output (VGA or HD Multimedia Interface).
- Reseat RAM modules. Try booting with one RAM stick if you have multiple.
- Reseat the CPU and check for bent pins (handle with extreme care).
- Jos käytät erillistä näytönohjainta, varmista, että se on kunnolla paikallaan ja että se saa virtaa.
- Järjestelmän epävakaus/kaatumiset:
- Tarkista suorittimen ja näytönohjaimen lämpötilat. Varmista riittävä jäähdytys.
- Suorita muistidiagnostiikkatyökalut tarkistaaksesi viallisen RAM-muistin.
- Varmista, että kaikki ajurit on asennettu oikein ja ajan tasalla.
- Tarkista löysien liitosten tai komponenttien varalta.
- USB-laitteita ei tunnisteta:
- Varmista, että USB-ajurit on asennettu.
- Kokeile eri USB-portteja.
- Tarkista BIOS-asetukset USB-ohjaimen käyttöönoton varalta.
Tekniset tiedot
Detailed technical specifications for the EBTOOLS LGA 1155 Motherboard:
| Ominaisuus | Erittely |
|---|---|
| Kohteen tyyppi | LGA 1155 emolevy |
| Materiaali | Printed Circuit Board, Metal |
| Sisäänrakennettu akku | CR2032 x 1 (240mAh) |
| CPU-tuki | 2nd/3rd Gen LGA1155 Pin Series Processors (for Celeron, for , for Core) |
| Piirisarja | H61 Chipset Series |
| MUISTIPAIKKOJEN | 2 x DDR3 |
| Suurin muistikapasiteetti | 16GB |
| USB-liitäntä | 6 x USB2.0, USB Pin x 1 |
| SATA-liitäntä | 4 x SATA2.0 |
| Verkkokortti | 100M Network Card |
| Näytönohjaimen paikka | 1 x PCIE X16 |
| Laajennettu käyttöliittymä | 1 x , 1 x M.2 |
| Pakkauksen mitat | 10.2 x 7.83 x 2.05 tuumaa |
| Tuotteen paino | 1.16 kiloa |
| Mallinumero | EBTOOLSpxvk7fmb38 |
| ASIN | B0CKVL89BD |

Figure 5: An angled perspective of the motherboard, showcasing its compact Mini ITX form factor and port layout.
Takuu ja tuki
For warranty information and technical support, please refer to the official EBTOOLS websivustolta tai ota yhteyttä heidän asiakaspalveluunsa. Säilytä ostokuitti ostotodistuksena.
While specific warranty details are not provided in this manual, general product warranties typically cover manufacturing defects for a limited period from the date of purchase.
Lisäsuojaa varten harkitse saatavilla olevia suojaussuunnitelmia:
- 3 vuoden suojaussuunnitelma
- 4 vuoden suojaussuunnitelma
- Täydellinen suojaus (kuukausitilaus)
These plans are offered separately and provide extended coverage beyond the standard manufacturer's warranty.
Valmistaja: EBTOOLS
Päivämäärä, kun ensimmäinen saatavilla: 11. lokakuuta 2023
Viralliset tuotevideot
Tälle tuotteelle ei ole tällä hetkellä saatavilla myyjän virallisia tuotevideoita.
Ask a question about this manual
Ask about setup, troubleshooting, compatibility, parts, safety, or missing instructions. Manuals+ will review the question and use this page’s manual context to help answer it.