
Krause 131669
KRAUSE STABILO+S Professional Multi-Purpose Ladder Instruction Manual
Malli: 131669
Johdanto
This manual provides essential instructions for the safe and effective use, setup, and maintenance of your KRAUSE STABILO+S Professional Multi-Purpose Ladder. This durable aluminum ladder is designed for various applications, offering versatility as a stepladder, extension ladder, and leaning ladder. Please read this manual thoroughly before initial use and retain it for future reference.
Turvallisuustiedot
VAROITUS: Näiden turvallisuusohjeiden noudattamatta jättäminen voi johtaa vakavaan loukkaantumiseen tai kuolemaan.
- Always inspect the ladder for damage or defects before each use. Do not use a damaged ladder.
- Ensure all locking mechanisms are fully engaged before climbing.
- Aseta tikkaat tukevalle, tasaiselle ja liukumattomalle alustalle.
- Säilytä kolme kosketuspistettä (kaksi kättä ja yksi jalka tai kaksi jalkaa ja yksi käsi) kiivetessäsi tai laskeutuessasi.
- Älä kurkota liikaa. Pidä vartalosi keskellä sivulaidojen välissä.
- Do not use the ladder near electrical wires or equipment.
- Älä ylitä 200 kg:n enimmäiskuormitusta.
- Ensure proper angle for leaning ladders (approximately 75 degrees).
- Käytä asianmukaisia jalkineita ja vältä löysiä vaatteita.
- Do not use the ladder in high winds or adverse weather conditions.
Asennus ja konfigurointi
The KRAUSE STABILO+S ladder offers multiple configurations for various tasks.
1. Stepladder (A-Frame) Configuration
To set up the ladder as a stepladder, unfold the sections until they form an 'A' shape. Ensure the spreader bars or locking hinges are fully engaged and locked into place. The base stabilizers should be firmly on the ground.

Image: The KRAUSE STABILO+S ladder configured as a stable A-frame stepladder, ready for use.
2. Stepladder with Extension Configuration
For increased height while maintaining the stability of a stepladder, extend one section upwards from the A-frame. Ensure all locking pins for the extension are securely fastened. The extended section should be vertical and aligned with the base.
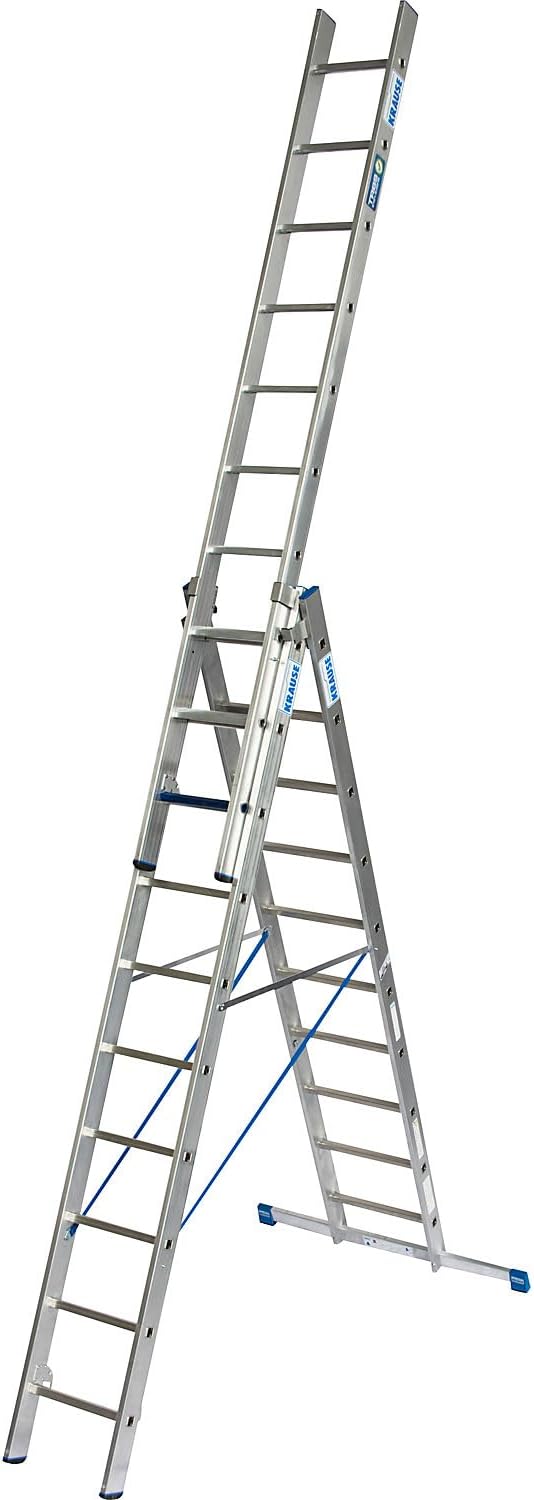
Image: The KRAUSE STABILO+S ladder set up as an A-frame with an additional section extended vertically, providing extra reach.

Kuva: Yksityiskohtainen view of the KRAUSE STABILO+S ladder in its A-frame extended configuration, highlighting the secure locking mechanisms and stable base.
3. Extension Ladder Configuration
To use the ladder as a full extension ladder, fully extend all sections and lock them into place. Ensure the ladder is leaning against a stable surface at the correct angle (approximately 75 degrees from the horizontal). The top of the ladder should extend at least 1 meter (3 rungs) above the landing point.

Image: The KRAUSE STABILO+S ladder fully extended and leaning against a wall, demonstrating its maximum reach as an extension ladder.
4. Two Separate Leaning Ladders Configuration
The ladder can be separated into two individual leaning ladders. This configuration is useful for tasks requiring two separate access points or for creating a scaffold base (with appropriate accessories, not included). Ensure each section is stable and properly secured before use.

Image: The KRAUSE STABILO+S ladder disassembled into two distinct sections, one configured as a short leaning ladder and the other as a compact A-frame.
Käyttöohjeet
Always ensure the ladder is correctly configured for the task at hand and all safety precautions are observed.
- Kiipeily: Face the ladder when climbing or descending. Use both hands to grip the side rails or rungs.
- Työskentely: Keep your belt buckle (navel) within the side rails. Avoid pushing or pulling objects while on the ladder, as this can destabilize it.
- Sijoitus: For leaning ladders, ensure the top rests against a solid, stable surface. For stepladders, ensure all four feet are firmly on the ground.
- Vakaus: Never move a ladder while someone is on it. Ensure the area around the base of the ladder is clear.

Image: A person safely using the KRAUSE STABILO+S ladder in its A-frame extended configuration for a task, demonstrating proper usage and stability.
Huolto
Säännöllinen huolto varmistaa tikkaiden pitkän käyttöiän ja turvallisen toiminnan.
- Puhdistus: Puhdista tikkaat säännöllisesti mainosaineellaamp cloth to remove dirt, grease, or other contaminants. Avoid harsh chemicals that could damage the aluminum.
- Tarkastus: Periodically check all rungs, side rails, locking mechanisms, and feet for wear, damage, or loose components. Pay close attention to hinges and pivot points.
- Varastointi: Store the ladder in a dry, protected area away from extreme temperatures and direct sunlight. Ensure it is stored in a way that prevents accidental falling or damage.
- Korjaukset: Do not attempt to repair damaged parts yourself. Contact a qualified technician or the manufacturer for genuine replacement parts and professional repair.
Vianetsintä
- Tikkaat tuntuvat epävakailta: Ensure all locking mechanisms are fully engaged. Check that the ladder is on a firm, level surface. Verify the correct angle for leaning ladders.
- Vaikeuksia osien laajentamisessa/sisäänvetämisessä: Clean the rails and rungs to remove any debris. Apply a small amount of silicone-based lubricant to the sliding parts if necessary, avoiding rungs.
- Vaurioituneet komponentit: Immediately cease use of the ladder. Do not attempt temporary repairs. Contact customer support for guidance on replacement parts or professional repair.
Tekniset tiedot
| Ominaisuus | Yksityiskohta |
|---|---|
| Merkki | Krause |
| Mallinumero | 131669 |
| Materiaali | Alumiini |
| Number of Rungs | 3 x 10 (sections) |
| Tuotteen mitat | 490 x 12.67 x 465 cm (approximate, varies by configuration) |
| Tuotteen paino | 25.5 kg |
| Kuormituskapasiteetti | 200 kg |
| Väri | Sininen (aksentit) |
Takuu ja tuki
For warranty information, technical support, or to purchase genuine replacement parts, please refer to the official Krause websivustolta tai ota yhteyttä valtuutettuun jälleenmyyjään. Säilytä ostokuitti ostotodistuksena.
Ask a question about this manual
Ask about setup, troubleshooting, compatibility, parts, safety, or missing instructions. Manuals+ will review the question and use this page’s manual context to help answer it.