Erbauer EAG18-115
Erbauer 18 V Harjaton Kulmahiomakone EAG18-Li 115 mm Käyttöohje
Model: EAG18-115
1. Johdanto ja turvallisuustiedot
This manual provides essential information for the safe and efficient operation of your Erbauer 18V Brushless Angle Grinder. Please read all instructions carefully before use to prevent injury and ensure proper tool function. Keep this manual for future reference.
Yleiset turvallisuusvaroitukset
- Always wear eye protection, hearing protection, and suitable gloves when operating the grinder.
- Varmista, että työkappale on kunnolla kiinniampennen jauhamista.
- Pidä kädet ja vartalo loitolla pyörivästä levystä.
- Do not use damaged or incorrect accessories.
- Irrota akku ennen säätöjen tekemistä, lisävarusteiden vaihtamista tai työkalun varastointia.
2. Tuotteen osat
Familiarize yourself with the parts of your Erbauer Angle Grinder:
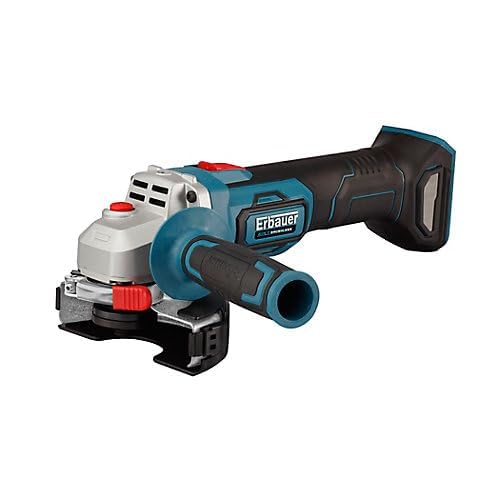
An image showing the Erbauer 18V Brushless Angle Grinder, model EAG18-Li 115mm. The tool is blue and black with a silver head, featuring a red power button and a black and blue side handle attached.
- Hiomakoneen runko
- Karan lukituspainike
- Päälle/pois-kytkin
- Sivukahva
- Suojavahti
- Hiomalevy (ei mukana)
- Battery Port (battery not included)
3. Asennus ja kokoonpano
3.1 Akun asennus
This tool operates with an Erbauer 18V battery pack (sold separately). Ensure the battery is fully charged before use.
- Align the battery pack with the battery port on the grinder.
- Liu'uta akkua paikalleen, kunnes se napsahtaa tukevasti.
- Irrota akku painamalla akun vapautuspainiketta ja liu'uttamalla akku ulos.
3.2 Sivukahvan kiinnittäminen
The side handle can be attached to either side of the grinder head for optimal control.
- Screw the side handle clockwise into one of the threaded holes on the grinder head until it is tight.
3.3 Installing the Protective Guard
The protective guard must always be used to shield against sparks and debris.
- Löysää suojusta clampruuvi.
- Position the guard to cover the grinding disc and direct sparks away from you.
- Kiristä clampruuvia tiukasti.
3.4 Mounting the Grinding Disc
Use only 115mm diameter grinding or cutting discs rated for the grinder's maximum RPM.
- Paina ja pidä painettuna karan lukituspainiketta.
- Unscrew the outer flange using the provided spanner.
- Place the grinding disc onto the inner flange, ensuring it sits correctly.
- Screw the outer flange back on and tighten it firmly with the spanner while holding the spindle lock button.
- Vapauta karan lukituspainike.
4. Käyttöohjeet
4.1 Virran kytkeminen päälle/pois
- To turn on: Slide the On/Off switch forward.
- To turn off: Slide the On/Off switch backward to the OFF position.
4.2 Hiontatekniikat
- Pidä hiomakoneesta tukevasti kiinni molemmilla käsillä, toisella pääkahvasta ja toisella sivukahvasta.
- Allow the disc to reach full operating speed before contacting the workpiece.
- Apply light, even pressure. Do not force the tool, as this can cause kickback or damage the disc.
- Maintain a shallow angle (typically 15-30 degrees) between the disc and the workpiece for grinding. For cutting, use a cutting disc and hold the tool perpendicular to the workpiece.
- Move the grinder smoothly across the surface to ensure an even finish and prevent overheating.
5. Huolto ja varastointi
5.1 Puhdistus
- Poista akku aina ennen puhdistamista.
- Puhdista tuuletusaukot säännöllisesti estääksesi pölyn kertymisen, joka voi johtaa ylikuumenemiseen. Käytä paineilmaa, jos mahdollista.
- Pyyhi työkalun ulkopinta pehmeällä,amp kangas. Älä käytä voimakkaita kemikaaleja tai hankaavia puhdistusaineita.
5.2 Varastointi
- Store the grinder in a dry, secure location, out of reach of children.
- Irrota akku työkalusta ennen pitkäaikaista säilytystä.
- Suojaa työkalu suoralta auringonvalolta ja äärimmäisiltä lämpötiloilta.
6. Vianmääritys
| Ongelma | Mahdollinen syy | Ratkaisu |
|---|---|---|
| Jauhin ei käynnisty | Battery not charged; Battery not inserted correctly; On/Off switch not fully engaged. | Charge battery; Reinsert battery securely; Ensure switch is in ON position. |
| Liiallinen tärinä | Damaged or unbalanced disc; Disc not properly mounted; Loose side handle. | Replace disc; Re-mount disc correctly, ensuring flanges are tight; Tighten side handle. |
| Vähentynyt suorituskyky | Battery low; Worn disc; Overheating. | Recharge battery; Replace disc; Allow tool to cool down, clean ventilation slots. |
7. Tekniset tiedot
- Merkki: Erbauer
- Malli: EAG18-115
- Voitage: 18 volttia
- Levyn halkaisija: 115 mm
- Teho: 72 wattia
- Materiaali: Metalli
- Väri: Sininen
- ASIN: B0C7JWVC1F
8. Takuu ja tuki
This Erbauer product is covered by the manufacturer's standard warranty. For specific warranty terms and conditions, please refer to the documentation provided with your purchase or visit the official Erbauer website. For technical support, spare parts, or service inquiries, please contact Erbauer customer service through their official channels.
Lisätietoja saat osoitteesta Erbauer brand page on Amazon.
Ask a question about this manual
Ask about setup, troubleshooting, compatibility, parts, safety, or missing instructions. Manuals+ will review the question and use this page’s manual context to help answer it.