
SEQURE MSS12 Pro
SEQURE MSS12 Pro 70W Digital Soldering Iron Station Kit
Model: MSS12 Pro | Brand: SEQURE
Johdanto
This instruction manual provides essential information for the safe and effective operation, maintenance, and troubleshooting of your SEQURE MSS12 Pro 70W Digital Soldering Iron Station Kit. This advanced soldering station features rapid heating, precise temperature control, and multiple power input options, making it suitable for various electronic and welding applications.
Turvallisuustiedot
- Käytä aina asianmukaisia henkilönsuojaimia, mukaan lukien suojalaseja, kun käytät juotinta.
- Varmista työtilasi riittävä ilmanvaihto, jotta vältät juotoshöyryjen hengittämisen.
- Juotoskolvin kärki kuumenee erittäin korkeiksi. Vältä suoraa kosketusta ihon tai syttyvien materiaalien kanssa.
- Aseta juotin telineeseensä, kun sitä ei käytetä, jotta vältyt vahingossa tapahtuvilta palovammoilta tai vaurioilta.
- Älä käytä juotinlaitetta nesteiden lähellä taiamp ehdot.
- Irrota laite virtalähteestä, kun sitä ei käytetä tai ennen huoltotoimenpiteitä.
- Pidä poissa lasten ulottuvilta.
Pakkauksen sisältö
Varmista, että pakkauksessasi on kaikki alla luetellut tuotteet:
- 1 x SEQURE MSS12 Pro Soldering Station Unit
- 1 x Juotinkahva
- 4 x T12 Soldering Iron Tips
- 1 x Solder Iron Holder
- 1 x AC Power Supply Cord
- 1 x säilytyspussi
- 1 x Käyttöohje (tämä asiakirja)

Figure 1: Complete SEQURE MSS12 Pro Soldering Iron Station Kit with all included components.
Asennus
- Aseta juotoskärki: Gently push one of the T12 soldering iron tips into the end of the soldering iron handle until it is firmly seated.
Video 1: Unboxing and initial setup of the SEQURE MSS12 Pro Soldering Station, showing how to connect components and power on the device.
- Yhdistä juotoskahva: Connect the cable from the soldering iron handle to the "Tip" port on the front of the MSS12 Pro control unit. Ensure the connection is secure.

Kuva 2: Yksityiskohtainen view of the MSS12 Pro unit, highlighting the handle interface, LCD screen, and function knob.
- Liitä virtalähde:
The MSS12 Pro supports multiple power input options:
- Vaihtovirta: Connect the provided AC power supply cord to the "AC 100-240V" port on the back of the unit, then plug it into a standard wall outlet.
- Tasavirta: Connect a DC12V-25V power supply to the DC input port.
- PD2.0/3.0, QC2.0/3.0: Use a compatible USB-C power delivery or quick charge adapter.
- 3S-6S Lipo Battery: Connect a compatible Lipo battery to the XT60 interface.

Figure 3: The MSS12 Pro's versatility in power input, supporting various sources for both indoor and outdoor use.
- Virta päälle: Flip the power switch on the back of the unit to the "ON" position. The LCD screen will illuminate.
Käyttöohjeet
Lämpötilan säätö
The MSS12 Pro features a flexible knob for easy temperature setting and adjustment. The temperature range is 100°C-450°C / 212°F-842°F.
- Lämpötilan säätö: Rotate the function knob (red knob) clockwise to increase temperature and counter-clockwise to decrease it. The current temperature will be displayed on the LCD screen.
- °C / °F Conversion: The unit supports switching between Celsius and Fahrenheit. Refer to the on-screen menu (accessed by pressing the knob) for this setting.
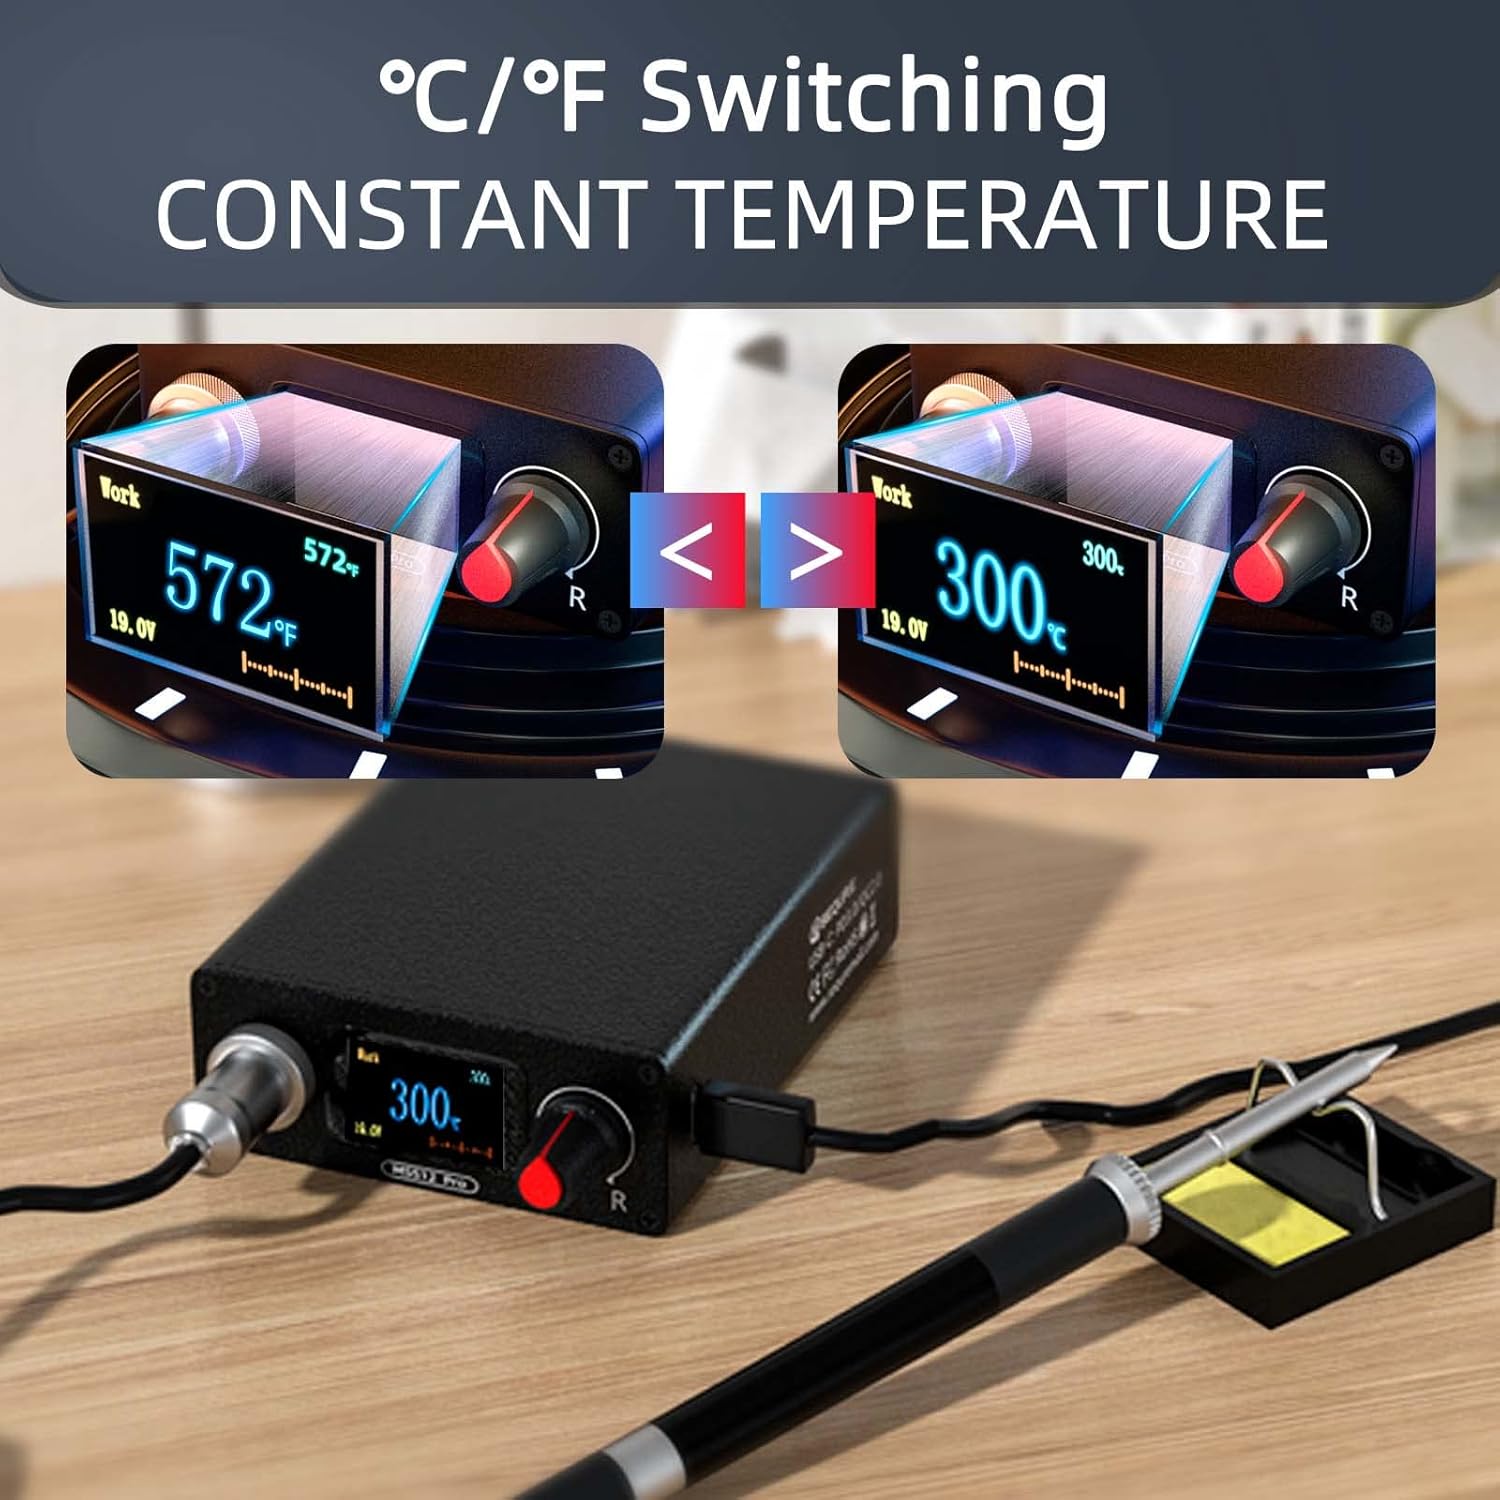
Figure 4: The LCD screen displaying temperature in both Celsius and Fahrenheit, demonstrating the easy conversion feature.

Figure 5: The MSS12 Pro's PID precision temperature control system ensures rapid heating and stable temperatures.
Auto Sleep & Standby
To prolong the life of the soldering iron tip and the station, the unit features intelligent sleep and standby modes:
- Nukkumismoodi: The station enters sleep mode when not used for a set duration (e.g., 3 minutes of inactivity), reducing the tip temperature to 200°C/392°F.
- Valmiustila: After a longer period of inactivity (e.g., 6 minutes after entering sleep mode), the unit will enter standby mode.
- To exit sleep or standby, simply pick up the soldering iron or rotate the knob.

Figure 6: Explanation of the auto sleep and standby modes, designed to conserve tip life and energy.
Kalibrointi
The MSS12 Pro supports fast temperature compensation and auto-calibration for precise temperature accuracy. This feature can be accessed and adjusted through the unit's menu system using the function knob.
General Soldering Tips
- Ensure the soldering tip is clean and tinned before each use.
- Levitä kärkeen pieni määrä juotetta lämmönsiirron parantamiseksi.
- Heat both the component lead and the PCB pad simultaneously before applying solder.
- Remove the soldering iron before removing the solder.

Figure 7: The MSS12 Pro is suitable for a wide range of applications, from professional industry use to hobbyist projects.
Huolto
- Kärjen puhdistus: Puhdista juotoskärki säännöllisesti käyttämälläamp sienellä tai messinkivillalla ylimääräisen juotteen ja hapettuman poistamiseksi. Puhdas kärki varmistaa tehokkaan lämmönsiirron.
- Kärjen tinaus: After cleaning, always tin the tip with a small amount of fresh solder to prevent oxidation and extend its lifespan.
- Kärjen vaihto: If a tip becomes heavily oxidized, pitted, or no longer heats effectively, replace it with a new T12 series tip.
- Yleinen puhdistus: Keep the control unit and soldering handle clean and free of dust and debris. Use a soft, dry cloth for cleaning. Do not use abrasive cleaners or solvents.
- Varastointi: When not in use, store the soldering station and its components in the provided storage bag in a dry, cool place.

Figure 8: The durable aluminum alloy handle of the MSS12 Pro is designed for comfort and longevity, aiding in maintenance and overall product life.
Vianetsintä
| Ongelma | Mahdollinen syy | Ratkaisu |
|---|---|---|
| Juotosrauta ei kuumene. | Power cord not connected, power switch off, faulty tip, or internal issue. | Check power connections. Ensure power switch is ON. Try a different soldering tip. If problem persists, contact support. |
| Tip not registering with unit. | Tip not fully inserted, or tip is faulty. | Ensure the tip is fully and securely inserted into the handle. Try a different tip. |
| Temperature unstable or inaccurate. | Tip oxidation, incorrect calibration, or environmental factors. | Clean and tin the tip. Perform auto-calibration via the unit's menu. Ensure stable power supply. |
| Unit enters sleep/standby too quickly. | Sleep/standby settings are too short. | Adjust the sleep/standby duration settings in the unit's menu. |
Tekniset tiedot
| Ominaisuus | Yksityiskohta |
|---|---|
| Malli | MSS12 Pro |
| Wattage | 70W |
| Lämpötila-alue | 100°C - 450°C / 212°F - 842°F |
| Lämpötilan vakaus | ±1 % |
| Näytön tyyppi | LCD |
| Virtalähde | AC100-240V, PD2.0/3.0, QC2.0/3.0, DC12V-25V, 3S-6S Lipo battery |
| Materiaali | Aluminum (handle) |
| Tuotteen paino | 9.1 unssia (noin 258 g) |
| Tuotteen mitat | 3.94 x 3.15 x 1.18 tuumaa (noin 10 x 8 x 3 cm) |
| Alkuperämaa | Kiina |

Figure 9: Performance specifications based on input voltage for the MSS12 Pro.
Takuu ja tuki
SEQURE offers a 90-day warranty for the MSS12 Pro Soldering Iron Station Kit. Lifetime professional customer support is also provided. For any questions, suggestions, or technical assistance, please contact SEQURE customer service through the vendor's official channels or the platform where the product was purchased.
Lisätietoja saat osoitteesta SEQURE Store on Amazon.
Asiaan liittyvät asiakirjatMSS12 Pro

Ask a question about this manual
Ask about setup, troubleshooting, compatibility, parts, safety, or missing instructions. Manuals+ will review the question and use this page’s manual context to help answer it.