OOYCYOO P 60A
OOYCYOO MPPT 60A aurinkolataussäätimen käyttöohje
Model: P 60A
1. Johdanto
This manual provides detailed instructions for the installation, operation, and maintenance of your OOYCYOO MPPT 60A Solar Charge Controller. This device is designed to efficiently manage power flow from your solar panels to your battery bank, ensuring optimal charging and system protection. It supports automatic 12V/24V system voltage identification and is compatible with various battery types.
Key features include a backlit LCD display, a 4-stage battery charging algorithm, and comprehensive protection functions.
2. Turvallisuusohjeet
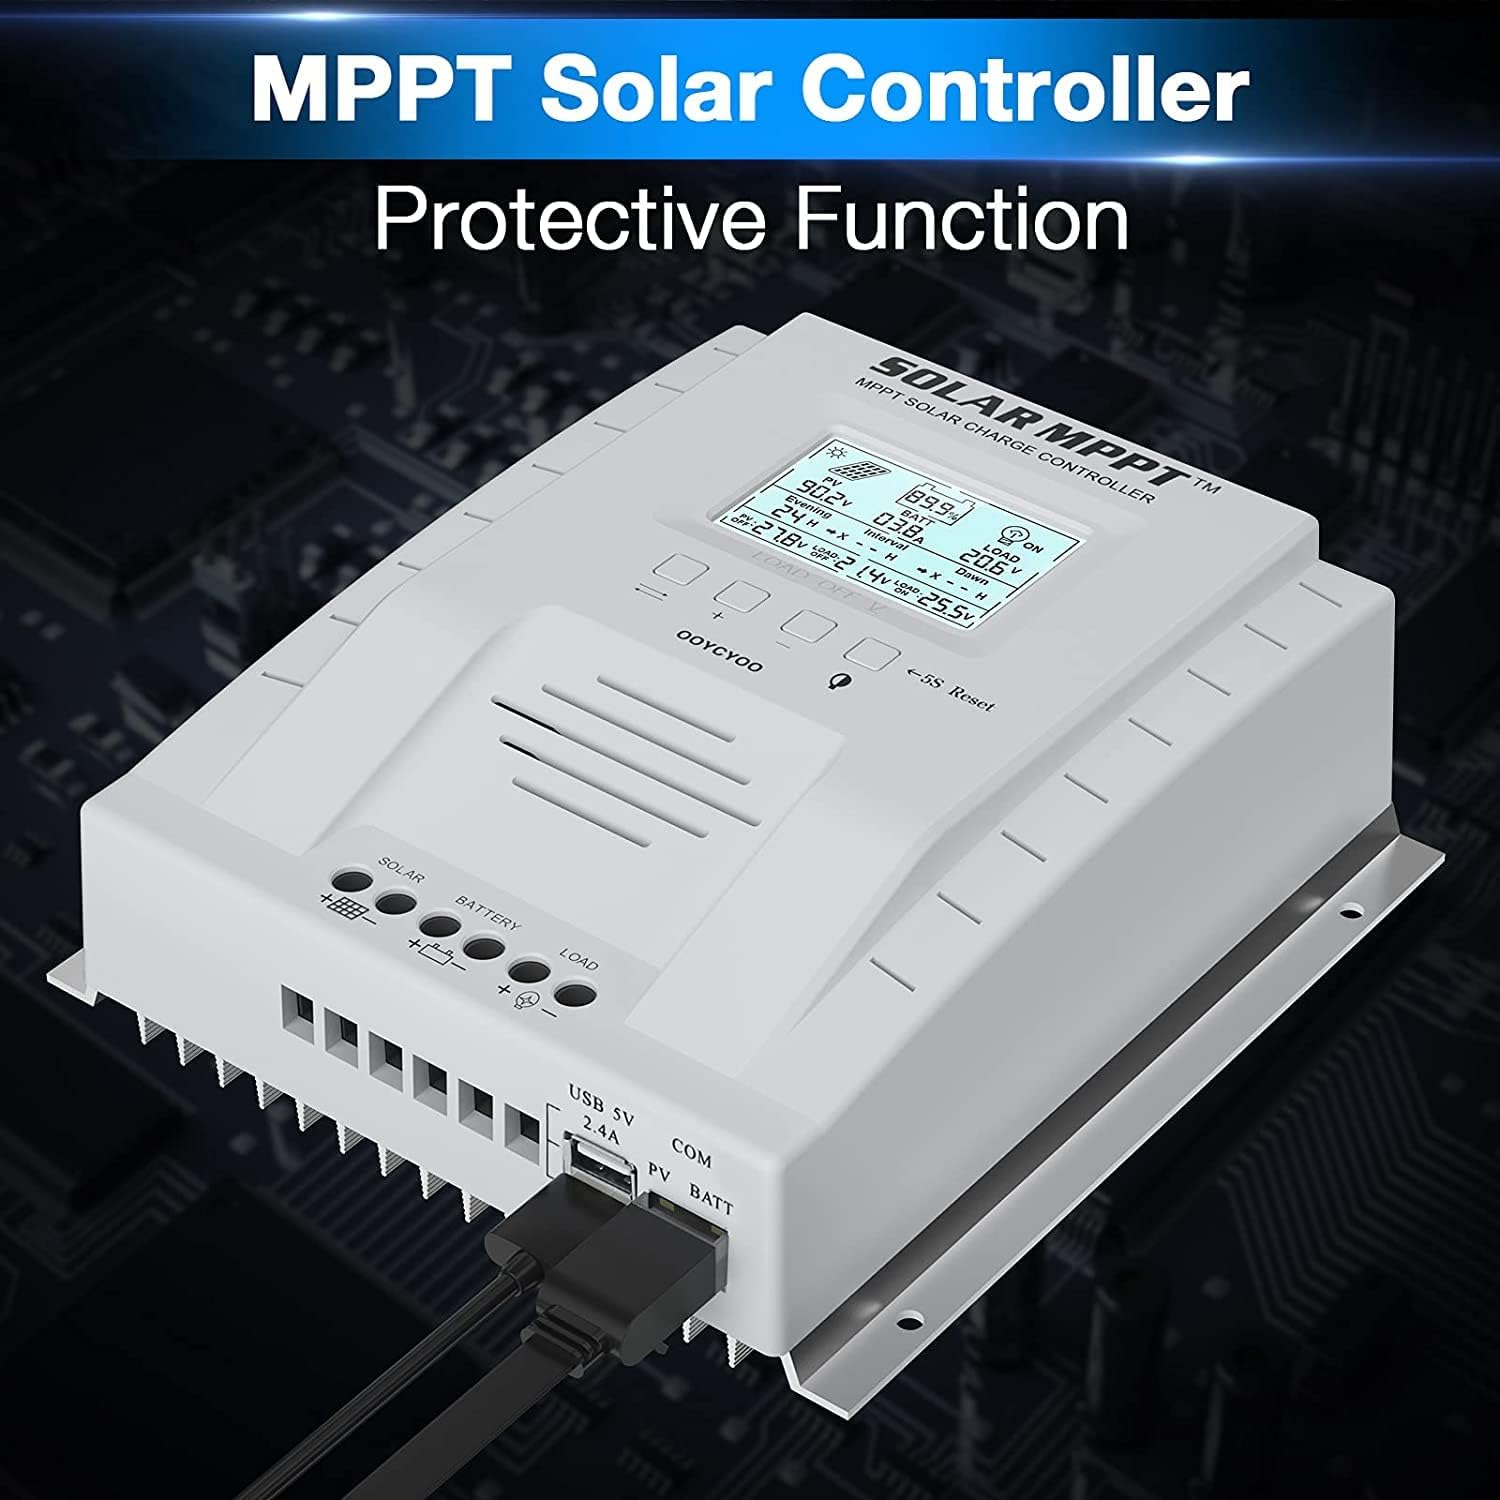
- Kytke aina ensin akku, sitten aurinkopaneeli ja lopuksi kuorma. Irrota liitännät käänteisessä järjestyksessä.
- Ensure all wiring is correctly polarized to prevent damage.
- Do not connect inverters or inductive loads directly to the controller's load terminals.
- Asenna ohjain hyvin ilmastoituun tilaan, kauas syttyvistä materiaaleista.
- The controller generates heat during operation; ensure adequate airflow. The integrated cooling fan activates when the temperature exceeds 45°C and turns off below 40°C.
- Käytä kaikissa liitännöissä sopivia sulakkeita ja katkaisijoita.
- This device is for indoor use only. Protect it from water and moisture.
3. Tuote ohiview
The OOYCYOO MPPT 60A Solar Charge Controller is designed for efficient solar power management. It features an LCD display for real-time data, multiple protection functions, and support for various battery types.
3.1 Pakkauksen sisältö
- 1 x OOYCYOO MPPT 60A Solar Charge Controller
- 1 x lämpötila-anturi
- 1 x Käyttöohje (englanti)
3.2 Komponenttien tunnistetiedot

The controller features a clear LCD display on the front for monitoring system status. Below the display are control buttons for navigation and settings. Connection terminals for solar panels, battery, and load are located at the bottom. USB ports and an RS485 communication port are on the side.
4. Asennus ja asennus
Oikea asennus on ratkaisevan tärkeää aurinkolataussäätimen turvallisen ja tehokkaan toiminnan kannalta. Noudata näitä ohjeita huolellisesti.
4.1 Ohjaimen asennus
- Valitse kuiva, hyvin ilmastoitu paikka, suojassa suoralta auringonvalolta, korkeilta lämpötiloilta ja vedeltä.
- Varmista, että ohjaimen ympärillä on riittävästi tilaa lämmön haihtumista varten.
- Mount the controller vertically on a wall or stable surface using the provided mounting holes.
4.2 Johdotusliitännät
Follow the connection order precisely to avoid damage to the controller or other components.
- Liitä akku: Kytke akun positiivinen ja negatiivinen napa ohjaimen vastaaviin akkuliittimiin. Varmista oikea napaisuus. Ohjain tunnistaa automaattisesti järjestelmän jännitteen.tage (12V tai 24V).
- Liitä aurinkopaneelit: Connect the positive and negative leads from your solar panel array to the corresponding PV terminals on the controller. Ensure correct polarity. Do not exceed the maximum PV input voltage 100V DC.
- Kytke kuorma (valinnainen): Connect your DC loads to the load terminals on the controller. Note that the load output is for DC loads only. Do not connect inverters or inductive loads directly to these terminals.
- Connect the Remote Temperature Sensor: Plug the temperature sensor into its dedicated port. This sensor helps the controller optimize charging based on battery temperature.

Tärkeä huomautus: Always connect the battery first and disconnect the solar panel last. Incorrect connection order can damage the controller.
5. Käyttöohjeet
Once installed, the controller will begin operation automatically. The LCD display provides real-time system information.
5.1 LCD-näyttö ja painikkeet

The backlit LCD displays critical system parameters such as PV voltage, akkutilavuustage, charging current, load current, and accumulated energy (KWH). The four buttons below the display are used for navigation and settings adjustment:
- Vaihtonäppäin: Used to cycle through display screens or confirm selections.
- '+' (Plus) Key: Increases values or moves forward in menus.
- '-' (Minus) Key: Decreases values or moves backward in menus.
- Manual Switch Load Key: Toggles the load output on/off manually.
- 5S Reset: Paina ja pidä painettuna 5 sekuntia palauttaaksesi tehdasasetukset.
5.2 Battery Charging Algorithm
Ohjain käyttää 4 sekunnintagLatausalgoritmi akun käyttöiän ja suorituskyvyn optimoimiseksi:
- Irtolataus: Charges the battery at maximum current until the voltage saavuttaa tehon voltage.
- Tehostinlataus: Varaukset vakiotilavuudellatage for a set period to ensure full charge.
- Kelluva veloitus: Pitää akun varaustason alhaisempanatage to prevent self-discharge and overcharging.
- Equalization (for specific battery types): Ylilataa akkua säännöllisesti kennojen varauksen tasapainottamiseksitagja estävät sulfaation.
5.3 Tuetut akkutyypit
The controller is compatible with various battery types, including:
- Lead-Acid (Sealed, Gel, Flooded)
- Litium (LFP)
- User-defined parameters for other battery types.
Pre-set charging parameters are available for Sealed, Gel, Flooded, and LI (LFP) batteries. Users can customize parameters for other battery types as needed.
6. Suojaustoiminnot
The OOYCYOO MPPT 60A Solar Charge Controller incorporates multiple protection mechanisms to ensure system safety and longevity:
- PV Overcurrent/Overpower Protection
- PV Short Circuit Protection
- PV käänteisen napaisuuden suojaus
- Reverse Charging at Night Protection
- Akun käänteisen napaisuuden suojaus
- Akun ylijännitetage Suojaus
- Battery Over-discharge Protection
- Battery Overtemperature Protection
- Controller Overtemperature Protection
- Lithium Battery Low Temperature Protection
- Kuorman oikosulkusuojaus
- Kuorman ylikuormitussuoja
- TVS High Voltage Ohimenevä suojaus
7. Huolto
Säännöllinen huolto varmistaa aurinkolataussäätimen optimaalisen suorituskyvyn ja pidentää sen käyttöikää.
- Tarkista liitännät: Tarkista säännöllisesti kaikkien johtojen liitännät kireyden ja korroosion varalta. Kiristä kaikki löysät liitännät.
- Puhdista ohjain: Keep the controller clean and free of dust. Use a dry cloth to wipe the exterior. Ensure ventilation openings are not obstructed.
- Tarkista vauriot: Check for any signs of physical damage, overheating, or unusual odors.
- Akun tarkastus: Follow the manufacturer's maintenance guidelines for your specific battery type.
8. Vianmääritys
Tässä osiossa käsitellään yleisiä ongelmia, joita saatat kohdata aurinkolataussäätimen kanssa.
| Ongelma | Mahdollinen syy | Ratkaisu |
|---|---|---|
| Ohjain ei käynnisty / LCD-näyttö tyhjä | Akkua ei ole kytketty tai akun varaustilatagLiian alhainen e. Käänteinen napaisuuskytkentä. | Varmista, että akku on ensin kytketty ja että sen jännite on riittävä.tage. Check battery polarity. |
| Ei latausta aurinkopaneeleista | Solar panels not connected or reverse polarity. Insufficient sunlight. PV voltage liian matala tai liian korkea. | Check solar panel connections and polarity. Ensure adequate sunlight. Verify PV voltage is within operating range (e.g., 18V-96V for 12V system, 36V-96V for 24V system). |
| Kuorma ei toimi | Load output disabled. Load short circuit or overload. Battery voltage liian alhainen. | Check load output status on LCD. Disconnect load and check for short circuit. Ensure battery is sufficiently charged. |
| Säätimen ylikuumeneminen | Poor ventilation. Excessive load or charging current. | Ensure adequate airflow around the controller. Reduce load or charging current if possible. |
| Epätarkka voltage lukemat | Loose connections. Faulty temperature sensor. | Check all wiring connections. Ensure temperature sensor is properly connected. |
9. Tekniset tiedot
Technical specifications for the OOYCYOO MPPT 60A Solar Charge Controller.
| Parametri | Arvo |
|---|---|
| Nimellislatausvirta | 60A |
| System Voltage | 12V/24V Auto Identification |
| Max. PV Open Circuit Voltage | 100V DC |
| Aurinkopaneelien maksimituloteho (12 V järjestelmä) | 750W |
| Aurinkopaneelien maksimituloteho (24 V järjestelmä) | 1500W |
| DC/DC Transfer Efficiency | Jopa 98.7 % |
| Käyttölämpötila | -20 ℃ - +55 ℃ |
| Liittimen koko | 10 AWG |
| Mitat (P*L*K) | 8.3 x 8.4 x 3.4 tuumaa (21.2 x 20.8 x 8.4 cm) |
| Paino | 3 lbs (1.28 kg) |
| Näytön tyyppi | LCD-taustavalo |
| UPC | 768461886785 |
| Mallinumero | P 60A |


10. Takuu ja tuki
For warranty information or technical support, please contact your retailer or the manufacturer directly. Refer to the product packaging or purchase documentation for specific contact details.
Ask a question about this manual
Ask about setup, troubleshooting, compatibility, parts, safety, or missing instructions. Manuals+ will review the question and use this page’s manual context to help answer it.