1. Johdanto
Thank you for choosing the PRIXTON Cinema Mini Projector. This compact and versatile projector is designed to provide an immersive viewing experience for movies, games, and presentations. Its multiple connectivity options and portable design make it ideal for various environments. Please read this manual carefully before using the projector to ensure proper operation and to maximize its lifespan.
2. Turvallisuustiedot
- Virtalähde: Käytä ainoastaan määritettyä virtalähdettä. Varmista, että äänenvoimakkuus ontage on yhteensopiva alueesi kanssa.
- Ilmanvaihto: Älä tuki tuuletusaukkoja. Varmista, että projektorin ympärillä on riittävästi tilaa asianmukaiselle ilmanvaihdolle ja ylikuumenemisen estämiseksi.
- Silmien turvallisuus: Älä katso suoraan projektorin linssiin, kunamp on päällä. Kirkas valo voi aiheuttaa silmävaurioita.
- Vesi ja kosteus: Keep the projector away from water, rain, and excessive humidity. Do not operate with wet hands.
- Puhdistus: Irrota virtajohto ennen puhdistamista. Käytä pehmeää, kuivaa liinaa. Vältä nestemäisiä puhdistusaineita.
- Sijoitus: Aseta projektori vakaalle ja tasaiselle alustalle. Vältä sen sijoittamista suoraan auringonvaloon tai lämmönlähteiden lähelle.
- Lapset: Keep the projector and its accessories out of reach of children.
3. Pakkauksen sisältö
Tarkista, että pakkauksessasi on kaikki tarvittavat osat:
- PRIXTON Cinema Mini -projektori
- Kaukosäädin
- Virtalähde
- Käyttöopas
4. Tuote ohiview
Familiarize yourself with the various parts of your PRIXTON Cinema Mini Projector.
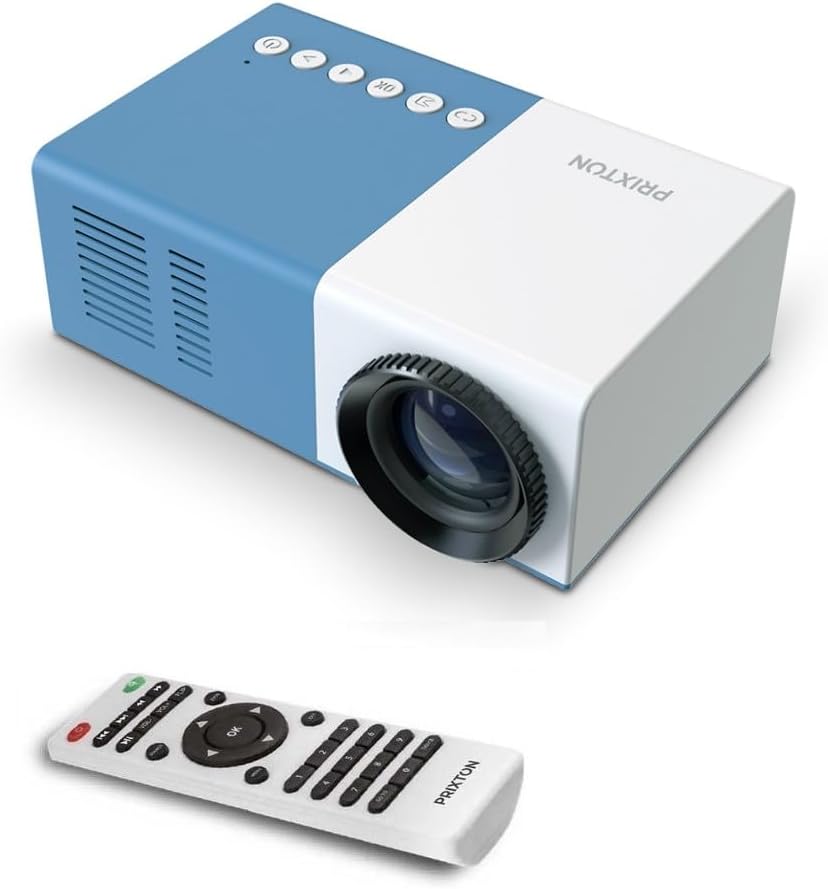
Kuva 4.1: Etu ja yläosa View of the PRIXTON Cinema Mini Projector with its remote control. The projector is blue and white, showing the lens, control buttons, and the included remote.
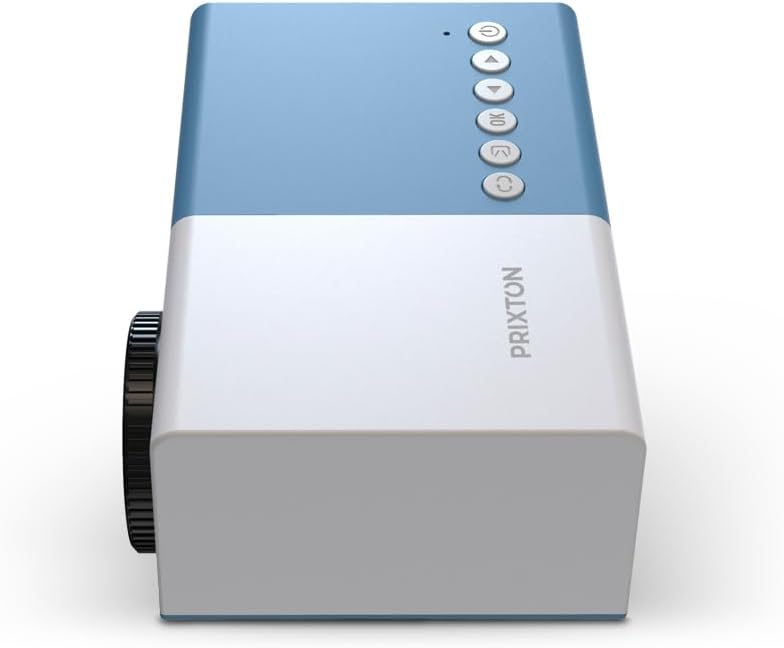
Kuva 4.2: Yläosa view of the projector, highlighting the control buttons (Power, Menu, OK, Navigation) and the focus wheel on the side.
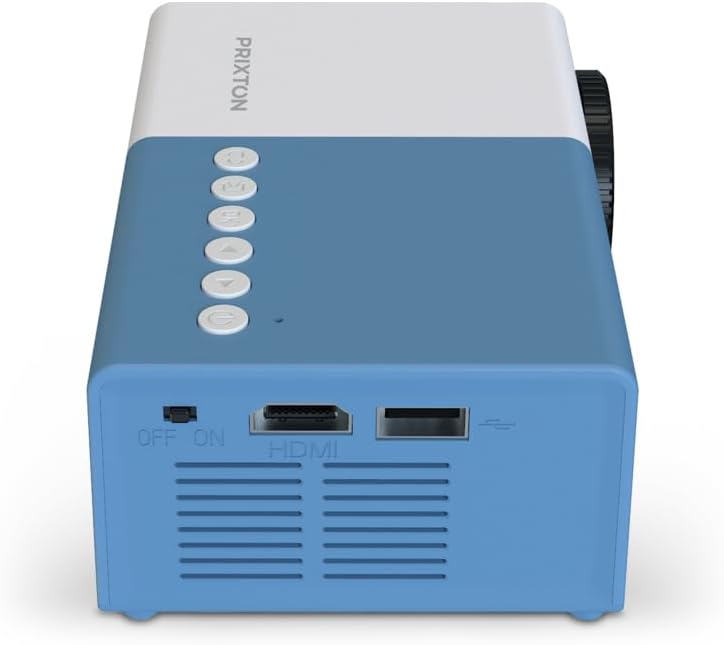
Kuva 4.3: Takaosa view of the projector, showing the power switch, HDMI port, USB port, and ventilation grilles.

Kuva 4.4: Sivu view of the projector, displaying the MicroSD card slot, AV In port, and additional ventilation.
Komponentit:
- Linssi: Heijastaa kuvan näytölle.
- Tarkennuspyörä: Säätää kuvan selkeyttä.
- Ohjauspainikkeet: Power, Menu, OK, and navigation buttons for on-device control.
- Virtakytkin: Kytkee projektorin päälle tai pois päältä.
- HDMI-portti: Connects to devices like laptops, streaming sticks, and game consoles.
- USB-portti: Median toistoon USB-asemilta.
- MicroSD-paikka: For media playback from MicroSD cards.
- AV-tulo: Yhdistetään vanhempiin laitteisiin AV-kaapelilla.
- Integroitu kaiutin: Tarjoaa äänilähdön.
5. Asennus
5.1 Virtaliitäntä
- Liitä virtalähde projektorin virransyöttöporttiin.
- Liitä verkkolaite pistorasiaan.
- Flip the power switch on the projector to the 'ON' position. The power indicator light should illuminate.
5.2 Sijoittelu ja heijastaminen
Place the projector on a stable surface, ensuring the lens is facing the projection surface (wall or screen).

Kuva 5.1: Illustration of projection distance and screen size. The projector can project images between 24 and 60 inches, with a maximum distance of 2 meters from the surface.
- For optimal image quality, ensure the room is dark.
- The projector can display images from 24 inches to 60 inches.
- The optimal projection distance is up to 2 meters (approximately 6.5 feet). Adjust the distance to achieve your desired screen size.
6. Käyttö
6.1 Virta päälle/pois
- Virran kytkeminen: After connecting power, press the Power button on the projector or the remote control.
- Virran sammuttaminen: Paina virtapainiketta uudelleen. Vahvista sammutus, jos sitä pyydetään.
6.2 Tarkennuksen säätö
After powering on, the image may appear blurry. Use the focus wheel located on the side of the projector to sharpen the image until it is clear.
6.3 Lähteen valinta
To select an input source (HDMI, USB, MicroSD, AV):
- Press the 'Source' or 'Input' button on the remote control or the projector.
- Use the navigation buttons to highlight your desired input source.
- Vahvista valintasi painamalla 'OK'.
7. Yhteydet
The PRIXTON Cinema Mini Projector offers multiple ways to connect your devices.
7.1 HDMI-liitäntä
Connect devices such as laptops, streaming sticks (e.g., Chromecast, Fire TV Stick), game consoles, or Blu-ray players using an HDMI cable.
- Connect one end of the HDMI cable to your device and the other end to the HDMI port on the projector.
- Select 'HDMI' as the input source (refer to Section 6.3).
7.2 USB- ja MicroSD-toisto
The projector supports direct media playback from USB drives and MicroSD cards.
- Insert your USB drive into the USB port or your MicroSD card into the MicroSD slot.
- Select 'USB' or 'MicroSD' as the input source.
- Navigoi files using the remote control and select the media you wish to play.
7.3 AV In Connection
For older devices that use composite video and stereo audio (RCA), connect them via the AV In port.
- Connect the AV cable from your device to the AV In port on the projector.
- Select 'AV' as the input source.
8. Äänilähtö
The projector features an integrated stereo speaker, providing audio for your content. Volume can be adjusted using the remote control.

Kuva 8.1: The PRIXTON Cinema Mini Projector in use, projecting content in a living room environment, demonstrating its portability and ease of setup for home entertainment.
9. Huolto
9.1 Linssin puhdistaminen
Use a soft, lint-free cloth specifically designed for optical lenses. Do not use abrasive cleaners or excessive force, as this can scratch the lens.
9.2 Projektorin rungon puhdistaminen
Wipe the exterior of the projector with a soft, dry cloth. Avoid using chemical cleaners that may damage the finish.
9.3 Ilmanvaihto
Regularly check that the ventilation grilles are free from dust and debris to ensure proper heat dissipation and prevent overheating.
9.4 Varastointi
Kun projektoria ei käytetä, säilytä sitä viileässä, kuivassa paikassa, poissa suorasta auringonvalosta ja äärimmäisistä lämpötiloista. Käytä mahdollisuuksien mukaan alkuperäistä pakkausta tai suojakoteloa.
10. Vianmääritys
Jos projektorin kanssa ilmenee ongelmia, katso seuraavat yleiset ongelmat ja ratkaisut.
| Ongelma | Mahdollinen syy | Ratkaisu |
|---|---|---|
| Ei kuvaa näytöllä | No power; Incorrect input source; Cable not connected. | Check power connection and switch; Select correct input source; Ensure HDMI/AV/USB cable is securely connected. |
| Kuva on epäselvä | Tarkennusta ei ole säädetty; Projektori on liian lähellä/kaukana. | Adjust the focus wheel; Adjust projection distance. |
| Ei ääntä | Volume too low; Muted; Source device audio issue. | Increase volume; Unmute projector; Check audio settings on source device. |
| Kaukosäädin ei toimi | Batteries low/dead; Obstruction; Remote not aimed at sensor. | Replace batteries; Remove obstructions; Aim remote directly at the projector's IR sensor. |
| Projektori ylikuumenee ja sammuu | Tukkeutunut ilmanvaihto; Pitkäaikainen käyttö. | Ensure vents are clear; Allow projector to cool down; Operate in a well-ventilated area. |
11. Tekniset tiedot
Technical specifications for the PRIXTON Cinema Mini Projector.
| Ominaisuus | Erittely |
|---|---|
| Merkki | Prixton |
| Mallinumero | Cinema Mini |
| Väri | Sininen |
| Projektiotekniikka | LED |
| Alkuperäinen resoluutio | QVGA 320 x 240 |
| Tuettu resoluutio | Up to Full HD (1920 x 1080) |
| Kirkkaus | 15 000 lumenia (15 ANSI-lumenia) |
| Projektion koko | 24" - 60" |
| Projektioetäisyys | Jopa 2 metriä |
| Yhteydet | HDMI, USB, MicroSD, AV In |
| Äänilähtö | Integroitu stereokaiutin |
| Erikoisominaisuudet | Kevyt, kannettava |
| Mukana olevat komponentit | Kaukosäädin |
12. Takuu ja tuki
For warranty information, please refer to the documentation provided at the time of purchase or contact your retailer. Information regarding spare parts availability and software updates is not available in this manual. For further assistance or technical support, please visit the official PRIXTON websivustolla tai ota yhteyttä heidän asiakaspalveluunsa.