Tuote loppuview
The ROCKBROS Rear Bike Rack (Model HJ1009-CBR) is an adjustable, quick-release bicycle cargo rack designed for transporting items on the back of your bicycle. Constructed from high-strength aluminum alloy, it offers a lightweight yet sturdy solution for carrying loads up to 115 lbs (52 kg). This rack features a full quick-release system for easy installation and removal, W-shaped bars to prevent pannier bags from interfering with tires, and adjustable telescopic rods to fit various bike frames.
Tärkeimmät ominaisuudet:
- Full Quick Release System: Allows for easy installation and removal from the seat post and bottom rod.
- Kestävä rakenne: Made from high-quality aluminum alloy, supporting up to 115 lbs (52 kg).
- Säädettävä muotoilu: Features adjustable rack length and telescopic rods (3-15cm extension) to accommodate different bicycle sizes.
- Pannier Protection: W-shaped bars are integrated to prevent pannier bags from contacting the bicycle tires.
- Parannettu näkyvyys: Includes a red rear reflector for improved safety during night or low-light conditions.
Tärkeitä turvallisuustietoja
Read all instructions carefully before installation and use. Failure to follow these instructions may result in product damage, personal injury, or property damage.
- Painorajoitus: Do not exceed the maximum load capacity of 115 lbs (52 kg). Overloading can compromise stability and safety.
- Yhteensopivuus: This rack is designed for most 26"-29" mountain bikes. It is ei sovellu for bikes with rear suspension, flat tires, soft-tailed frames, carbon fiber frames, or folding bikes.
- Seat Post Diameter: Ensure your seat tube diameter is within 23mm for proper fitment. Use appropriate shims or gaskets if the seat post is too thin.
- Turvallinen kiinnitys: Always ensure all bolts, clamps, and quick-release mechanisms are securely tightened before riding. Regularly check for looseness.
- Kuorman jakautuminen: Distribute cargo evenly on the rack to maintain bicycle balance and stability.
- Näkyvyys: The included red rear reflector enhances visibility. Consider additional lighting for night riding.
Pakkauksen sisältö
Varmista, että kaikki osat ovat mukana ennen asennuksen aloittamista.

Image: All components of the ROCKBROS Rear Bike Rack, including the main rack body, adjustable support rods, W-shaped side bars, quick-release clamps, reflector, elastic cord, and installation tools.
| Komponentti | Määrä |
|---|---|
| Rack Body | 1 |
| Adjustable Telescopic Rods | 2 |
| W-shaped Side Bars (Guardrails) | 2 |
| Quick Release Clamps | 2 |
| Red Rear Reflector | 1 |
| Joustava johto | 1 |
| Installation Tool Set (Allen wrenches, spanner) | 1 setti |
| Kumitiivisteet | Eri |
| Pultit ja aluslevyt | Eri |
Tekniset tiedot
- Merkki: ROCKBROS
- Mallinumero: HJ1009-CBR
- Materiaali: Alumiiniseos
- Väri: Musta
- Tuotteen paino: 1.25 kiloa (noin 2.75 paunaa)
- Kantavuus: 115 lbs (52 kg)
- Asennustyyppi: Takaistuimen kiinnitys
- Suunta: Takaosa
- Compatible Wheel Size: 26" - 29" (most mountain bikes)
- Seat Tube Diameter Compatibility: 23 mm sisällä
- Adjustable Rod Extension: 3-15 cm
Asennusohjeet
Follow these steps carefully to install your ROCKBROS Rear Bike Rack. It is recommended to watch the installation video for visual guidance.
Video: Official ROCKBROS Rear Bike Rack Installation Guide. This video demonstrates the step-by-step process of attaching the rack to a bicycle, including securing the quick-release clamps, adjusting the support rods, and mounting the W-shaped side bars.
- 1. Prepare the Seat Post Clamp:
Place two large rubber gaskets inside the quick-release clamp to protect your seat post and ensure a snug fit. If your seat post is thinner, additional gaskets may be required.

Image: A hand placing two black rubber gaskets into the open quick-release clamp mechanism of the bike rack, preparing it for attachment to the seat post.
- 2. Mount the Rack to the Seat Post:
Attach the main rack body to the bicycle's seat post using the quick-release clamp. Varmista, että clamp is positioned correctly and securely tightened. The quick-release lever should be firmly closed.
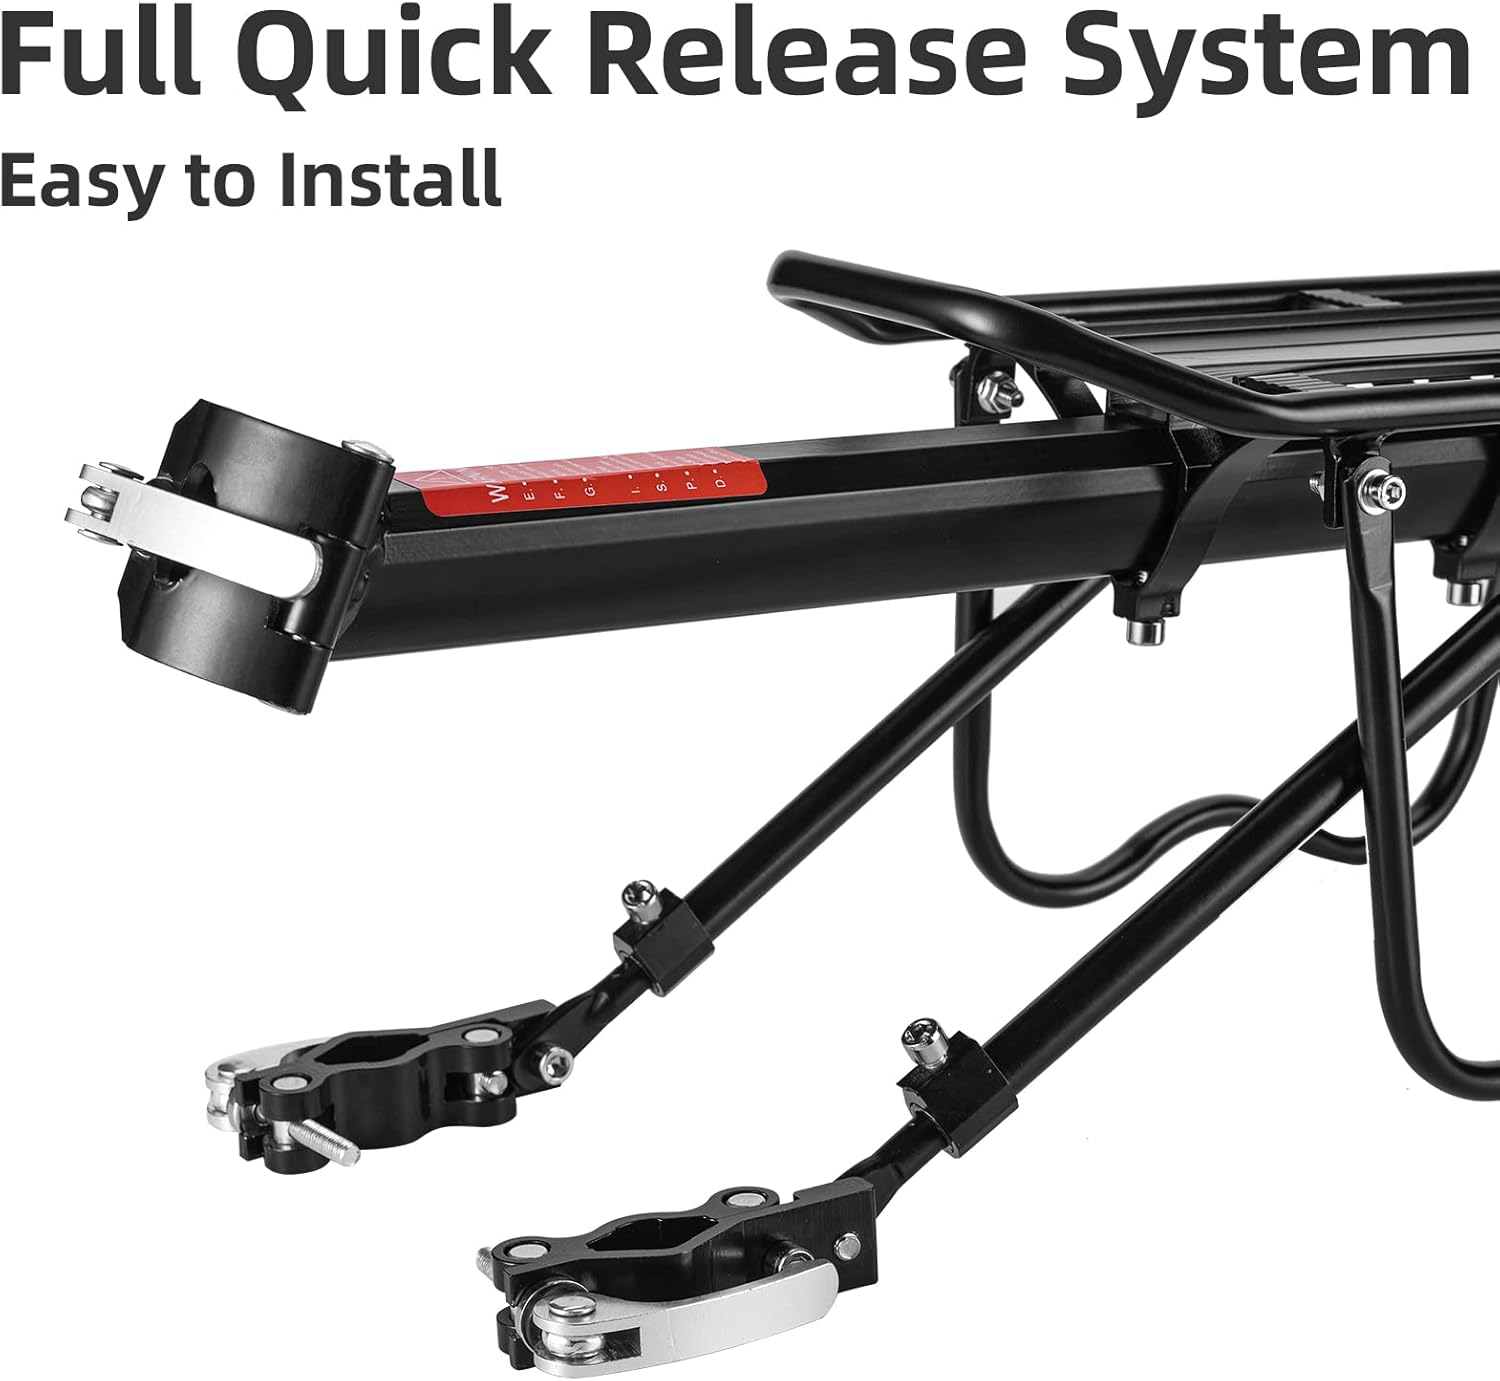
Image: A close-up of the quick-release clamp being secured around the bicycle's seat post, with the main rack body extending horizontally from it.
- 3. Adjust Rack Panel Position:
Adjust the position of the rack panel along the main beam to achieve the desired length and balance over the rear wheel. Use an Allen wrench to loosen and tighten the screws that secure the panel.

Image: A hand using an Allen wrench to adjust the screws on the underside of the main rack beam, allowing the top panel to slide and adjust its position relative to the bike's rear wheel.
- 4. Mount W-shaped Side Bars (Guardrails):
Attach the W-shaped side bars to the main rack body. These bars prevent pannier bags from rubbing against the rear wheel. Secure them with the provided bolts and tools.

Image: A hand attaching one of the W-shaped side bars to the main rack structure, securing it with a bolt and washer.
- 5. Install Telescopic Support Rods:
Connect the telescopic support rods from the main rack body down to the lower part of your bike frame (e.g., seat stays or chain stays). Ensure the quick-release heads are attached to the bike frame.
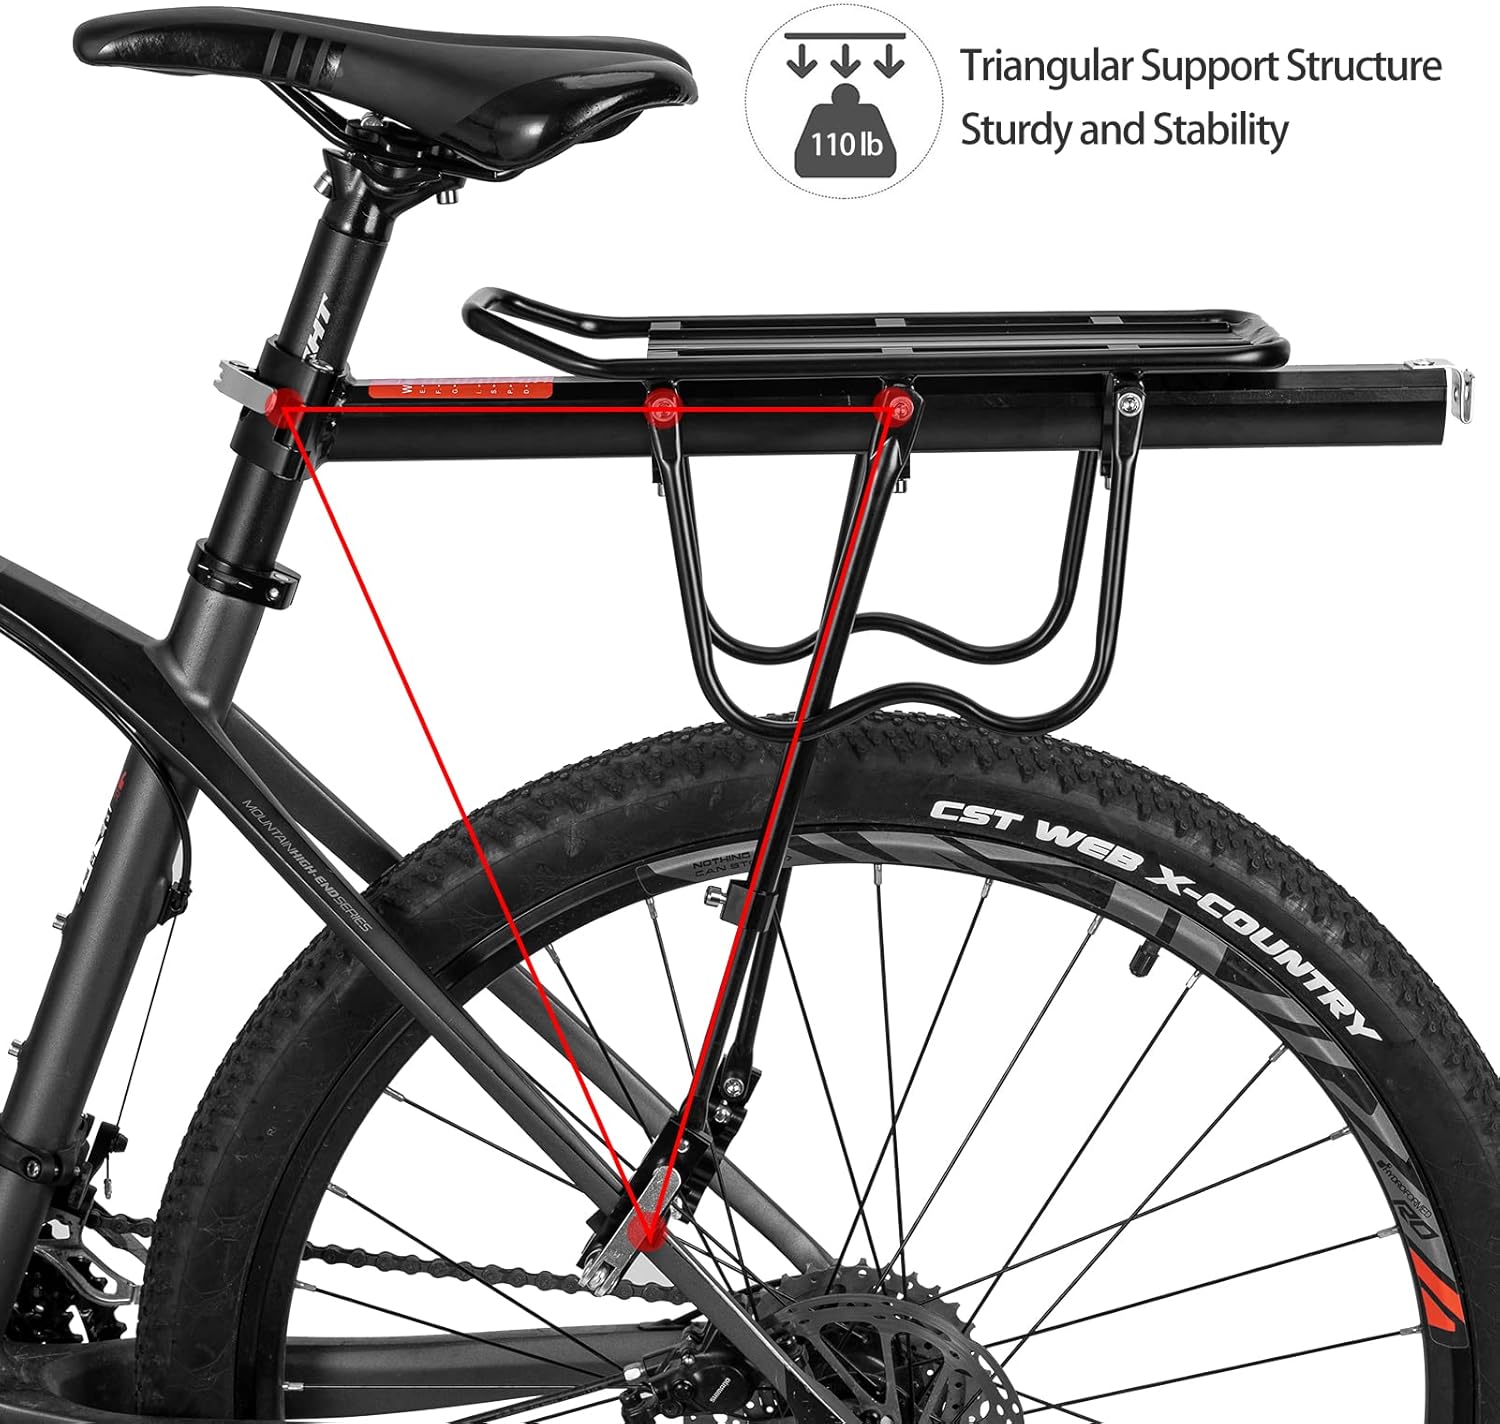
Image: A hand securing the lower end of a telescopic support rod to the bicycle's frame near the rear wheel, using a quick-release mechanism.
- 6. Adjust and Secure Telescopic Rods:
Adjust the length of the telescopic rods to ensure the rack is level and stable. Tighten all bolts and quick-release levers on the support rods securely. Double-check all connections.

Image: A hand using an Allen wrench to tighten a bolt on the telescopic support rod, ensuring it is securely fastened and the rack is stable.
- 7. Attach Rear Reflector:
Slide the red rear reflector onto the designated slot at the back of the rack for increased visibility.

Image: A hand sliding the red rear reflector into the slot at the very back of the bike rack, completing the installation.
- 8. Lopputarkastus:
Before riding, ensure all connections are tight and the rack is stable. Gently push and pull on the rack to confirm it is securely mounted and does not wobble.

Image: A fully installed ROCKBROS Rear Bike Rack on a black mountain bike, viewed from the side, showing the rack securely attached to the seat post and frame.
Käyttöohjeet
Once installed, the ROCKBROS Rear Bike Rack is ready for use.
- Lastin lastaus: Place items on the top platform of the rack. For larger items or pannier bags, utilize the W-shaped side bars for support and to keep them clear of the wheels.
- Lastin kiinnitys: Use the provided elastic cord or other suitable straps (not included) to securely fasten your cargo to the rack. Ensure items are stable and do not shift during transit.
- Painon jakautuminen: Distribute the weight of your cargo as evenly as possible to maintain bicycle balance. Avoid placing all weight on one side.
- Näkyvyys: Ensure the rear reflector is not obstructed by cargo. If necessary, use additional rear lights, especially when riding at night.
- Pikavapautustoiminto: To remove the rack, simply open the quick-release lever on the seat post clamp and detach the lower support rods.

Kuva: Kaksi entistäamples of the ROCKBROS bike rack in use: one side shows the rack with pannier bags attached, and the other side shows it with a trunk bag, demonstrating its versatility for carrying different types of cargo.
Huolto
Säännöllinen huolto varmistaa pyörätelineesi pitkän käyttöiän ja turvallisen toiminnan.
- Puhtaus: Pyyhi teline mainoksellaamp liinalla lian ja noen poistamiseen. Vältä voimakkaita kemikaaleja, jotka voivat vahingoittaa pintaa.
- Kiinnittimen tarkistus: Periodically inspect all bolts, screws, and quick-release mechanisms for tightness. Re-tighten any loose fasteners.
- Vahinkotarkastus: Check the aluminum alloy frame and plastic components for any signs of cracks, bends, or other damage. Replace damaged parts immediately.
- Voitelu: Apply a small amount of lubricant to the quick-release mechanism pivots if they become stiff.
Vianetsintä
If you encounter issues with your ROCKBROS Rear Bike Rack, refer to the following common solutions:
- Teline on heiluva:
Varmista, että pikalukitus clamp on the seat post is fully tightened. Check that the telescopic support rods are securely fastened to both the rack and the bike frame, and that their length is adjusted correctly to provide stable support.
- Pannier Bags Rubbing Tires:
Verify that the W-shaped side bars are correctly installed and positioned. Adjust the rack's position on the seat post if necessary to provide more clearance.
- Difficulty Installing on Seat Post:
Confirm your seat tube diameter is within the specified 23mm. Use the provided rubber gaskets to ensure a snug fit. If the seat post is too large, the rack may not be compatible. If too small, add more shims.
- Rack Not Level:
Adjust the length of the telescopic support rods. Loosen the fasteners, adjust the rod length until the rack platform is level, then re-tighten securely.
Takuu ja tuki
For warranty information or technical support, please contact ROCKBROS customer service. Refer to your purchase documentation or the official ROCKBROS websivusto yhteystiedot.
Verkkoresurssit:
- Lisätietoja ja tukea tuotteesta on virallisella sivustolla. ROCKBROS Store on Amazon.