1. Johdanto
This manual provides essential information for the safe and efficient operation, maintenance, and troubleshooting of your Profile GE Automatic Espresso Machine + Milk Frother. Please read these instructions thoroughly before first use and retain for future reference.

Image 1.1: The Profile GE Automatic Espresso Machine with a prepared espresso and a latte.
2. Turvallisuustiedot
Noudata aina sähkölaitteita käyttäessäsi perusturvallisuusohjeita tulipalon, sähköiskun ja henkilövahinkojen riskin vähentämiseksi.
- Ensure the appliance is connected to a grounded outlet.
- Älä upota konetta, johtoa tai pistoketta veteen tai muihin nesteisiin.
- Irrota pistoke pistorasiasta, kun et käytä ja ennen puhdistusta.
- Älä käytä laitetta, jonka johto tai pistoke on vaurioitunut.
- Pidä kädet ja johdot poissa kuumilta pinnoilta.
- Käytä vain valmistajan suosittelemia lisälaitteita.
3. Tuote ohiview
Profile GE Automatic Espresso Machine is designed for convenience and quality, featuring an integrated grinder, milk frother, and smart connectivity.
3.1 Komponentit
- Ohjauspaneeli: Touch-sensitive buttons for various drink selections and functions.
- Papusäiliö: Stores whole coffee beans for grinding.
- Tekojärvi: Irrotettava säiliö vedensyöttöä varten.
- Kahvisuutin: Annostelee haudutettua kahvia.
- Höyrysauva: Maidon vaahdottamiseen.
- Tippakaukalo: Kerää ylimääräisiä nesteitä.
- Porsaan astia: Kerää käytettyjä kahvinpuruja.

Image 3.1: The top control panel with buttons for Espresso, Americano, My Brew, Steam, and Hot Water.

Image 3.2: The integrated bean hopper with whole coffee beans and grind size adjustment knob.

Image 3.3: The removable water reservoir being lifted from the machine.
4. Asennus
4.1 Purkaminen pakkauksesta ja alkusijoitus
- Poista kaikki pakkausmateriaalit varovasti.
- Aseta laite vakaalle, tasaiselle alustalle, poissa lämmönlähteistä ja suorasta auringonvalosta.
- Varmista, että koneen ympärillä on riittävästi tilaa ilmanvaihtoa ja osien saatavuutta varten.
4.2 Ensimmäinen puhdistus
Ennen ensimmäistä käyttökertaa puhdista kaikki irrotettavat osat lämpimällä vedellä ja miedolla pesuaineella. Huuhtele huolellisesti ja kuivaa. Pyyhi laitteen ulkopinta vedellä.amp kangas.
4.3 Vesisäiliön täyttö
- Remove the water reservoir from the machine (refer to Image 3.3).
- Fill with fresh, cold drinking water up to the MAX line.
- Aseta säiliö tukevasti takaisin koneeseen.
4.4 Kahvipapujen lisääminen
- Open the lid of the bean hopper (refer to Image 3.2).
- Kaada kokonaisia kahvipapuja säiliöön. Älä täytä liikaa.
- Sulje kansi kunnolla.
4.5 Käynnistäminen ja alkuhuuhtelu
- Liitä virtajohto maadoitettuun pistorasiaan.
- Press the power button on the control panel. The machine will perform an initial rinse cycle.
- Place a container under the coffee spout to collect the rinse water.
4.6 SmartHQ App Connection
For enhanced customization and software updates, connect your espresso machine to the SmartHQ app.
- Lataa SmartHQ-sovellus laitteesi sovelluskaupasta.
- Follow the in-app instructions to pair your espresso machine.
- Customize drink preferences, volume, and strength through the app.

Image 4.1: Using the SmartHQ app to control and customize the espresso machine.
5. Käyttöohjeet
5.1 Kahvin valmistus
The machine offers Espresso, Americano, Lungo, and Hot Water options. The 'My Cup' setting is pre-set to Ristretto and can be adjusted via the SmartHQ app.
- Ensure the water reservoir is filled and the bean hopper contains coffee beans.
- Aseta kuppi kahviputken alle.
- Select your desired drink (Espresso, Americano, Lungo, My Cup) from the control panel.
- Kone jauhaa pavut, keittää ja annostelee kahvisi automaattisesti.

Image 5.1: The espresso machine dispensing a fresh shot of espresso.
5.2 Jauhatuskarkeuden säätö
The integrated conical burr grinder allows for 5 levels of grind size adjustment, from coarsest to finest, to optimize flavor extraction.
- Locate the grind size adjustment knob inside the bean hopper (refer to Image 3.2).
- Turn the knob to select your desired grind setting. Finer grinds are suitable for espresso, while coarser grinds are better for longer coffee types.
5.3 Using the Steam Frother
The steam frother creates various milk textures for cappuccinos, lattes, and more.
- Fill the included stainless steel frothing pitcher with cold milk.
- Aseta höyrysuutin maitoon.
- Press the 'Steam' button on the control panel.
- Move the pitcher to achieve desired foam texture.
- Once finished, press the 'Steam' button again to stop.
- Immediately clean the steam wand after each use to prevent milk residue buildup.
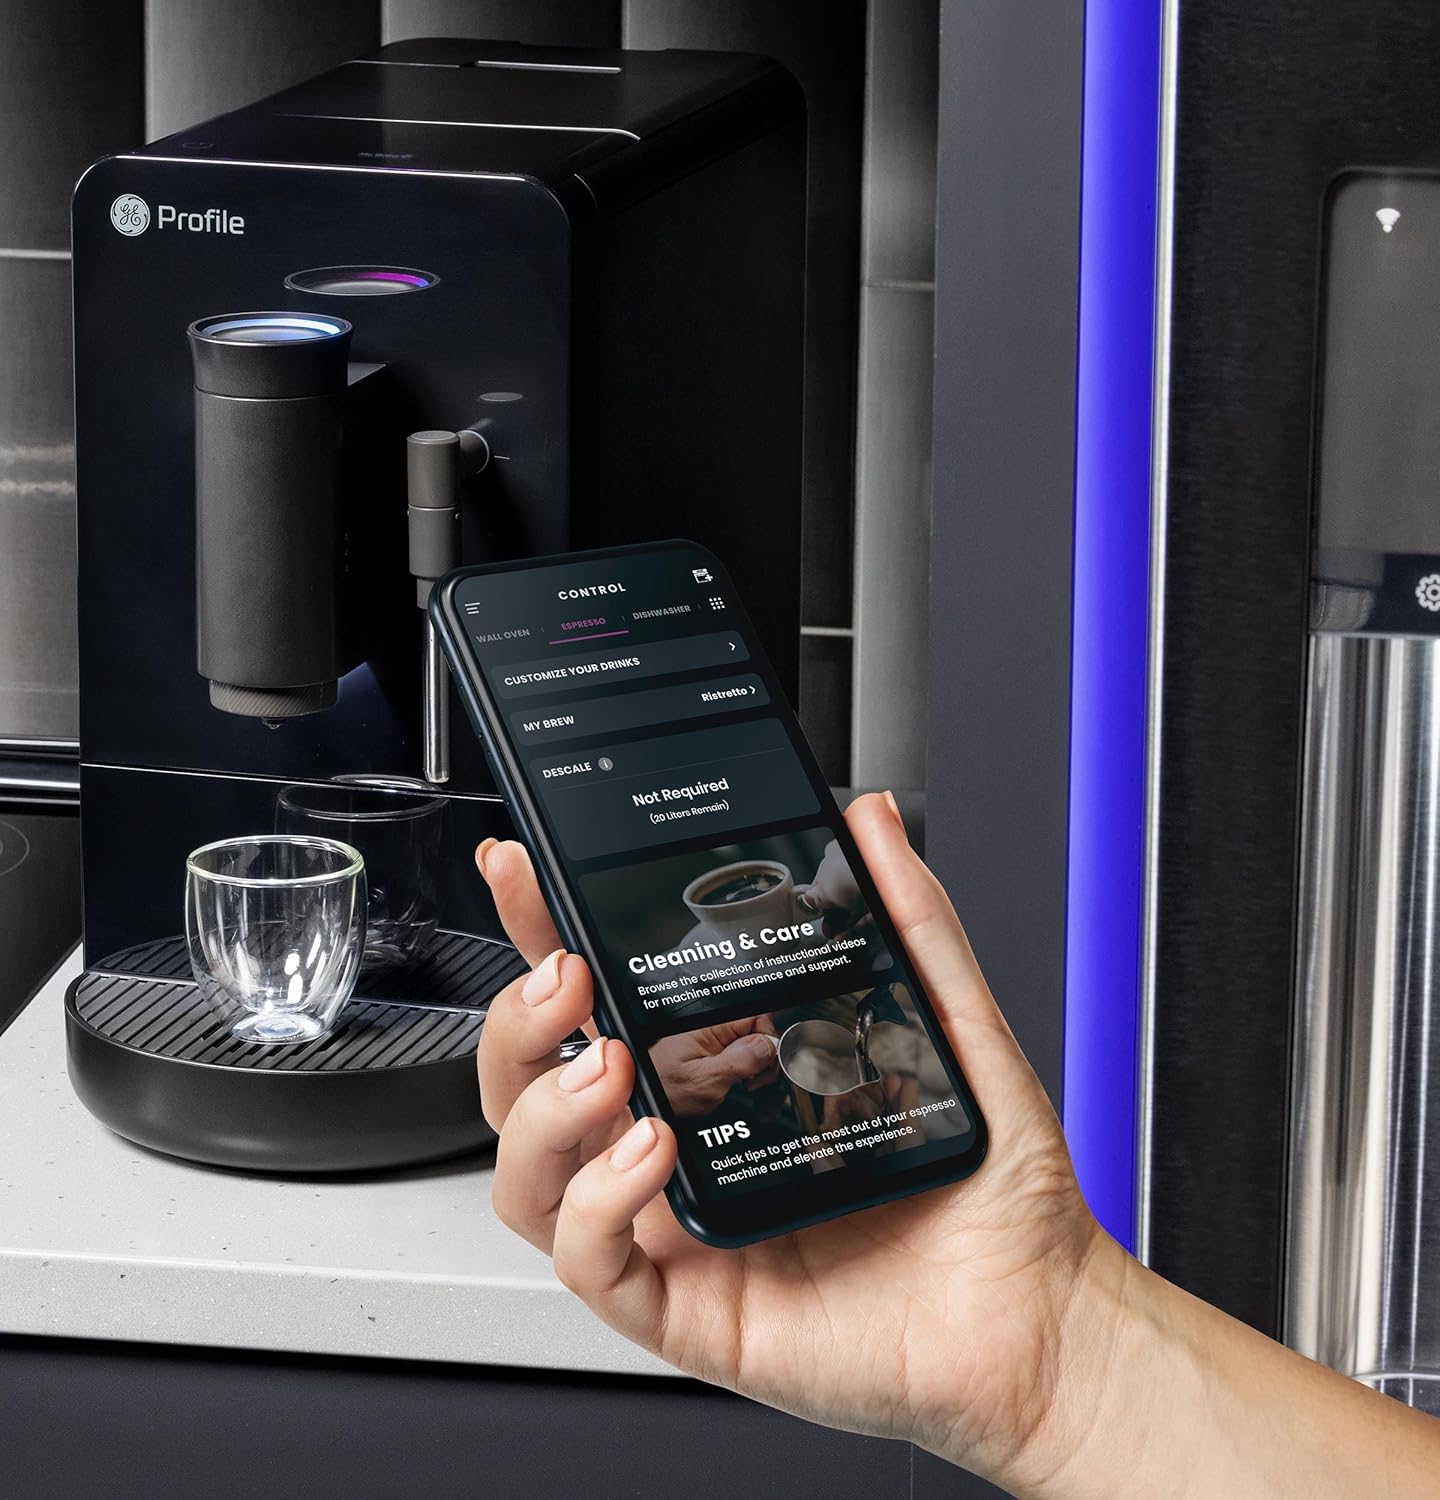
Image 5.2: A hand using the steam wand to froth milk in a stainless steel pitcher.
6. Huolto
Säännöllinen puhdistus ja huolto takaavat espressokoneesi optimaalisen suorituskyvyn ja pitkän käyttöiän.
6.1 Päivittäinen puhdistus
- Höyrysauva: Pyyhi höyrysuutin jokaisen käyttökerran jälkeenamp liinalla. Poista suuttimesta mahdolliset maitojäämät höyryllä.
- Tippa-alusta ja sakkasäiliö: Tyhjennä ja huuhtele päivittäin. Kone ilmoittaa, kun sakkasäiliö on tyhjennettävä.
- Tekojärvi: Huuhtele päivittäin ja täytä puhtaalla vedellä.
6.2 Viikkosiivous
- Keittoyksikkö: The brew unit is typically removable for rinsing under running water. Refer to the included cleaning kit instructions for detailed steps.
- Papusäiliö: Periodically clean out any oil residue or old beans.
6.3 Kalkinpoisto
The machine will prompt you when descaling is required. Use a descaling solution specifically designed for espresso machines and follow the instructions provided with the descaling agent or in the SmartHQ app.
7. Vianmääritys
Tässä osiossa käsitellään yleisiä espressokoneesi kanssa mahdollisesti ilmeneviä ongelmia.
| Ongelma | Mahdollinen syy | Ratkaisu |
|---|---|---|
| No coffee dispensed / "Add Beans" message | Bean hopper empty or beans not feeding correctly. | Refill bean hopper. Gently stir beans to ensure they feed into the grinder. |
| Kahvi on liian laimeaa tai vetistä | Grind size too coarse, insufficient coffee dose, or descaling needed. | Adjust grind size to a finer setting. Check SmartHQ app for strength settings. Perform descaling if prompted. |
| Maito ei vaahtoa kunnolla | Steam wand clogged, milk type unsuitable, or insufficient steam pressure. | Clean steam wand thoroughly. Use fresh, cold milk. Ensure machine is heated to steam temperature. |
| Kone ei käynnisty | Ei kytketty pistorasiaan, virta pois päältätage, tai sulake on lauennut. | Check power connection. Verify power outlet functionality. Reset circuit breaker if necessary. |
| SmartHQ app connectivity issues | Incorrect Wi-Fi password, network interference, or app bug. | Verify Wi-Fi credentials. Ensure machine is within Wi-Fi range. Restart app and machine. Check for app updates. |
8. Tekniset tiedot
- Merkki: Profile
- Mallin nimi: GE Profile Automatic Espresso Machine + Frother
- Tuotteen mallinumero: P7CEBBS6RBB
- Väri: Musta
- Tuotteen mitat: 7" S x 16" L x 12.5" K
- Tuotteen paino: 16 kiloa
- Voitage: 120V
- Toimintatila: Täysin automaattinen
- Erikoisominaisuudet: Built-In Bean Hopper, Built-In Conical Burr Grinder & Adjustable Grind Size, Programmable My Brew Setting, Steam Frother & Frothing Pitcher, WiFi Connected
- Mukana tulevat komponentit: Puhdistussarja, kahvipapusäiliö, espressokone, höyrysauva, maitokannu, vesisäiliö
- Kahvin syöttötyyppi: Kokonaiset pavut
- Ihmisen käyttöliittymän syöttö: Kosketusnäyttö

Image 8.1: Product dimensions of the espresso machine.
9. Takuu ja tuki
This product is covered by a manufacturer's warranty. For specific warranty details, registration, or technical support, please refer to the warranty card included with your product or visit the official GE Profile website. You may also contact customer service through the SmartHQ app for assistance.