1. Johdanto
This manual provides detailed instructions for the installation, operation, and maintenance of the Vivotek ND9425P 16-Channel 4K UHD Network Video Recorder (NVR). This NVR is designed to manage and record video streams from up to 16 IP cameras, offering 4K UHD resolution support for high-quality surveillance. It is an integral component of a comprehensive security system, suitable for various applications requiring reliable video monitoring and recording.
Key features of the Vivotek ND9425P NVR include:
- Multimedia SoC CPU for efficient processing.
- Support for H.265, H.264, and MJPEG video codecs for flexible compression.
- Seamless recording capabilities.
- Smart Stream III optimization for bandwidth efficiency.
- Integrated PoE technology for simplified camera connectivity (when used with compatible PoE cameras).
2. Turvallisuustiedot
Lue kaikki turvallisuusohjeet huolellisesti ennen laitteen käyttöä. Näiden ohjeiden noudattamatta jättäminen voi johtaa loukkaantumiseen tai tuotteen vaurioitumiseen.
- Virtalähde: Use only the power adapter supplied with the NVR. Ensure the power outlet provides the correct voltage.
- Ilmanvaihto: Do not block any ventilation openings. Install the NVR in a well-ventilated area to prevent overheating.
- Ympäristö: Vältä NVR-laitteen altistamista vedelle, kosteudelle, äärimmäisille lämpötiloille tai suoralle auringonvalolle.
- Puhdistus: Katkaise virta ennen puhdistamista. Käytä kuivaa, pehmeää liinaa. Älä käytä nestemäisiä tai aerosolipuhdistusaineita.
- Huolto: Älä yritä huoltaa tätä tuotetta itse. Anna kaikki huoltotoimenpiteet pätevän huoltohenkilöstön tehtäväksi.
- johdot: Ensure all cables are properly connected and secured to prevent tripping hazards or accidental disconnections.
3. Pakkauksen sisältö
Varmista, että pakkauksessa on kaikki tarvittavat osat ennen asennuksen aloittamista:
- Vivotek ND9425P 16-Channel 4K UHD NVR Unit
- Virtalähde
- USB Mouse
- Pika-asennusopas
- Resource CD (containing full manual and software)
- Screws for HDD installation (if applicable)
- Ethernet-kaapeli
Note: The package contents may vary slightly depending on the specific kit purchased. For example, some kits may include 8 x 2 MP Night Vision Dome Cameras and 8 x Ethernet Patch Cables.
4. Tuote ohiview
Tämä osio tarjoaa ylityksenview of the Vivotek ND9425P NVR's physical components and interfaces.
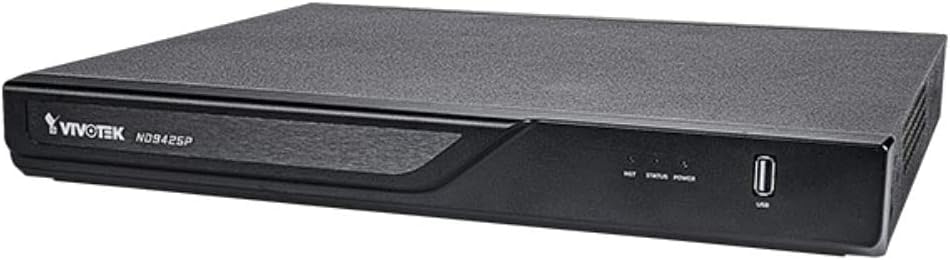
Kuva 4.1: Vivotek ND9425P NVR Front Panel
The image displays the Vivotek ND9425P NVR unit, a compact black rectangular device. The front panel features the "VIVOTEK ND9425P" logo on the left, followed by three small indicator lights labeled "NET", "STATUS", and "POWER". On the far right of the front panel, there is a USB port, labeled "USB" below it. The top surface of the NVR has a textured finish.
4.1 Etupaneelin merkkivalot ja portit
- NET LED: Osoittaa verkon toimintaa.
- TILA -LED: Indicates system status (e.g., recording, error).
- VIRTA LED: Osoittaa virran tilan.
- USB-portti: For connecting a USB mouse, keyboard, or external storage devices for backup.
4.2 Takapaneelin portit
The rear panel typically includes ports for power input, Ethernet (LAN), HDMI/VGA video output, audio input/output, and additional USB ports for peripheral connections.
5. Asennus
5.1 Laitteiston asennus
- Kiintolevyn asennus (jos sitä ei ole esiasennettu):
Unscrew the NVR cover. Carefully slide the hard drive into the bay and secure it with the provided screws. Reattach the cover.
- Yhdistä kamerat:
Connect your IP cameras to the NVR's PoE ports (if available) or to your network switch. Ensure all cameras are powered on and accessible on the network.
- Yhdistä verkkoon:
Kytke Ethernet-kaapeli NVR-laitteen LAN-porttiin reitittimeen tai verkkokytkimeen.
- Yhdistä näyttö:
Liitä näyttö NVR-laitteen HDMI- tai VGA-lähtöporttiin.
- Liitä oheislaitteet:
Liitä USB-hiiri NVR-laitteen USB-porttiin.
- Virta päälle:
Kytke virtalähde NVR-laitteen virtalähteeseen ja kytke se sitten pistorasiaan. NVR käynnistyy automaattisesti.
5.2 Alkumääritysten ohjattu toiminto
Upon the first boot, the NVR will typically launch an initial configuration wizard. Follow the on-screen prompts to:
- Määritä järjestelmänvalvojan salasana.
- Määritä verkkoasetukset (DHCP tai staattinen IP).
- Etsi ja lisää yhdistetyt IP-kamerat.
- Aseta päivämäärä ja aika.
- Alusta kiintolevy tallennusta varten.
6. NVR-laitteen käyttö
6.1 Livenä View
Alkuasetusten jälkeen NVR näyttää reaaliaikaista kuvaa view yhdistettyjen kameroiden määrästä. Voit vaihtaa yhden kameran ja view ja monikameraruudukko views.
6.2 Tallennusasetukset
Access the recording settings through the main menu to configure recording schedules and modes:
- Jatkuva tallennus: Tallenteet 24/7.
- Liiketunnistuksen tallennus: Records only when motion is detected by the camera.
- Ajastettu tallennus: Tallentaa tiettyinä aikoina päivästä tai viikosta.
- Tapahtuman tallennus: Records based on specific events (e.g., alarm input).
6.3 Toisto ja varmuuskopiointi
Uudelleenview tallennettu footage:
- Navigate to the "Playback" section from the main menu.
- Valitse haluttu(t) kamera(t) ja päivämäärä-/aikaväli.
- Käytä aikajanaa navigoidaksesi tallenteiden välillä.
- To back up footage, insert a USB drive into the NVR's USB port and follow the on-screen instructions for export.
6.4 Etäkäyttö
The Vivotek ND9425P NVR supports remote access via a web browser or dedicated mobile applications (e.g., VIVOCloud). Refer to the full user manual on the Resource CD for detailed instructions on setting up remote access, including port forwarding or P2P cloud services.
7. Huolto
7.1 laiteohjelmistopäivitystä
Tarkista ja asenna säännöllisesti laiteohjelmistopäivitykset varmistaaksesi optimaalisen suorituskyvyn, tietoturvan ja uusien ominaisuuksien käytön. Laiteohjelmistopäivitykset voidaan yleensä suorittaa NVR-laitteen kautta. web interface or through a USB drive.
7.2 Kiintolevyn hallinta
The NVR will automatically overwrite the oldest recordings when the hard drive is full. You can configure storage settings, check HDD health, and format the drive through the system settings.
7.3 Puhdistus
Keep the NVR unit clean by gently wiping its exterior with a dry, soft cloth. Ensure ventilation openings are free from dust and obstructions.
8. Vianmääritys
| Ongelma | Mahdollinen syy | Ratkaisu |
|---|---|---|
| Ei Virtaa | Power cable disconnected; faulty power adapter; power outlet issue. | Check power cable connection; try a different power outlet; contact support if adapter is faulty. |
| Ei videolähtöä | HDMI/VGA cable loose; incorrect display input selected; NVR not booted. | Ensure display cable is secure; select correct input on monitor; wait for NVR to boot up. |
| Kamerat eivät näy | Network issue; camera not powered; incorrect camera IP address; camera not added to NVR. | Check network cables; ensure cameras are powered; verify camera IP settings; add cameras via NVR interface. |
| Ei tallennusta | Hard drive not initialized; recording schedule not set; HDD full. | Initialize HDD in settings; configure recording schedule; check HDD status. |
| Remote Access Fails | Network configuration issue; port forwarding not set up; firewall blocking. | Verify network settings; configure port forwarding on router; check firewall rules. |
For more detailed troubleshooting, refer to the comprehensive user manual provided on the Resource CD or visit the VIVOTEK support websivusto.
9. Tekniset tiedot
| Ominaisuus | Yksityiskohta |
|---|---|
| Mallinumero | ND9425P |
| Valmistaja | Vivotek USA |
| Tuotteen mitat | 19.69 x 19.69 x 11.02 tuumaa |
| Tuotteen paino | 8.62 kiloa |
| Yhteystekniikka | Ethernet |
| Yhteensopivat laitteet | Kamera |
| Muistin tallennuskapasiteetti | 64 GB (referring to internal flash/RAM, not HDD capacity) |
| Kanavien lukumäärä | 16 |
| video koodekit | H,265, H.264, MJPEG |
| Maksimaalisen resoluution tuki | 4K UHD (as per product title) |
10. Takuu ja tuki
For warranty information, please refer to the warranty card included with your product or visit the official VIVOTEK website. VIVOTEK provides technical support for its products. If you encounter issues that cannot be resolved using this manual or the troubleshooting section, please contact VIVOTEK customer support through their official websivustolla tai nimetyissä tukikanavissa.
Official VIVOTEK Websivusto: www.vivotek.com