
Johdanto
This manual provides comprehensive instructions for the Vivitar Podcast and Social Media Microphone MIC918. This high-quality condenser microphone is designed for clear audio capture for various applications, including podcasting, live streaming, gaming, voice-overs, and vocal recording. It features a simple plug-and-play USB connection, integrated volume control, and a stable tripod stand for optimal positioning.
Turvallisuustiedot
- Älä altista mikrofonia vedelle tai liialliselle kosteudelle.
- Vältä äärimmäisiä lämpötiloja tai suoraa auringonvaloa.
- Älä yritä purkaa tai muokata mikrofonia. Tämä mitätöi takuun.
- Pidä mikrofoni poissa vahvoista magneettikentistä.
- Käytä puhdistukseen vain pehmeää, kuivaa liinaa.
Tuote loppuview
Pakkauksen sisältö
- Vivitar MIC918 Microphone Unit
- kolmijalka jalusta
- Integrated USB Connection Cable
Mikrofonin komponentit
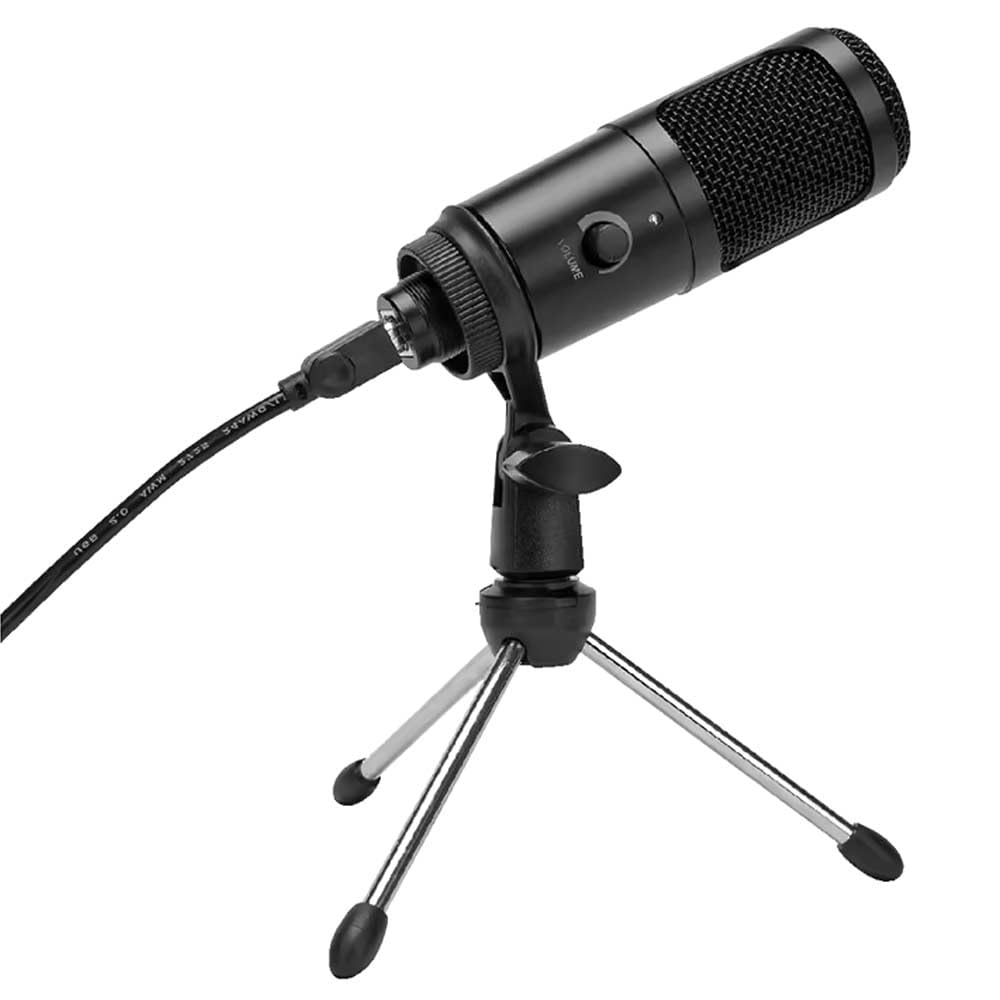
Kuva 1: Vivitar MIC918 Microphone unit attached to its tripod stand, showing the integrated USB cable.

Kuva 2: Sivu view of the Vivitar MIC918 Microphone, highlighting the volume control knob and the Vivitar brand logo.
The microphone unit features a durable metal construction. The front side includes a volume control knob for easy audio level adjustments. The microphone is designed with a unidirectional polar pattern to focus on sound directly in front of it, reducing background noise.
Asennus
Mikrofonin liittäminen
- Kokoa teline: If not already assembled, unfold the tripod stand and ensure it is stable on a flat surface. Securely attach the microphone unit to the stand's mounting point. The rotating shaft ring allows for angle adjustment.
- Yhdistä laitteeseen: Plug the integrated USB cable from the microphone into an available USB port on your computer, laptop, or compatible gaming console.
- Plug and Play: The Vivitar MIC918 is a plug-and-play device. Your operating system (Windows, macOS, etc.) should automatically detect and install the necessary drivers. No additional software installation is typically required.
- Valitse syöttölaitteeksi: After connecting, navigate to your device's sound settings or the audio settings within your recording/streaming software. Select the "Vivitar MIC918" or similar USB audio device as your primary input (microphone) device.
Toiminnassa
Äänenvoimakkuuden säätäminen
The microphone features a built-in volume control knob located on its side (refer to Figure 2). Rotate this knob clockwise to increase the microphone's input sensitivity (volume) and counter-clockwise to decrease it. Adjust this to achieve the desired recording level without distortion.
Mikrofonin sijoittaminen
For optimal audio capture, position the microphone directly in front of the sound source (e.g., your mouth for speaking or singing). The tilting tripod stand allows you to adjust the microphone's angle to best suit your needs. Due to its unidirectional polar pattern, the microphone is most sensitive to sounds coming from the front and less sensitive to sounds from the sides or rear, helping to minimize ambient noise.
Huolto
- Puhdistus: Use a soft, dry, lint-free cloth to wipe the microphone's exterior. Do not use liquid cleaners, aerosols, or solvents.
- Varastointi: Kun mikrofonia ei käytetä, säilytä sitä puhtaassa, kuivassa paikassa, poissa pölystä ja äärimmäisistä lämpötiloista.
- Käsittely: Käsittele mikrofonia varoen. Vältä sen pudottamista tai voimakkaiden iskujen kohteeksi altistamista.
Vianetsintä
| Ongelma | Mahdollinen syy | Ratkaisu |
|---|---|---|
| Mikrofonista ei kuulu ääntä. | Mikrofonia ei ole kytketty oikein. Väärä syöttölaite valittu. Mikrofonin äänenvoimakkuus liian alhainen. | Ensure USB cable is securely plugged into both the microphone and the device. Verify that "Vivitar MIC918" is selected as the input device in your system's sound settings or recording software. Increase the volume using the knob on the microphone and check system input levels. |
| Poor sound quality (e.g., muffled, too quiet, background noise). | Mikrofonin väärä sijoittelu. Korkea ympäristön melu. Input level too high or too low. | Position the microphone closer to the sound source and ensure it's facing directly towards it. Tallenna hiljaisemmassa ympäristössä. Adjust the microphone's volume knob and system input levels to an optimal range, avoiding clipping or being too faint. |
| Tietokone ei tunnista mikrofonia. | Viallinen USB-portti tai -kaapeli. System driver issue. | Yritä kytkeä mikrofoni tietokoneesi toiseen USB-porttiin. Restart your computer. If the issue persists, check your operating system's device manager for any driver conflicts or updates. |
Tekniset tiedot
| Ominaisuus | Erittely |
|---|---|
| Merkki | Vivitar |
| Mallinumero | MIC918 |
| Yhteydet | USB (Plug and Play) |
| Mikrofonin tyyppi | Lauhdutin |
| Napainen kuvio | Yksisuuntainen |
| Signaali-kohinasuhde | 78 dB |
| Kotelon materiaali | Metalli |
| Tuotteen paino | 0.95 paunaa (noin 0.43 kg) |
| Tuotteen mitat (P x L x K) | 8.86 x 5.36 x 2.49 tuumaa (noin 22.5 x 13.6 x 6.3 cm) |
| Virtalähde | Johdollinen sähkökäyttöinen (USB:n kautta) |
| Yhteensopivat laitteet | Computers, Laptops, Gaming Consoles |
Takuutiedot
The Vivitar Podcast and Social Media Microphone MIC918 comes with a 3-Year USA Warranty. For specific terms, conditions, and to register your product, please refer to the official Vivitar websivustolta tai ota yhteyttä suoraan heidän asiakastukeen. Säilytä ostokuitti takuuvaatimuksia varten.
Asiakastuki
For further assistance, technical support, or inquiries regarding your Vivitar MIC918 microphone, please visit the official Vivitar website or contact their customer service department. Contact information can typically be found on the Vivitar websivuston 'Tuki'- tai 'Ota yhteyttä' -osioista.