HoldPeak HP-890CN
HoldPeak HP-890CN Digital Multimeter User Manual
Model: HP-890CN
1. Johdanto
Thank you for choosing the HoldPeak HP-890CN Digital Multimeter. This device is designed for stable and reliable performance, featuring an anti-drop design and a clear 25mm high LCD display. It is capable of measuring various electrical parameters including DC/AC voltage, diode, resistance, capacitance, frequency, duty cycle, temperature, and hFE, along with a non-contact voltage (NCV) detection function. Please read this manual thoroughly before use to ensure safe and proper operation.
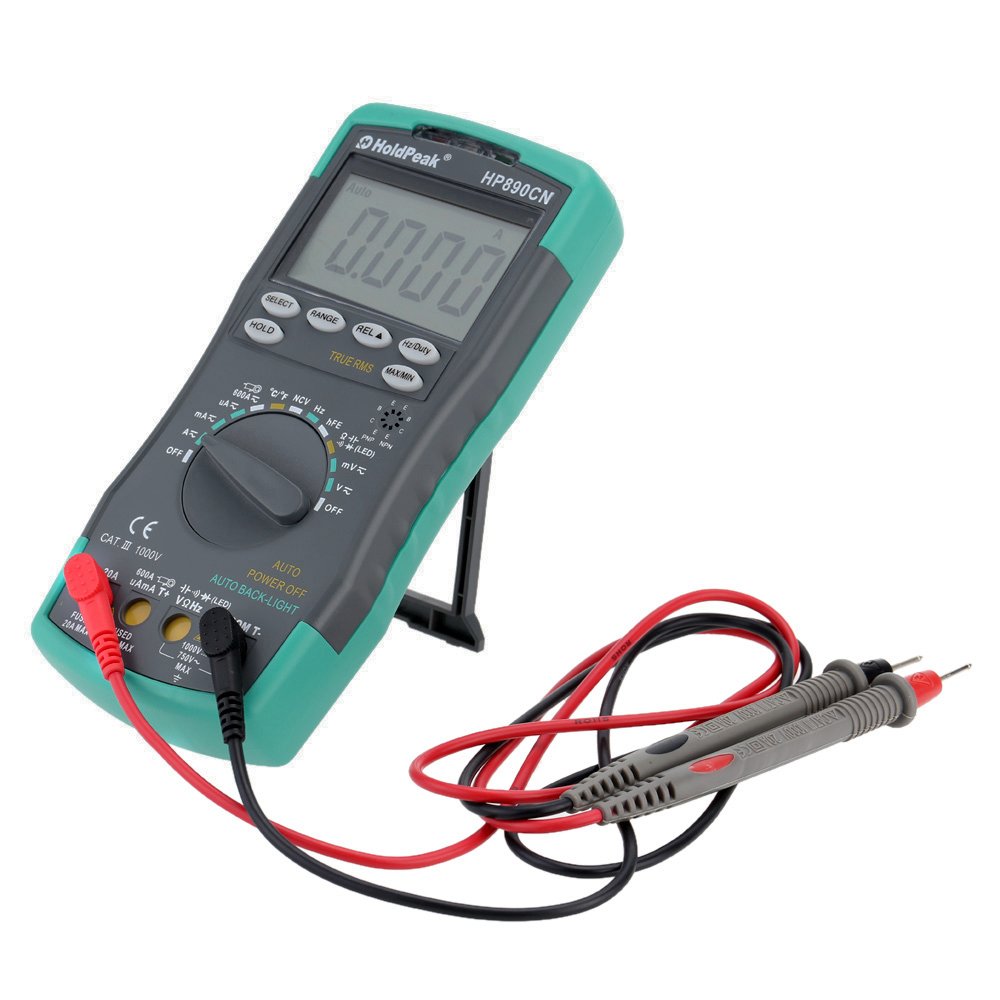
Figure 1: HoldPeak HP-890CN Digital Multimeter
2. Turvallisuustiedot
WARNING: To avoid electrical shock or damage to the meter, please observe the following safety precautions:
- Always remove test leads from the circuit before opening the case or battery cover.
- Älä käytä mittaria, jos kotelo tai paristokotelon kansi on auki.
- To prevent damage or injury, ensure quick-acting fuses with the specified amp and volt ratings are installed.
- This device complies with IEC 1010-1 1000V CAT III, Pollution Degree 2 standards.
- Käytä mittauksiin aina oikeaa funktiota ja mittausaluetta.
- Älä koskaan käytä voltage tai virta, joka ylittää määritetyt enimmäisrajat.
- Ole varovainen työskennellessäsi volyymin kanssatagyli 30 V AC RMS, 42 V huippu tai 60 V DC. Nämä jännitteettagse aiheuttaa sähköiskuvaaran.
- Pidä sormet mittauspään suojusten takana mittausten aikana.

Kuva 2: Takaosa view of the multimeter showing safety warnings and battery compartment.
3. Tuote ohiview
The HoldPeak HP-890CN Digital Multimeter features a large LCD display and intuitive controls for ease of use. Below is a diagram illustrating the main components and their functions.

Figure 3: Labeled diagram of the HP-890CN Multimeter.
Tärkeimmät komponentit:
- LCD-näyttö: Shows measurement readings, units, and function indicators. Features smart backlight.
- Toimintokytkin: Pyörivä kytkin mittaustoimintojen valitsemiseksi (tilavuustage, virta, vastus jne.).
- Tuloliittimet:
- COM: Yhteinen tuloliitin mustalle mittausjohdolle.
- VΩHz: Syöte voltage-, resistanssi-, taajuus-, kapasitanssi-, diodi- ja lämpötilamittaukset (punainen mittausjohto).
- mAµA: Input for current measurements up to 600mA (red test lead).
- 20A: Tulo virranmittauksiin jopa 20 A:iin asti (punainen mittausjohto).
- Painikkeet:
- VALITSE: Toggles between functions within a single rotary switch position (e.g., AC/DC, Diode/Continuity).
- ALUE: Manually selects measurement range (auto-ranging is default).
- REL (suhteellinen arvo): Measures relative changes.
- Hz/Käyttömäärä: Valitsee taajuuden tai käyttösuhteen mittauksen.
- PITÄÄ: Jäädyttää näytön nykyisen lukeman.
- TRUE RMS: Indicates True RMS measurement capability for AC.
- MAX/MIN: Tallentaa maksimi- ja minimiarvot.
- NCV Induction Area: Kontaktittomille voltage tunnistus.
- hFE Testing Interface: Pistoke transistorien testaamiseen.
- Jalusta: Integroitu jalusta kätevää käyttöä varten viewing (rotates 180 degrees).
4. Asennus
4.1 Akun asennus
The multimeter requires either two 1.5V AAA batteries or one 9V 6F22 battery (not included). The specific battery type included with your product may vary. To install or replace batteries:
- Varmista, että yleismittari on sammutettu ja kaikki mittausjohdot on irrotettu.
- Paikanna paristolokero mittarin takaa.
- Löysää paristokotelon kantta kiinnittävä ruuvi ruuvimeisselillä.
- Irrota akun kansi.
- Aseta uudet paristot paikoilleen varmistaen oikea napaisuus (+ ja -).
- Aseta akun kansi takaisin paikalleen ja kiristä ruuvi tiukasti.

Kuva 4: Sisäinen view of the multimeter, showing the battery compartment.
4.2 Mittausjohtojen kytkeminen
Always connect the black test lead to the COM jack. Connect the red test lead to the appropriate input jack based on the measurement you intend to perform:
- Osalle Voltage, Resistance, Capacitance, Frequency, Diode, and Temperature: Connect the red lead to the VΩHz Jack.
- For Current up to 600mA: Connect the red lead to the mAµA Jack.
- For Current up to 20A: Connect the red lead to the 20A Jack.
5. Käyttöohjeet
Before taking any measurements, ensure the test leads are correctly connected and the function switch is set to the desired measurement type.
5.1 Virta päälle/pois
Rotate the function switch from the OFF position to any desired measurement function to turn the meter ON. Rotate it back to OFF to power it down. The meter features an auto power-off function to conserve battery life.
5.2 Mittaus DC Voltage (V=)
- Set the function switch to the V= position.
- Kytke musta mittausjohto COM-liittimeen ja punainen mittausjohto VΩHz-liittimeen.
- Connect the test probes across the component or circuit to be measured, in parallel.
- Lue voltage -arvo nestekidenäytössä.
5.3 AC:n mittaus Voltage (V~)
- Aseta toimintokytkin V~-asentoon.
- Kytke musta mittausjohto COM-liittimeen ja punainen mittausjohto VΩHz-liittimeen.
- Connect the test probes across the component or circuit to be measured, in parallel.
- Lue voltage value on the LCD display. This meter provides True RMS readings for AC voltage.

Kuva 5: Vaihtovirtavirran mittaaminentage pistorasiasta.
5.4 Measuring DC/AC Current (A= / A~)
CAUTION: Always connect the meter in series with the circuit when measuring current. Ensure the circuit is de-energized before connecting the meter.
- Set the function switch to the A= or A~ position. Use the SELECT button to toggle between DC and AC if necessary.
- Liitä musta testijohto COM-liittimeen.
- For currents up to 600mA, connect the red test lead to the mAµA liittimeen. Alle 20 A:n virroille kytke punainen mittausjohto 20A Jack.
- Break the circuit and connect the test probes in series with the circuit.
- Kytke virta virtapiiriin ja lue virran arvo LCD-näytöltä.
5.5 Resistanssin (Ω) mittaaminen
- Aseta toimintokytkin Ω-asentoon.
- Kytke musta mittausjohto COM-liittimeen ja punainen mittausjohto VΩHz-liittimeen.
- Connect the test probes across the component to be measured. Ensure the component is de-energized.
- Lue vastusarvo LCD-näytöltä.
5.6 Kapasitanssin (F) mittaaminen
- Set the function switch to the capacitance (F) position.
- Kytke musta mittausjohto COM-liittimeen ja punainen mittausjohto VΩHz-liittimeen.
- Connect the test probes across the capacitor. Ensure the capacitor is fully discharged before measurement.
- Lue kapasitanssiarvo LCD-näytöltä.
5.7 Measuring Frequency (Hz) / Duty Cycle (%)
- Set the function switch to the Hz/% position.
- Kytke musta mittausjohto COM-liittimeen ja punainen mittausjohto VΩHz-liittimeen.
- Kytke mittausjohdot signaalilähteen liittimiin.
- Press the Hz/Duty button to toggle between frequency and duty cycle measurements.
- Lue arvo LCD-näytöltä.
5.8 Dioditesti
- Set the function switch to the Diode/Continuity position. Press SELECT to choose Diode Test.
- Kytke musta mittausjohto COM-liittimeen ja punainen mittausjohto VΩHz-liittimeen.
- Kytke punainen anturi diodin anodiin ja musta anturi katodiin.
- Lue eteenpäin voltage drop on the LCD display. Reverse the probes to check for open circuit (OL).
5.9 Jatkuvuustesti
- Set the function switch to the Diode/Continuity position. Press SELECT to choose Continuity Test.
- Kytke musta mittausjohto COM-liittimeen ja punainen mittausjohto VΩHz-liittimeen.
- Kytke mittausjohdot piiriin tai komponenttiin.
- Jos resistanssi on alle noin 50 Ω, summeri soi osoittaen jatkuvuutta.
5.10 Lämpötilan mittaus (°C/°F)
- Aseta toimintokytkin °C/°F-asentoon.
- Connect the K-type thermocouple probe to the VΩHz and COM jacks, observing polarity.
- Place the thermocouple tip on or near the object whose temperature is to be measured.
- Read the temperature on the LCD display. Use the SELECT button to switch between Celsius and Fahrenheit.
5.11 hFE-testi (transistoritesti)
- Aseta toimintokytkin hFE-asentoon.
- Insert the transistor's Emitter, Base, and Collector leads into the corresponding holes in the hFE socket, ensuring correct NPN or PNP type.
- Lue hFE-arvo (tasavirran vahvistus) LCD-näytöltä.
5.12 Non-Contact Voltage (NCV) Tunnistus
- Set the function switch to the NCV position.
- Move the NCV induction area of the meter close to the conductor being tested.
- Jos AC voltage is detected (90V to 1000V AC RMS), the NCV red indicator will light up, and the buzzer will sound. The intensity of the sound and light indicates the strength of the detected voltage.
5.13 Erikoistoiminnot
- PITÄÄ: Paina pysäyttääksesi nykyisen lukeman näytölle. Paina uudelleen vapauttaaksesi toiminnon.
- REL (suhteellinen arvo): Press to store the current reading as a reference. Subsequent measurements will show the difference from this reference.
- MAX/MIN: Press to enter MAX/MIN mode. The meter will display the maximum or minimum reading recorded since entering this mode. Press again to cycle between MAX, MIN, and current reading.
6. Huolto
6.1 Puhdistus
Pyyhi mittari mainoksellaamp cloth and mild detergent. Do not use abrasives or solvents. Keep the contacts of the input jacks clean.
6.2 Pariston vaihto
When the battery symbol appears on the LCD, the batteries need to be replaced. Refer to section 4.1 for battery installation instructions.
6.3 Sulakkeen vaihto
WARNING: To avoid electrical shock, disconnect the test leads before opening the case. Replace fuses only with quick-acting fuses of the specified type and rating.
The meter is protected by two fuses:
- F1: 600mA/250V fast-blow fuse for the mAµA input.
- F2: 20A/250V fast-blow fuse for the 20A input.
Sulakkeen vaihtaminen:
- Turn the meter OFF and disconnect all test leads.
- Irrota paristokansi ja paristot.
- Unscrew the screws holding the back case and carefully open the meter.
- Irrota vanha sulake varovasti kampeamalla se varovasti irti kiinnikkeistään.
- Install a new fuse of the correct type and rating.
- Kokoa mittari uudelleen ja varmista, että kaikki ruuvit on kiristetty.
7. Vianmääritys
- Random values in mV mode: It is normal for the display to show random values in mV mode when the input terminals are open (not connected to a circuit). Simply short the input terminals to zero the reading. This will not affect measurement results.
- Ei näyttöä tai himmeä näyttö: Tarkista paristojen varaustaso. Vaihda paristot, jos varaus on vähissä.
- No reading in current mode: Check if the fuse is blown. Replace if necessary (refer to section 6.3). Ensure test leads are connected to the correct current input jack (mAµA or 20A) and in series with the circuit.
- "OL" näytöllä: Indicates an overload (measurement exceeds the selected range) or an open circuit.
8. Tekniset tiedot
| Parametri | Erittely |
|---|---|
| Merkki | HoldPeak |
| Malli | HP-890CN |
| Väri | Gray + Blue-Green |
| Materiaali | Muovi |
| Max näyttö | 6000 lasketaan |
| Range Control | Automaattinen alue |
| Näytön koko | 60 × 35 mm |
| DC Voitage | 60mV/600mV/6V/60V/600V/1000V |
| AC Voitage (tosi RMS) | 60mV/600mV/6V/60V/600V/750V |
| DC virta | 600µA/6000µA/60mA/600mA/6A/20A |
| Vaihtovirta (tosi RMS) | 600µA/6000µA/60mA/600mA/6A/20A |
| Resistanssi | 600Ω/6KΩ/60KΩ/600KΩ/6MΩ/60MΩ |
| Kapasitanssi | 9.999nF/99.99nF/999.9nF/9.999µF/99.99µF/999.9µF/9.99mF/99.99mF |
| Taajuus | 9.999Hz/99.99Hz/999.9Hz/9.999KHz/99.99KHz/999.9KHz/9.999MHz |
| Käyttömäärä | 0.1 % - 99.9 % |
| Lämpötila | -20 ~ 1000 ° C / -4 ~ 2222 ° F |
| Dioditesti | Kyllä |
| Jatkuvuus Summeri | Kyllä |
| Transistorin hFE-testi | 0-1000 |
| NCV-tunnistus | 90V ~ 1000V AC rms |
| Virtalähde | 2 * 1.5V AAA batteries / 1 * 9V 6F22 battery (not included) |
| Toimintaympäristö | 0-40°C (32-104°F) |
| Varastointiympäristö | -20-60 ° C (-4-140 ° F) |
| Tuotteen koko (P × L × K) | Approx. 19 × 8.5 × 3.5 cm (7.67 × 3.35 × 1.37 inches) |
| Tuotteen paino | 300 grammaa (10.58 unssia) |
| Valmistaja | MIS-E0833 |
| UPC | 783950206936, 791592905193 |
9. Pakkauksen sisältö
Paketti sisältää seuraavat tuotteet:
- 1 * HoldPeak HP-890CN Digital Multimeter
- 1 * Säilytyspussi
- 1 * Pair of Test Leads (Red and Black)
- 1 * K-Type Thermocouple Probe
- 1 * Englanninkielinen käyttöopas

Kuva 6: Yleismittari ja mukana toimitetut lisävarusteet.

Figure 7: Included storage bag for the multimeter.
10. Takuu ja tuki
For warranty information or technical support, please refer to the documentation provided with your purchase or contact the seller/manufacturer directly. Keep your purchase receipt as proof of purchase.