BESDER BES-MH03
BESDER Home Security IP Camera User Manual
Model: BES-MH03
1. Johdanto
Thank you for choosing the BESDER Home Security IP Camera. This wireless smart WiFi camera is designed to provide reliable surveillance, audio recording, and baby monitoring capabilities with high-definition video. This manual will guide you through the setup, operation, and maintenance of your new device to ensure optimal performance and security.
2. Turvallisuustiedot
- Varmista, että kamera saa virtaa oikealla äänenvoimakkuudellatage (DC 5V) as specified.
- Do not expose the camera to water or moisture. It is designed for indoor use only.
- Vältä kameran sijoittamista suoraan auringonvaloon tai lämmönlähteiden lähelle.
- Älä yritä purkaa tai korjata kameraa itse. Ota yhteyttä pätevään huoltohenkilöstöön.
- Pidä kamera ja sen lisävarusteet poissa lasten ulottuvilta.
- Use only the provided power adapter and cable to prevent damage.
3. Pakkauksen sisältö
Tarkista paketti varmistaaksesi, että kaikki osat ovat mukana ja hyvässä kunnossa:
- BESDER Home Security IP Camera
- USB-virtakaapeli
- Virtalähde (DC 5V)
- Kiinnitysruuvit ja seinätulpat
- Käyttöopas (tämä asiakirja)

Image showing the BESDER IP Camera along with its accessories: a USB power cable, a power adapter, and a packet of mounting screws.
4. Tuote ohiview
Familiarize yourself with the main components of your BESDER IP Camera:
- Kameran linssi: Kaappaa videon footage.
- Infrapuna-LEDit: Yönäköä varten.
- Mikrofoni: Äänituloa varten.
- Kaiutin: Kaksisuuntaiseen ääniviestintään.
- SD-korttipaikka: Paikalliseen videoiden tallennukseen (tukee jopa 64 Gt).
- Power Interface (DC 5V): Liitetään virtalähteeseen.
- Reset-painike: Käytetään tehdasasetusten palauttamiseen.

Diagram illustrating the side view of the BESDER IP Camera, highlighting the SD Card slot, Power interface (DC 5V), and Reset button.
5. Asennus
5.1. Virran kytkeminen
- Connect the USB power cable to the camera's power interface.
- Liitä verkkolaite tavalliseen pistorasiaan.
- The camera will power on, and its indicator light will begin to flash, indicating it's ready for setup.
5.2. App Installation (iCSee)
The BESDER IP Camera uses the iCSee application for remote monitoring and control.
- Download the iCSee app from your mobile device's app store (App Store for iOS or Google Play Store for Android).
Lataa iOS:lle | Lataa Androidille - Rekisteröi uusi tili tai kirjaudu sisään, jos sinulla on jo tili.
5.3. Wi-Fi-yhteys
Follow these steps to connect your camera to your home Wi-Fi network:
- Open the iCSee app and tap the "+" icon to add a new device.
- Select "Add My Device" or "Add Camera".
- Choose the "Wi-Fi Camera" option.
- Follow the on-screen prompts to enter your Wi-Fi network name (SSID) and password. Ensure your phone is connected to a 2.4GHz Wi-Fi network, as the camera may not support 5GHz.
- The app will generate a QR code. Position your phone's screen in front of the camera lens (approx. 15-20 cm away) until you hear a confirmation sound from the camera.
- Once connected, the camera's indicator light will turn solid blue. You can now name your camera and start monitoring.
5.4. Asennus
Kamera voidaan sijoittaa tasaiselle alustalle tai kiinnittää seinään tai kattoon.
- Valitse sopiva paikka, jossa on selkeä view ja Wi-Fi-yhteyden kantaman sisällä.
- If mounting, use the provided mounting screws and wall plugs to secure the camera base.
- Adjust the camera's angle as needed within the app after mounting.
6. Käyttö
6.1. Livenä View
Access real-time video feed from your camera through the iCSee app.
- Open the iCSee app and select your camera from the device list.
- The live video feed will appear. You can pan and tilt the camera remotely using the controls in the app.

Screenshot of a multi-camera monitoring interface, likely from the iCSee application, displaying live feeds from multiple cameras and recording controls.
6.2. Tallennus ja säilytys
The camera supports local storage via a MicroSD card.
- Insert a MicroSD card (up to 64GB, Class 10 recommended) into the SD card slot.
- In the iCSee app settings, navigate to "Storage Settings" to format the SD card and configure recording modes (e.g., continuous, motion-triggered).
- Tallennettu footage voi olla viewed and downloaded directly from the app.
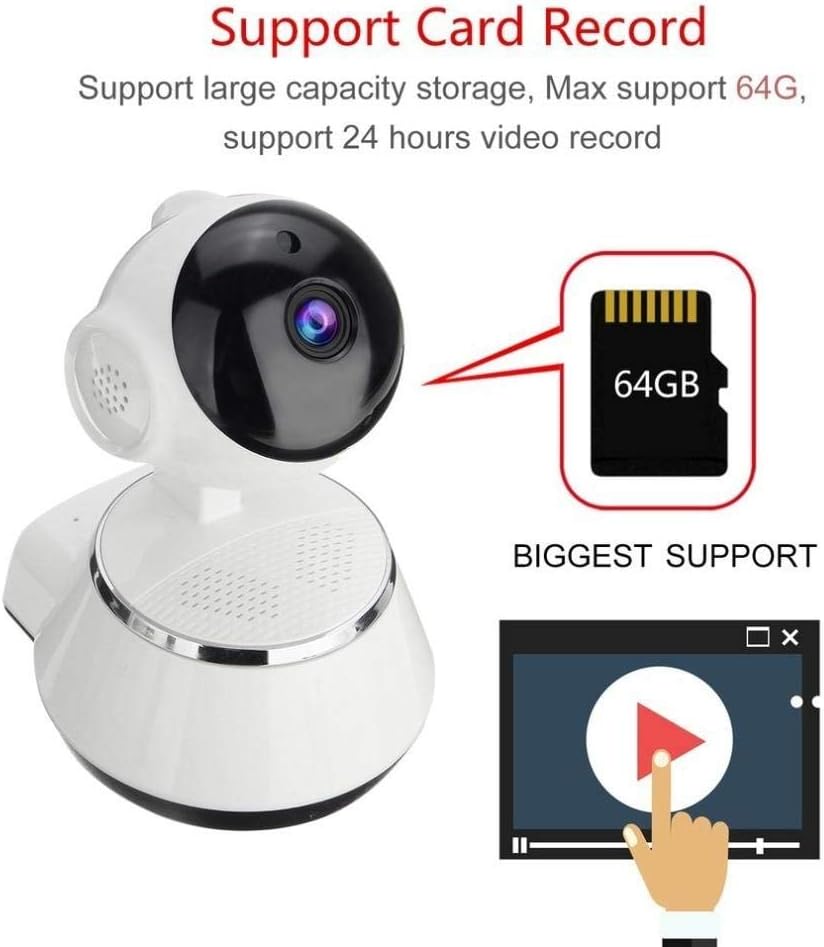
Image demonstrating the camera's support for large capacity storage, specifically showing a 64GB MicroSD card, indicating support for 24-hour video recording.
6.3. Liiketunnistus
Receive alerts when motion is detected in the camera's field of view.
- Enable "Motion Detection" in the camera settings within the iCSee app.
- Adjust sensitivity levels and set up notification preferences (e.g., push notifications, email alerts).
6.4. Night Vision
Kamera vaihtaa automaattisesti pimeänäköön hämärässä.
- Infrared LEDs provide clear black-and-white video up to 10 meters in complete darkness.
- No manual intervention is required for night vision activation.

Comparison image displayed on a smartphone screen, showing the difference between daytime and nighttime monitoring views, highlighting the infrared night vision capability.
6.5. Kaksisuuntainen ääni
Kommunikoi kameran kautta sisäänrakennetun mikrofonin ja kaiuttimen avulla.
- Liven aikana view, tap the microphone icon in the iCSee app to speak through the camera.
- Napauta kaiutinkuvaketta kuunnellaksesi ääntä kameran ympäristöstä.
6.6. Etäkäyttö
Monitor your property from anywhere with an internet connection.
- As long as your camera is connected to Wi-Fi and your phone has internet access, you can view live feeds and manage settings remotely via the iCSee app.
7. Huolto
- Puhdistus: Puhdista kameran linssi ja runko pehmeällä, kuivalla liinalla. Älä käytä nestemäisiä puhdistusaineita tai aerosoleja.
- Laiteohjelmistopäivitykset: Regularly check for firmware updates through the iCSee app to ensure your camera has the latest features and security patches.
- SD-kortin hallinta: Periodically back up important recordings and format the SD card to maintain optimal performance.
- Varastointi: Kun kameraa ei käytetä pitkään aikaan, säilytä sitä viileässä, kuivassa paikassa, suojassa suoralta auringonvalolta.
8. Vianmääritys
| Ongelma | Mahdollinen syy / Ratkaisu |
|---|---|
| Kamera ei käynnisty | Ensure the power adapter is securely connected to both the camera and the power outlet. Try a different outlet. |
| Ei voi muodostaa yhteyttä Wi-Fi-verkkoon | Check if your Wi-Fi network is 2.4GHz. Ensure the Wi-Fi password is correct. Move the camera closer to the router. Reset the camera and try again. |
| Elää view on sumea tai tumma | Clean the camera lens. Check lighting conditions. Ensure night vision is functioning correctly in low light. |
| SD-kortti ei tallenna | Ensure the SD card is inserted correctly and formatted in the app. Check if the card is full or corrupted. Try a different SD card. |
| Ei ääntä tai äänenlaatu on huono | Check microphone and speaker settings in the app. Ensure there are no obstructions blocking the microphone or speaker. |
| Kamera katkeaa usein | Weak Wi-Fi signal. Move the camera closer to the router or consider a Wi-Fi extender. Reduce network congestion. |
9. Tekniset tiedot
| Ominaisuus | Yksityiskohta |
|---|---|
| Mallinumero | BES-MH03 |
| Yhteystekniikka | Langaton (Wi-Fi) |
| Suositeltu käyttö | Baby Monitoring, Home Security |
| Erikoisominaisuudet | Motion Sensor, Night Vision (Infrared distance 10m) |
| Muototekijä | Kupoli |
| Wattage | 3 wattia |
| Tallennustuki | MicroSD-kortti (max 64GB) |
| Audio | Two-way audio (Audio Record) |
10. Takuu ja tuki
BESDER products are manufactured to high-quality standards. For warranty information, please refer to the terms and conditions provided at the point of purchase or contact your retailer. For technical support or further assistance, please refer to the support section within the iCSee application or visit the official BESDER websivusto (jos saatavilla).
Ask a question about this manual
Ask about setup, troubleshooting, compatibility, parts, safety, or missing instructions. Manuals+ will review the question and use this page’s manual context to help answer it.