Tile Redi T3642L-SCDNBVZ
Tile Redi T3642L-SCDNBVZ Shower Pan Kit Instruction Manual
Brand: Tile Redi | Model: T3642L-SCDNBVZ
Tuote loppuview
The Tile Redi T3642L-SCDNBVZ Shower Pan Kit offers an all-in-one, leak-proof, pre-pitched solution for shower installations. Designed for easy tiling, this single curb, left drain pan includes integrated splash walls, a 2-inch PVC drain, and a designer brushed nickel drain grate. It simplifies the shower base replacement process, allowing for direct tile application to match any bathroom decor. All Redi Trench shower pans are UL listed, ensuring quality and safety.
- ALL-IN-ONE SHOWER SOLUTION: One-piece, leak-proof, pre-pitched shower pan with integrated curb and splash walls.
- READY TO TILE: Install tile directly on shower pan surface to customize base to the look and feel of your bathroom.
- HELPPO ASENTAA: Includes Redi Flash waterproofing system designed to eliminate leaks.
- DRAIN & GRATE INCLUDED: Features 2-inch, left PVC drain and designer brushed nickel drain grate.
- MITAT: 42" WIDTH x 36" DEPTH x 4.5" Threshold HEIGHT; Shower curb width: 4.5 Inches.

Figure 1: Tile Redi T3642L-SCDNBVZ Shower Pan Kit with Left Drain.
Asennus ja asennus
Proper installation is crucial for the longevity and performance of your Tile Redi shower pan. Follow these steps carefully to ensure a successful setup.
1. Asennusta edeltävä valmistelu
Before beginning installation, ensure your shower pan subfloor is level, and all walls are plumb and square. Verify that the bore hole for the drain is a 6-inch diameter opening and is correctly located according to your specific pan's measurements. For the T3642L-SCDNBVZ model, the drain center should be 15 inches off the back wall and 6 inches off the side wall (closest to the drain).

Figure 2: Shower Pan Measuring Guide for accurate bore hole placement.
2. Shower Dry-Fit
To ensure a perfect fit, dry-fit your shower pan into the space. Place the pan against the corner, ensuring it touches all walls. Verify that it is perfectly level on the floor with no movement or bulge. The drain hub should fit precisely inside the bore hole.

Figure 3: Key features of the Tile Redi shower pan, including its leakproof and pre-pitched design.
3. Mortar Preparation
Prepare your mortar mix. We recommend using a Type N or Type S mortar mix, which are sand-based and free of rocks or pebbles that could hinder proper pan seating. Ensure the mortar is wet and loose enough to allow the pan to easily sink into the mortar bed. For exact pan measurements and recommended thinsets, refer to the detailed installation instructions provided with your product.
4. Laying Mortar
Spread the mixed mortar evenly across the subfloor within the shower stall. Use a finishing trowel to achieve a smooth texture. Stay approximately one inch off the perimeter of the shower framing to ensure mortar remains within the rib foundation underneath the pan. Extend the mortar all the way up to the bore hole. Use a depth gauge to verify the mortar bed is at the required depth (e.g., 1 inch for this model).
5. Pan Installation
Apply PVC glue to the drain hub. Carefully place the pan against the wall, lowering it evenly into the mortar bed. Apply downward pressure first at the drain, as this is the lowest point of the pan. Confirm the waste line pipe is connected by inserting it into the hub. Shimmy the pan left to right or front to back to allow it to fully recess into the mortar bed. DO NOT STEP INTO THE PAN.

Kuva 4: Päättynytview of the installation process, from measuring to setting tile.
Using a level, ensure the pan is level left to right and front to back along the splash walls and along the curb. Do not use the inside of the pan as an indicator, as it is pre-pitched. Pack any gaps under the curb with excess mortar. Once the pan is set and leveled, you can secure it into place by setting screws above the splash walls into the framing on each corner. NEVER PUNCTURE THE PAN OR SCREW THROUGH THE PAN SPLASH WALL. This is only to hold it in place while the mortar dries.

Figure 5: The Redi Flash waterproofing system included to eliminate leaks.
Allow the pan to set and dry for 24 hours before proceeding. After drying, install the flashing, then the backer board, and finally, install your chosen tile directly onto the pan surface.

Figure 6: The leakproof tileable surface allows for direct tile application.
Käyttö ja käyttö
The Tile Redi shower pan is designed for both commercial and residential use. Once properly installed and tiled, the pre-pitched surface ensures efficient water drainage towards the integrated drain. Regular use will not compromise the integrity of the pan when installed according to these instructions.
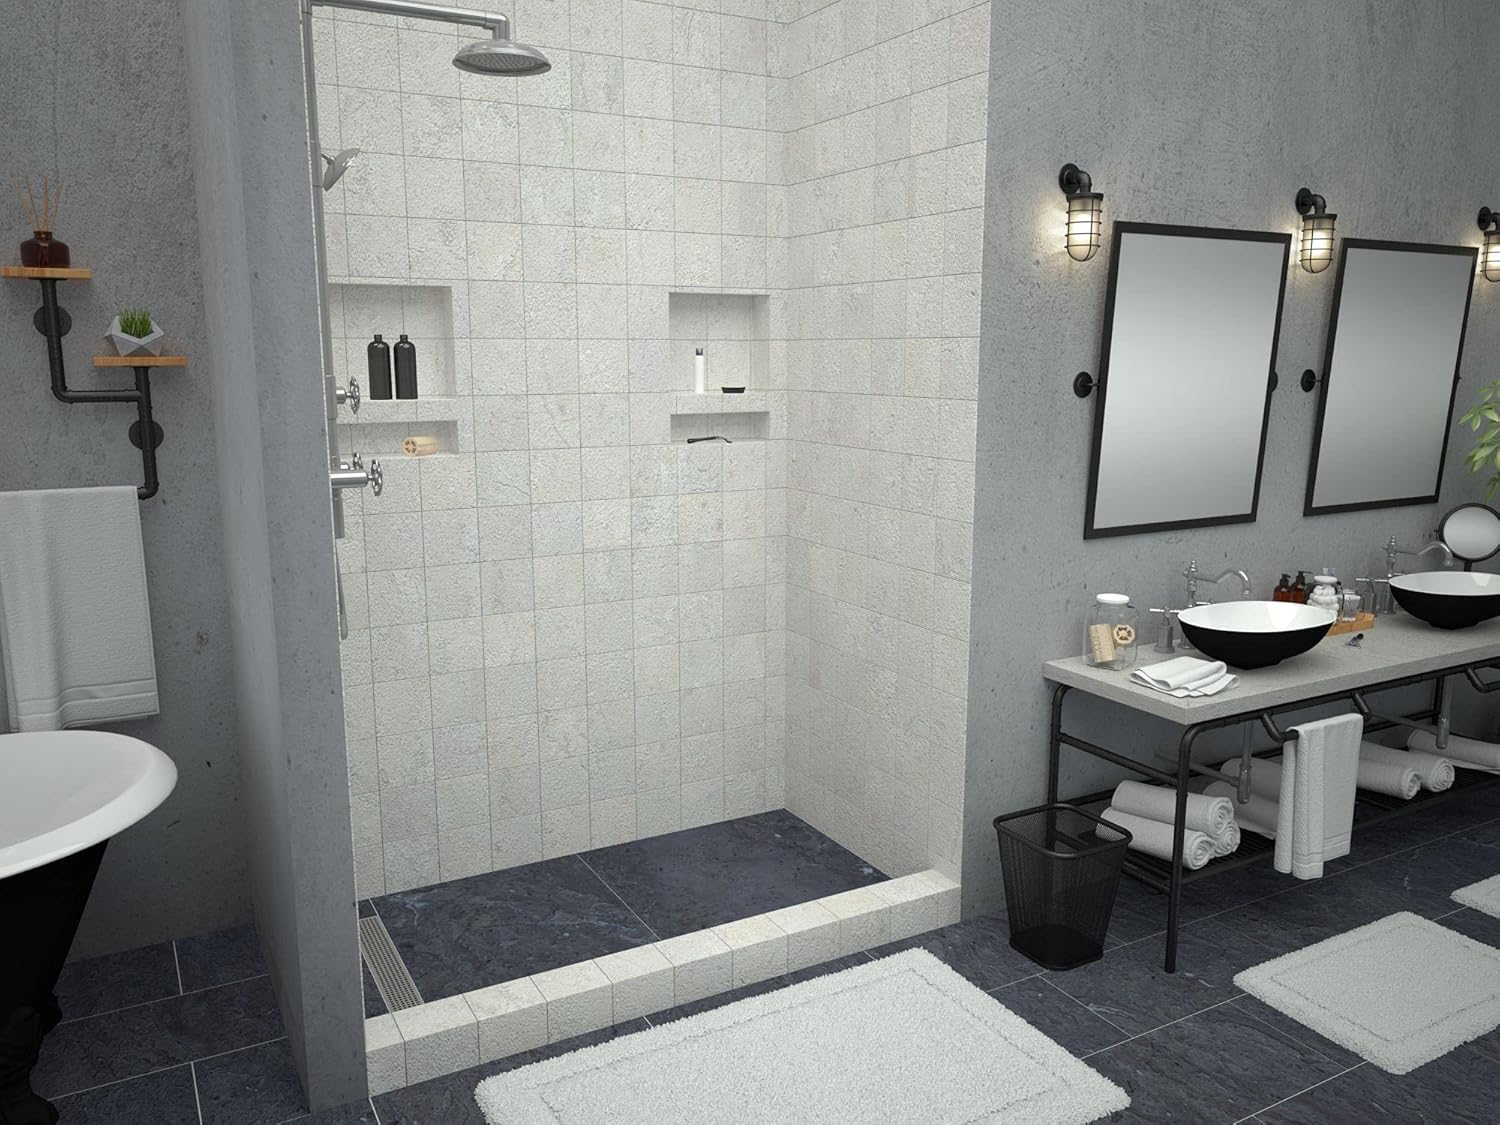
Kuva 7: Esimample of a fully installed Tile Redi shower pan with tiling.
Huolto
To maintain your Tile Redi shower pan and ensure its longevity, regular cleaning of the tiled surface and drain grate is recommended. Use non-abrasive cleaners suitable for your chosen tile and grout. Periodically check the drain grate for any debris that might impede water flow and clean as necessary.
Vianetsintä
Most issues with shower pans arise from improper installation. If you encounter problems such as water pooling or leaks, review the installation steps carefully. Ensure the subfloor was level, walls were plumb and square, and the mortar bed was applied correctly and allowed to dry completely. Verify that the drain connection is secure and free of obstructions. If issues persist, consult a qualified plumbing professional.
Tekniset tiedot
| Attribuutti | Yksityiskohta |
|---|---|
| Valmistaja | Tile Redi USA, LLC |
| Osanumero | T3642L-SCDNBVZ |
| Tuotteen paino | 46 kiloa |
| Tuotteen mitat | 36 x 42 x 5.75 tuumaa |
| Tuotteen mallinumero | T3642L-SCDNBVZ |
| Koko | 42" L x 36" S |
| Väri | Harjattu nikkeli |
| Tyyli | Left Designer Grate with Flashing |
| Valmis | Harjattu nikkeli |
| Materiaali | polyuretaani |
| Muoto | Suorakulmio |
| Asennusmenetelmä | Lattiaan asennettava |
| Tuote Paketin määrä | 1 |
| Sertifiointi | UL, ANSI Standards |
| Erikoisominaisuudet | Helppo asentaa |
| Käyttö | Commercial / Asuminen |
| Mukana olevat komponentit | Shower Pan, Drain, Flashing |

Figure 8: Technical drawing with dimensions for the shower pan.
Takuu ja tuki
The Tile Redi T3642L-SCDNBVZ Shower Pan Kit comes with a 3 vuoden rajoitettu takuu. For detailed warranty information or product support, please visit the official Tile Redi Store or contact their customer service.
Vieraile osoitteessa Tile Redi Store saadaksesi lisää tuotteita ja tietoa.