1. Johdanto
This manual provides detailed instructions for the installation, operation, and maintenance of your Akozon Digital Programmable Timer. Please read this manual carefully before use to ensure proper function and safety.

Figure 1: Akozon Digital Programmable Timer 12V
2. Tuote ohiview ja Ominaisuudet
The Akozon Digital Programmable Timer is a weekly programmable electronic timer designed for precise control of various electrical equipment. Its robust design and advanced features ensure reliable operation.
- Automaattinen ohjaus: Automatically turns electrical equipment on and off according to preset schedules.
- Korkea tarkkuus: Equipped with a high-precision chip for accurate timing.
- Viikoittainen ohjelmointi: Supports advanced programming for up to one week in advance.
- Useita ohjelmia: Features 16 ON/OFF settings (programs) for daily or weekly scheduling.
- Varavirta: Integrated high-performance rechargeable battery maintains time display and stores data for over 12 months during power outages.
- Kestävä rakenne: Housing made of hard, durable plastic for extended lifespan.
- LCD-näyttö: Clear LCD for easy viewing of time and program status.
- DIN-kiskon asennus: Designed for convenient installation on a DIN rail.
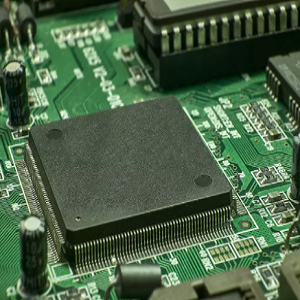
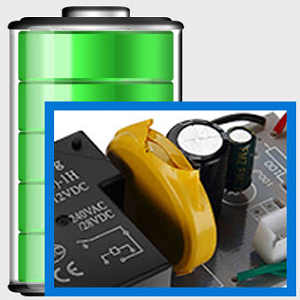
Figure 2: Internal components showing the high-precision chip and rechargeable backup battery.
3. Tekniset tiedot
| Mallinumero | Akozonqegcgmk04u-01 |
| Tulo Voltage | 12V DC/AC |
| Lähtökapasiteetti | 25(16)A, 240VAC |
| Virrankulutus | <1W |
| Ajoitusalue | 1 minuutista 168 tuntiin |
| Ohjelmat | 16 ON/OFF settings (daily/weekly) |
| Ajoitusvirhe | <±2 seconds/day |
| Virtakatkosmuisti | >12 months (with internal rechargeable battery) |
| Käyttölämpötila | -20 °C - 55 °C |
| Asennusmenetelmä | DIN-kisko |
| Mitat (noin) | 36 mm (L) x 86 mm (K) x 65 mm (S) |
| Paino (n.) | 120 g |
| Näyttö | LCD |

Kuva 3: Tuotteen yksityiskohtaiset mitat ja tärkeimmät tekniset tiedot.
4. Turvallisuustiedot
- Katkaise virta aina ennen asennusta tai huoltoa.
- Installation should be performed by a qualified electrician to prevent electric shock or damage to the device.
- Varmista, että syöttötilavuustage matches the timer's specifications (12V DC/AC). Connecting to incorrect voltage voi vaurioittaa yksikköä.
- Do not expose the device to excessive moisture or extreme temperatures outside the specified operating range.
- Do not disassemble the timer; refer servicing to qualified personnel.
5. Asennus ja asennus
5.1 DIN-kiskon asennus
The timer is designed for easy installation on a standard 35mm DIN rail. Simply clip the timer onto the rail in your distribution box.

Kuva 4: Esimample of the timer installed on a DIN rail within a distribution box.
5.2 Kytkentäohjeet
Refer to the wiring diagram below for correct connection. Ensure all connections are secure and comply with local electrical codes.
- Terminaalit 1 ja 2: Power input (12V DC/AC).
- Terminaalit 3, 4, 5: Output contacts.
- 3: Normaalisti suljettu (NC)
- 4: Yleinen (COM)
- 5: Normaalisti auki (NO)

Figure 5: Detailed wiring diagram showing connections for power input and output contacts.

Kuva 6: Esimamples of wiring methods, including direct load connection and connection via a contactor.
6. Käyttöohjeet
6.1 Initial Setup and Unlocking
- Upon first use, connect the timer to power (12V DC/AC).
- Paina RESET button to clear all previous settings and initialize the timer.
- The timer display may be locked. To unlock, press the C/R button four times. The lock icon will disappear from the display. If no operation occurs for 15 seconds, the timer will automatically lock again.
6.2 Nykyisen kellonajan ja päivämäärän asettaminen
After unlocking, set the current time and day:
- Paina P button (Program button) once.
- Paina D+ button to set the current day of the week (MO, TU, WE, TH, FR, SA, SU).
- Paina H+ -painiketta asettaaksesi nykyisen tunnin.
- Paina M+ -painiketta asettaaksesi nykyisen minuutin.
- Paina P -painiketta uudelleen poistuaksesi ajan asetustilasta.

Kuva 7: Lähikuva view of the timer's control buttons.

Figure 8: Explanation of button functions and display elements, including day, hour, minute, and reset.
6.3 Manuaalinen ohjaus
Paina MANUAALINEN C/R button to cycle through manual control modes:
- PÄÄLLÄ: Output is continuously ON.
- AUTO: Timer operates according to programmed schedules.
- OFF: Output is continuously OFF.
Valitse AUTO for the timer to follow your programmed settings.
7. Programming ON/OFF Schedules
The timer supports up to 16 ON/OFF programs. Follow these steps to set your desired schedules:
- Paina P -painiketta siirtyäksesi ohjelmointitilaan. Näytössä näkyy "1 ON".
- Paina D+ to select the day(s) for this program. You can choose a single day, weekdays, weekends, or all days.
- Paina H+ asettaaksesi käynnistysajan.
- Paina M+ asettaaksesi käynnistysminuutin.
- Paina P uudelleen. Näytössä näkyy "1 OFF".
- Paina D+ to select the day(s) for this OFF program (usually the same as ON, but can be different).
- Paina H+ to set the OFF hour.
- Paina M+ to set the OFF minute.
- Repeat steps 1-8 for additional ON/OFF programs (up to 16). Press P to advance to the next program number.
- Poistu ohjelmointitilasta painamalla MANUAALINEN C/R button. Ensure the timer is set to AUTO tila ohjelmien suorittamiseen.
Note: If you need to cancel a program, press the C/R -painiketta viewing the specific ON or OFF program. This will clear the settings for that program.
8. Sovellukset
The Akozon Digital Programmable Timer is versatile and can be used in various applications, including:
- Controlling lamps and lighting systems (e.g., streetlights, garden lights, neon signs).
- Managing water heaters and preheaters.
- Automating agricultural facilities (e.g., irrigation systems).
- Controlling broadcasting equipment.
- Scheduling household appliances.
- Operating sprayers and bottling equipment.

Kuva 9: Esimamples of environments where the timer can be used, such as controlling outdoor lighting and industrial equipment.
9. Huolto
- Pidä ajastin puhtaana ja pölyttömänä. Käytä puhdistamiseen pehmeää, kuivaa liinaa.
- Älä käytä hankaavia puhdistusaineita tai liuottimia.
- Varmista laitteen ympärillä asianmukainen tuuletus ylikuumenemisen estämiseksi.
- The internal battery is designed for long-term backup. If the timer consistently loses time or program settings after a power outage, the internal battery may need professional inspection.
10. Vianmääritys
| Ongelma | Mahdollinen syy | Ratkaisu |
|---|---|---|
| Näyttö on tyhjä. | No power supply or internal battery depleted. | Check power connections. Allow time for the internal battery to charge (connect to power for several hours). |
| Timer does not respond to button presses. | Timer is locked. | Paina C/R button four times to unlock. |
| Ohjelmat eivät suoritu. | Ajastin ei ole AUTOMAATTINEN-tilassa. Virheelliset ohjelma-asetukset. | Paina MANUAALINEN C/R kunnes näytössä näkyy "AUTO". Uudelleenview ja oikeat ohjelma-asetukset. |
| Time or settings are lost after power outage. | Internal backup battery is not charging or is depleted. | Ensure the timer is connected to power for sufficient time to charge the internal battery. If the issue persists, contact customer support. |
| Output is always ON or OFF, ignoring programs. | Timer is in manual ON or OFF mode. | Paina MANUAALINEN C/R kunnes näytössä näkyy "AUTO". |
11. Takuu ja tuki
Akozon products are manufactured to high-quality standards. For warranty information or technical support, please refer to the contact details provided with your purchase or visit the official Akozon websivusto.
Säilytä ostokuitti takuuvaatimuksia varten.