
Johdanto
Thank you for choosing the USX MOUNT UL Listed Tilting TV Wall Mount. This manual provides detailed instructions for safe and proper installation, operation, and maintenance of your TV mount. Please read all instructions carefully before beginning installation to ensure a secure and optimal viewkokemusta.
Turvallisuustiedot
VAROITUS: Failure to read and follow all instructions may result in personal injury, property damage, or voiding of warranty. If you have any questions, please contact customer service.
- Varmista, että kiinnityspinta (seinä) kestää turvallisesti telineen ja television yhteispainon.
- Do not install this product into drywall alone. It must be mounted to wood studs, concrete, or brick walls.
- Use appropriate tools and follow all drilling and fastening instructions precisely.
- Two-person installation is highly recommended for safety, especially when lifting and positioning the television.
- Pidä lapset ja lemmikkieläimet loitolla asennuksen aikana.
Pakkauksen sisältö
Please verify that all components are present and undamaged before installation. If any parts are missing or defective, contact USX MOUNT customer service.
- TV-seinäkiinnitys
- Standard Mounting Hardware Kit (pre-labeled bags)
- Kuplataso
- Nippusiteet (3 kpl)
- Käyttöohje
Tekniset tiedot
| Ominaisuus | Yksityiskohta |
|---|---|
| Mallinumero | XTM009 |
| Asennustyyppi | Seinäteline |
| Liikkeen tyyppi | Kallistaa |
| Materiaali | Metalli |
| Väri | Musta |
| Yhteensopivat TV-koot | 26-60 tuumaa |
| Paino Kapasiteetti | Jopa 99 paunaa (45 kg) |
| VESA-yhteensopivuus | 75x75mm, 100x100mm, 200x100mm, 200x200mm, 300x200mm, 300x300mm, 400x300mm, 400x400mm |
| Suurin kallistuskulma | 0° - -8° |
| Profile seinältä | 1.5 tuumaa (3.8 cm) |
| Tuotteen paino | 1.42 kg |
Yhteensopivuuden tarkistus
Before installation, ensure your TV and wall are compatible with this mount:
- TV-koko: Suitable for most 26-60 inch flat screen, LED, LCD, and curved TVs.
- TV:n paino: Your TV must weigh no more than 99 lbs (45 kg).
- VESA-kuvio: Check the four mounting holes on the back of your TV. The distance (width x height) must match one of the following VESA patterns: 75x75mm, 100x100mm, 200x100mm, 200x200mm, 300x200mm, 300x300mm, 400x300mm, 400x400mm.
- Seinän tyyppi: This mount is designed for installation on wood studs (12 or 16 inch spacing), solid concrete, or brick walls. ÄLÄ asenna kipsilevyyn yksin.
- Blocked Inputs: Ensure the mount will not block any necessary input ports on the back of your TV.

Asennusopas
Follow these steps for a secure and easy installation. A detailed installation video is also provided below.
Vaihe 1: Kiinnitä kiinnikkeet television takaosaan
- Aseta televisio varovasti kuvaruutu alaspäin pehmeälle ja puhtaalle alustalle naarmujen välttämiseksi.
- Identify the correct screws and spacers from the hardware kit that fit your TV's VESA mounting holes.
- Attach the two vertical TV brackets to the back of your TV using the selected screws and spacers. Ensure they are securely tightened.

Vaihe 2: Asenna seinälevy
- Paikanna haluttu kiinnityskohta seinälläsi. Käytä puurakenteiden etsintätyökalua tarvittaessa.
- Mark the drilling points for the wall plate. Use the included bubble level to ensure the marks are perfectly horizontal.
- Drill pilot holes at the marked locations. For wood studs, use a 4/32 inch (3mm) drill bit to a depth of 2.36 inches (60mm). For concrete/brick, use a 3/8 inch (10mm) drill bit and insert concrete anchors.
- Attach the wall plate to the wall using the lag bolts and washers. Tighten securely.
Vaihe 3: Ripusta televisio seinälevyyn
- With assistance, carefully lift the TV with the attached brackets and hook them onto the top edge of the wall plate.
- Laske televisiota varovasti, kunnes kiinnikkeet tarttuvat seinälevyyn.
- Pull the quick-release straps downwards to ensure the TV is securely locked onto the wall plate.
Asennus video
This video demonstrates the installation process for the USX MOUNT Tilting TV Wall Mount, showing steps from preparing the wall to mounting the TV.
Toiminta
This tilting TV wall mount allows for easy adjustment to optimize your viewkuvauskulma ja vähentää häikäisyä.
Kallistuskulman säätö
- The mount offers a tilt adjustment range of 0° to -8°.
- To adjust the tilt, gently push or pull the bottom of your TV to achieve the desired angle. No tools are required for this adjustment.

Quick Lock and Release
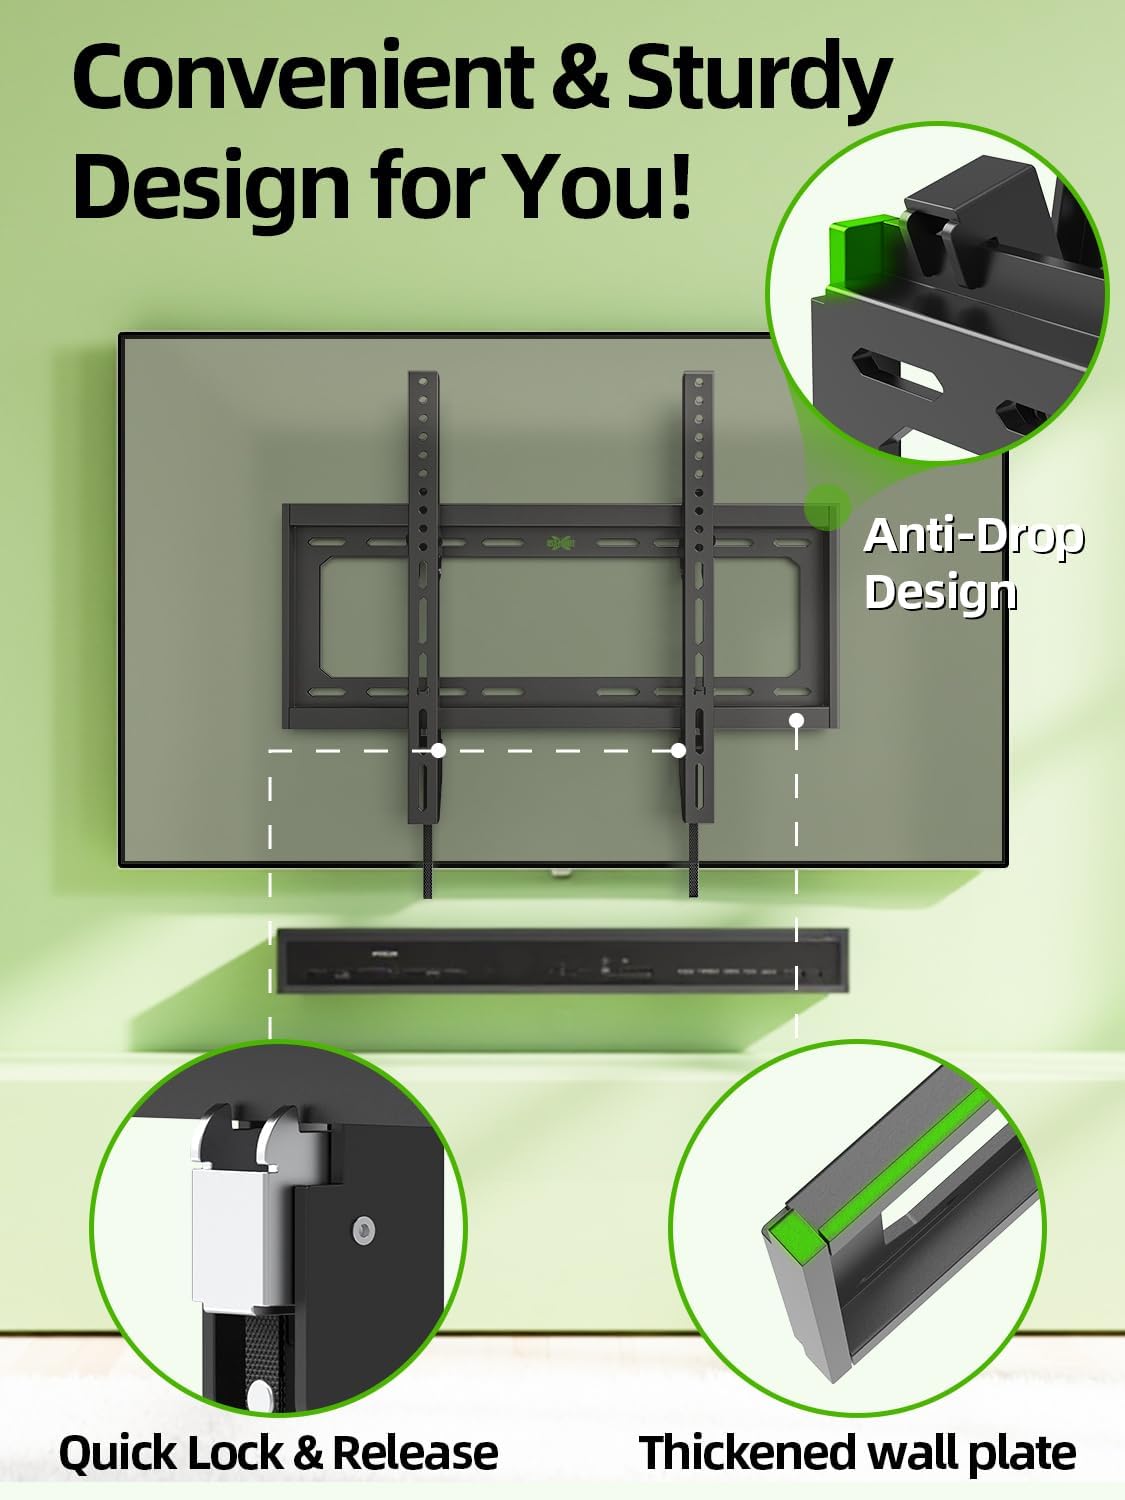
- The mount features a quick lock and release mechanism for easy removal or re-attachment of the TV.
- To release the TV, pull down on the integrated straps located at the bottom of the TV brackets. This disengages the locking mechanism, allowing you to lift the TV off the wall plate.
- To lock, ensure the straps are released and the TV is fully seated on the wall plate. The anti-drop design helps secure the TV.
Scenario Video
This video illustrates various scenarios where the USX MOUNT Tilting TV Wall Mount can be applied, showcasinsen toimivuutta eri asetuksissa.
Huolto
Säännöllinen huolto varmistaa TV-telineesi pitkän käyttöiän ja turvallisen toiminnan.
- Tarkista säännöllisesti kaikkien ruuvien ja pulttien kireys. Kiristä tarvittaessa uudelleen.
- Puhdista teline pehmeällä, kuivalla liinalla. Vältä hankaavia puhdistusaineita tai liuottimia.
- Ensure no cables are pinched or stressed by the mount or TV.
Vianetsintä
Jos kohtaat ongelmia, tutustu seuraaviin yleisiin ongelmiin ja ratkaisuihin:
- Televisio ei ole vaakasuorassa: Ensure the wall plate was installed level. Small adjustments can sometimes be made by slightly loosening and re-tightening the TV brackets on the wall plate, or by using the leveling feature if available.
- Kiinnitys tuntuu löysältä: Immediately remove the TV. Re-check all wall fasteners and TV bracket screws for proper tightness. Ensure the wall type is appropriate for installation.
- Difficulty tilting TV: Ensure no cables are obstructing the movement. Check that the tilt mechanism is not overtightened (though this model is tool-free tilt).
- TV cannot be locked onto wall plate: Ensure the TV brackets are correctly aligned with the wall plate and the quick-release straps are fully engaged.
Takuu ja tuki
USX MOUNT provides a 10-year warranty for this product. For technical assistance, missing parts, or any other inquiries, please contact our US-based friendly customer service. We are committed to providing quality products and excellent customer experience.
Yhteystiedot: Please refer to the product packaging or the official USX MOUNT websivustolta ajantasaisimmat asiakaspalvelun yhteystiedot.