1. Tuote ohiview
The Thermaltake The Tower 900 is a full tower PC case designed for high-end PC enthusiasts and modders. Developed in collaboration with Watermod France, this chassis emphasizes a unique vertical installation layout and features durable 5mm tempered glass panels to showcase internal components. It supports extensive liquid cooling configurations and offers ample space for various hardware components.

Kuva 1: Etuosa view of the Thermaltake The Tower 900 showcasing internal components and custom liquid cooling setup.
Key features include a spacious interior for custom liquid cooling loops, support for XL ATX motherboards, and multiple drive bays for storage. The design prioritizes both aesthetic display and functional cooling performance.
2. Asennus ja asennus
This section provides general guidelines for assembling your PC components within The Tower 900 chassis. Due to its modular design, many parts can be disassembled for easier installation.
2.1 Laatikon purkaminen ja alkutarkastus
Carefully remove the chassis from its packaging. Inspect for any damage that may have occurred during transit. Keep all packaging materials for future transport or warranty claims.

Kuva 2: Räjähtänyt view illustrating the modular components of The Tower 900 for easier assembly.
2.2 Sivupaneelien irrottaminen
The tempered glass side panels are secured with thumbscrews. Unscrew these to remove the panels, providing full access to the interior for component installation.
2.3 Emolevyn asennus
- Install the necessary motherboard standoffs onto the motherboard tray according to your motherboard's form factor (XL ATX, ATX, microATX).
- Aseta emolevy varovasti tukien päälle ja kohdista ruuvinreiät.
- Kiinnitä emolevy ruuveilla.
2.4 Virtalähteen (PSU) asennus
The PSU is mounted at the rear of the chassis. Ensure proper orientation and secure it with screws. Route cables through the designated cutouts for clean management.

Kuva 3: View of the power supply unit mounting area at the rear of the chassis.
2.5 Tallennusaseman asennus
The case features multiple drive bays for 3.5-inch HDDs and 2.5-inch SSDs. Utilize the removable drive trays for easy installation. The case supports up to six 3.5-inch drives or twelve 2.5-inch drives.
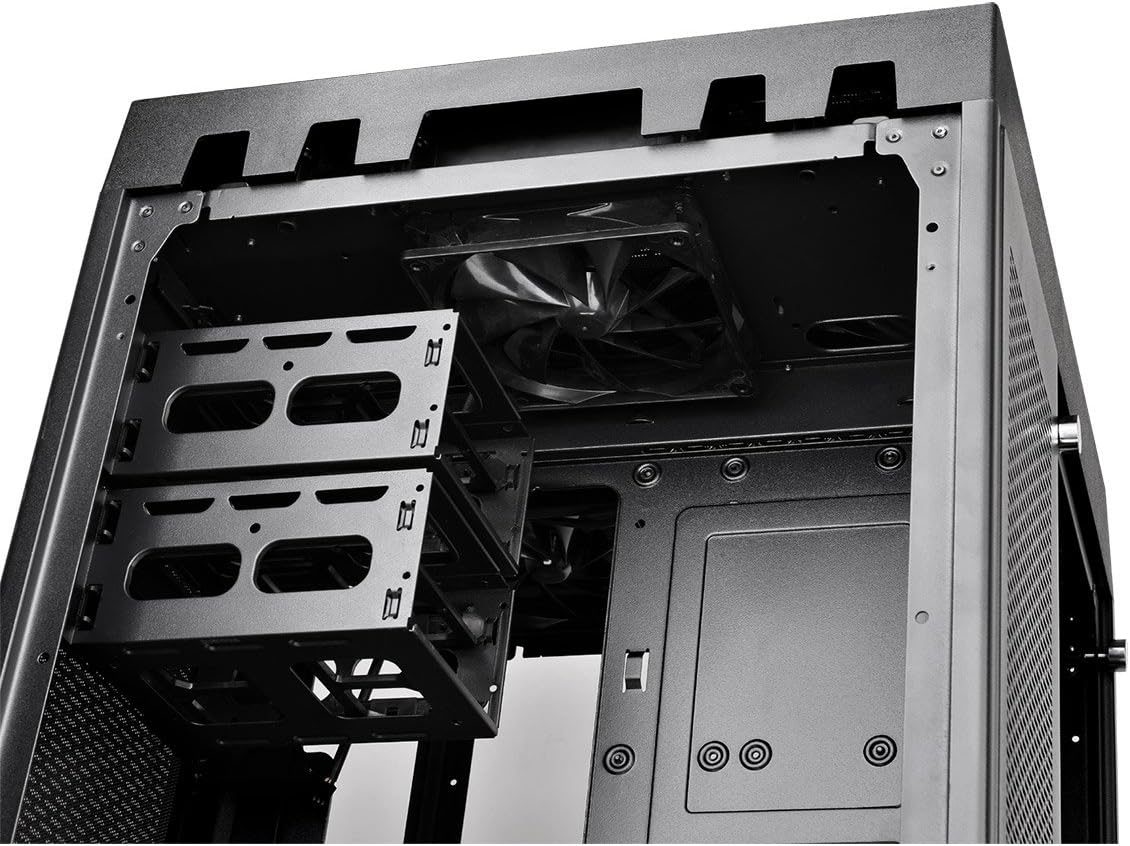
Figure 4: Removable drive trays for 3.5-inch and 2.5-inch storage devices.
2.6 Cooling System Installation (Fans/Radiators)
The Tower 900 is optimized for liquid cooling, supporting up to two 560mm radiators. Install fans and radiators in the designated areas, ensuring proper airflow direction. The case comes with two pre-installed 140mm fans at the top.

Kuva 5: Sivu view showing fan mounting locations, ideal for radiator installation.
For custom liquid cooling, the case provides dedicated space for pumps and reservoirs. Note that pump brackets are designed for Thermaltake D5 pumps; other pump models may require custom mounting solutions.
2.7 Kaapelin hallinta
Utilize the numerous cable routing holes and tie-down points behind the motherboard tray to ensure a clean build and optimal airflow. Long SATA and PSU cables are recommended for this large chassis.
3. Käyttöohjeet
Once all components are installed and secured, and the side panels are reattached, connect your peripherals and power cable.
3.1 Etupaneelin I/O-paneeli
The top front panel provides convenient access to essential ports and controls:
- Virtapainike: Järjestelmän kytkeminen päälle/pois.
- Reset-painike: Käynnistääksesi järjestelmän uudelleen.
- USB 3.0 -portit (x4): Nopeaa tiedonsiirtoa varten.
- Audio Jacks (Headphone/Microphone): Äänituloa/-lähtöä varten.

Figure 6: Close-up of the top I/O panel featuring USB 3.0 ports, audio jacks, and power/reset buttons.
3.2 Järjestelmän virta päälle
Press the power button on the front I/O panel to start your system. Ensure all cables are securely connected before powering on.
4. Huolto
Säännöllinen huolto auttaa varmistamaan tietokoneesi komponenttien optimaalisen suorituskyvyn ja pitkäikäisyyden.
4.1 Pölysuodattimen puhdistus
The Tower 900 is equipped with magnetic dust filters on various intake points. These filters should be cleaned regularly (e.g., monthly in a living area) to prevent dust buildup inside the chassis, which can impede airflow and cooling efficiency.

Figure 7: Various magnetic dust filters included with the chassis for easy removal and cleaning.
- Gently remove the magnetic dust filters from their respective locations.
- Clean the filters using compressed air or by rinsing them with water. Ensure they are completely dry before reattaching.
4.2 Karkaistun lasin hoito
Clean the tempered glass panels with a soft, lint-free cloth and a glass cleaner. Avoid abrasive materials that could scratch the surface.
4.3 Sisäinen puhdistus
Periodically, use compressed air to remove dust from internal components such as fans, heatsinks, and graphics cards. Ensure the system is powered off and unplugged before performing internal cleaning.
5. Vianmääritys
This section addresses common issues that may arise during or after PC assembly.
5.1 Järjestelmä ei käynnisty
- Verify that the power cable is securely connected to both the PSU and the wall outlet.
- Ensure the PSU's power switch is in the "ON" position.
- Tarkista kaikki sisäiset virtaliitännät, erityisesti emolevyn 24-nastaisen ATX- ja 8-nastaisen CPU-virtakaapelit.
- Confirm that the front panel power switch cable is correctly connected to the motherboard's header.
5.2 Liiallinen melu
- Identify the source of the noise (e.g., fan, HDD).
- Ensure all fans are securely mounted and free from obstructions.
- Check for loose cables or components that might be vibrating against the chassis.
- If using HDDs, ensure they are properly secured in their drive bays to minimize vibration.
5.3 Huono jäähdytysteho
- Puhdista kaikki pölysuodattimet ja sisäiset osat Huolto-osiossa kuvatulla tavalla.
- Verify that all fans are spinning and oriented correctly for optimal airflow (intake/exhaust).
- Ensure radiators are not obstructed and have adequate airflow.
- For liquid cooling systems, check pump operation and coolant levels.
6. Tekniset tiedot
| Ominaisuus | Yksityiskohta |
|---|---|
| Merkki | Thermaltake |
| Mallin nimi | Torni 900 |
| Asian tyyppi | Täysi torni |
| Emolevyn yhteensopivuus | XL ATX, ATX, Micro ATX |
| Materiaali | Teräs, karkaistu lasi |
| Väri | Musta |
| Mitat (S x L x K) | 48.3P x 42.6l x 75.2H cm (19.02 x 16.77 x 29.61 inches) |
| Paino | 24.5 kg (54 lbs) |
| Drive Bays | 6 x 3.5" or 12 x 2.5" (internal) |
| Laajennuspaikat | 7 |
| Edessä olevat I / O-portit | 4 x USB 3.0, HD Audio |
| Jäähdytysmenetelmä | Air, Liquid (supports up to 2x 560mm radiators) |
| Esiasennetut tuulettimet | 2 x 140mm (top) |
| Virtalähteen tyyppi | Standard PS2 PSU (rear mount) |
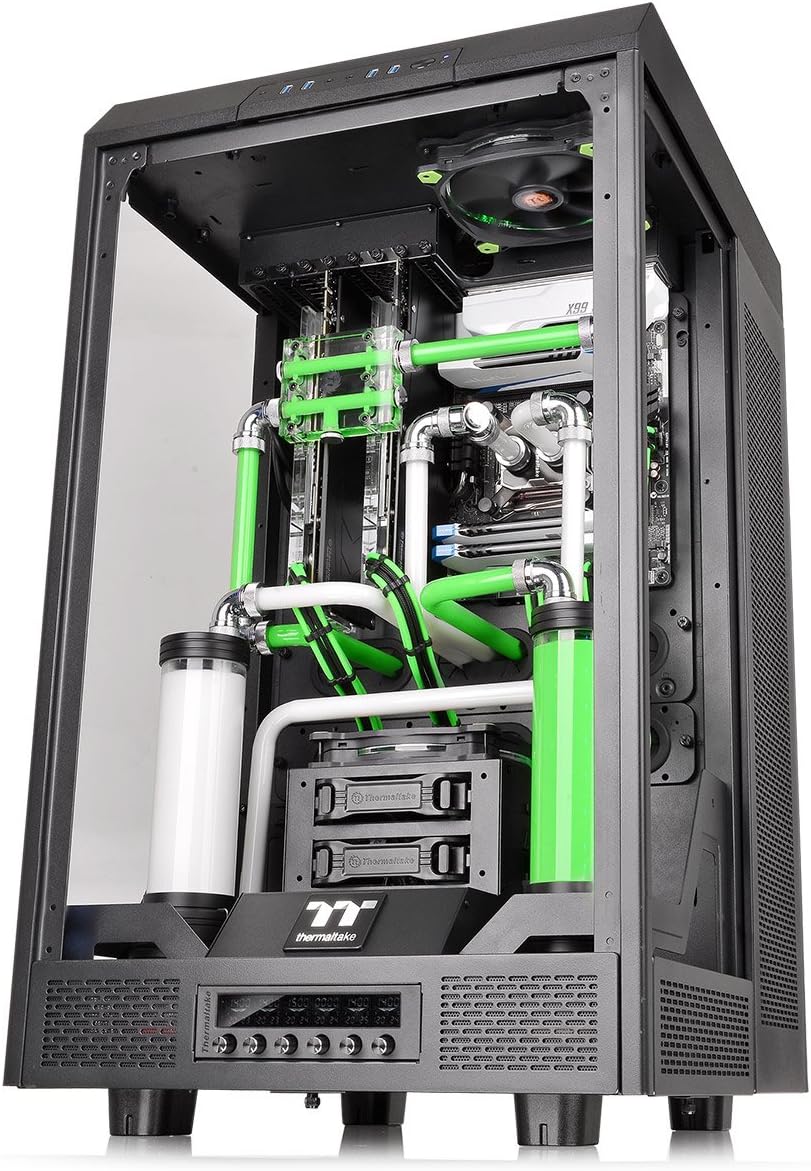
Figure 8: Diagram illustrating the dimensions of The Tower 900 chassis.
7. Takuu ja tuki
7.1 Takuutiedot
The Thermaltake The Tower 900 comes with a 2 vuoden valmistajan takuuSäilytä ostokuitti takuuvaatimuksia varten. Takuu kattaa materiaali- ja valmistusvirheet normaalissa käytössä.
7.2 Asiakastuki
For technical assistance, troubleshooting, or warranty inquiries, please contact Thermaltake customer support. Refer to the official Thermaltake websivustolta ajantasaisimmat yhteystiedot ja tukiresurssit.
- Online-tuki: Visit the Thermaltake official website for FAQs, driver downloads, and support tickets.
- Yhteystiedot: Specific regional contact details can be found on the support section of the Thermaltake websivusto.
Thermaltake is committed to providing excellent support and innovative products, driven by a passion for DIY and PC modding.


