
1. Johdanto
The GeoVision GV-VS2400 is a compact and powerful 4-channel H.264 Video Server designed for converting analog video signals into high-resolution digital images. This device supports TVI 1080p/720p and analog 960H/D1 real-time video inputs, making it an integral part of a comprehensive IP surveillance solution when integrated with GV-System (GV-DVR/NVR) or GV-VMS.
Key features include support for over 50 PTZ camera models, local video recording to USB storage, and a Tampering Alarm system to enhance security. The GV-VS2400 is suitable for various surveillance applications requiring reliable video digitization and management.
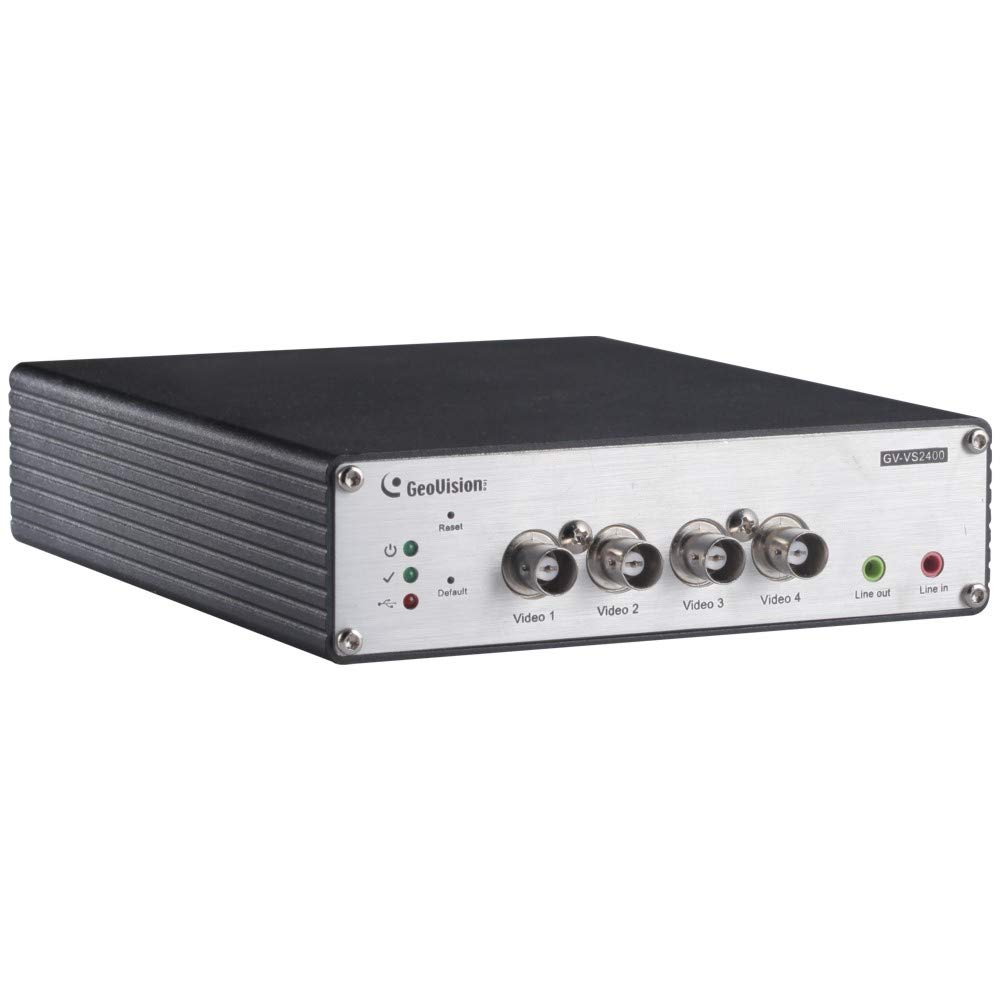
Kuva 1: Etuosa view of the GeoVision GV-VS2400 Video Server, showing its compact design and ports.
2. Asennus
2.1 Pakkauksen sisältö
Ennen asennuksen aloittamista tarkista, että pakkauksessa on kaikki tarvittavat osat:
- GV-VS2400 Video Server Unit
- Virtalähde (12V DC)
- Pika-aloitusopas
- Software CD (GV-System/GV-VMS)
- Asennussarja (jos sovellettavissa)
2.2 Laitteiston asennus
- Yhdistä kamerat: Connect up to four TVI 1080p/720p or analog 960H/D1 cameras to the video input ports on the GV-VS2400. Ensure secure connections.
- Verkkoyhteys: Connect the GV-VS2400 to your network using an Ethernet cable. Alternatively, configure Wi-Fi or 3G/4G connectivity as required.
- USB Storage (Optional): For local recording, connect a compatible USB HDD to the USB port on the GV-VS2400.
- Virtaliitäntä: Connect the 12V DC power adapter to the GV-VS2400 and then plug it into a power outlet. The device will power on automatically.
Kuva 2: Takaosa view of the GV-VS2400, illustrating video input, network, and power connections.
2.3 Alkukokoonpano
After hardware installation, access the device's web interface for initial configuration:
- Tutustu laitteeseen: Use the GeoVision IP Device Utility software (available on the provided CD or GeoVision website) to discover the GV-VS2400 on your network.
- Pääsy Web Käyttöliittymä: Avaa a web browser and enter the IP address of the GV-VS2400. Log in using the default credentials (refer to the Quick Start Guide for details).
- Verkkoasetukset: Configure network settings, including IP address, subnet mask, and gateway, to match your network environment.
- Videoasetukset: Adjust video input settings for each connected camera, including resolution, frame rate, and compression (H.264).
- PTZ-ohjaus: If using PTZ cameras, configure the appropriate PTZ protocol and settings.
- Tallennusasetukset: Format and configure the connected USB HDD for video recording.
3. Operating the GV-VS2400
3.1 Livenä View ja Tallennus
The GV-VS2400 can be monitored and managed through its web interface or integrated with GeoVision's GV-System/GV-VMS software.
- Elää View: Access the live video streams from connected cameras through the web käyttöliittymä tai asiakasohjelmisto.
- Manuaalinen tallennus: Initiate manual recording of video streams to the configured USB storage or network storage.
- Ajastettu tallennus: Set up recording schedules based on time or events (e.g., motion detection).
3.2 Tamphälytys
Tampering Alarm feature detects attempts to obstruct or disable cameras.
- Ota T käyttöönampering-tunnistus: Vuonna web interface, navigate to the camera settings and enable the Tampering Alarm for desired channels.
- Toimintojen määrittäminen: Specify actions to be taken when a tampering event is detected, such as sending notifications, triggering recording, or activating an alarm output.
3.3 Mobiiliyhteys
The GV-VS2400 supports remote access via mobile devices using GeoVision's mobile applications.
- Lataa sovellus: Download the appropriate GeoVision mobile app from your device's app store.
- Lisää laite: Add the GV-VS2400 to the app using its IP address or QR code.
- View Live Feeds: Access live video feeds and manage basic settings remotely.
4. Huolto
4.1 laiteohjelmistopäivitystä
Tarkista ja asenna laiteohjelmistopäivitykset säännöllisesti varmistaaksesi optimaalisen suorituskyvyn ja tietoturvan.
- Visit the official GeoVision webuusimmat laiteohjelmistoversiot.
- Follow the provided instructions for firmware update procedures.
4.2 System Backup and Restore
It is recommended to regularly back up your system configurations.
- Käytä web interface to export configuration files.
- Store backup files in a secure location.
4.3 Puhdistus
Keep the device clean to prevent dust accumulation and ensure proper ventilation.
- Puhdista laitteen ulkopinta pehmeällä, kuivalla liinalla.
- Älä käytä nestemäisiä puhdistusaineita tai hankaavia aineita.
5. Vianmääritys
| Ongelma | Mahdollinen syy | Ratkaisu |
|---|---|---|
| Ei videosignaalia |
|
|
| Ei pääse web käyttöliittymä |
|
|
| Tallennus ei toimi |
|
|
6. Tekniset tiedot
| Ominaisuus | Kuvaus |
|---|---|
| Malli | GV-VS2400 |
| Videotulo | 4-channel TVI 1080p / 720p, Analog 960H / D1 |
| Videon pakkaus | H.264 |
| Maksimiresoluutio | Up to 2 Megapixels (digitized) |
| Yhteydet | Ethernet, Wi-Fi, USB, UMTS / 3G / 3.5G / 4G |
| Varastointi | USB HDD (for local recording) |
| PTZ-tuki | Supports over 50 PTZ models |
| Virransyöttö | 12V DC |
| Erikoisominaisuudet | Tampering Alarm, Automatic switch between WiFi and 3G, Multi-language web interface (29 languages) |
7. Takuu ja tuki
7.1 Tuotetakuu
GeoVision products typically come with a limited warranty. Please refer to the warranty card included with your product or visit the official GeoVision website for detailed warranty terms and conditions specific to the GV-VS2400. Keep your proof of purchase for warranty claims.
7.2 Tekninen tuki
For technical assistance, product inquiries, or troubleshooting beyond this manual, please contact GeoVision technical support:
- Websivusto: Visit the official GeoVision websivusto tukiresursseille, usein kysytyille kysymyksille ja ajurilatauksille.
- Yhteystiedot: Refer to the GeoVision website for regional contact numbers and email addresses for technical support.
- Verkkoresurssit: Explore GeoVision's online knowledge base and forums for community support and additional information.