
1. Tärkeitä turvallisuustietoja
Lue ja ymmärrä kaikki ohjeet ennen asennuksen aloittamista. Ohjeiden noudattamatta jättäminen voi aiheuttaa sähköiskun, tulipalon tai muita vaarallisia tai jopa kuolemaan johtavia vammoja. Tämä tuote on asennettava sovellettavien asennusmääräysten mukaisesti henkilön toimesta, joka tuntee tuotteen rakenteen ja toiminnan sekä siihen liittyvät vaarat.
- VAROITUS: Sähköiskun vaara. Katkaise virta sulakkeesta tai katkaisijasta ennen asennusta tai huoltoa.
- Kaikkien sähköliitäntöjen on oltava paikallisten määräysten tai National Electric Coden (NEC) mukaisia.
- Jos olet epävarma johdotusmenetelmistä, ota yhteyttä pätevään sähköasentajaan.
- This fixture is designed for outdoor, wet location use. Ensure all connections are properly sealed to prevent water intrusion.
- Do not attempt to modify the integrated LED light source. It is not replaceable.
2. Pakkauksen sisältö
Varmista, että kaikki osat ovat mukana ennen asennuksen aloittamista:
- 1 x VAXCEL Melbourne Post Light Fixture (with integrated LED)
- 1 x Clear Crackle Glass Shade
- Kiinnitystarvikkeet (ruuvit, mutterit)
3. Tekniset tiedot
| Ominaisuus | Erittely |
|---|---|
| Mallinumero | T0165 |
| Mitat (P x L x K) | 8 cm x 8 cm x 16 cm |
| Paino | 3.97 puntaa |
| Materiaali | Seosteräs, lasi |
| Valon lähde | Integrated LED (6 Watts) |
| Kirkkaus | 300 lumenia |
| Värilämpötila | 3000 Kelvin (lämmin valkoinen) |
| Värintoistoindeksi (CRI) | 82 |
| Voitage | 120 volttia |
| Erikoisominaisuudet | Dusk to Dawn Sensor, Exterior Wet Rated |
| Asennustyyppi | Post Mounted (fits standard 3-inch diameter post, not included) |
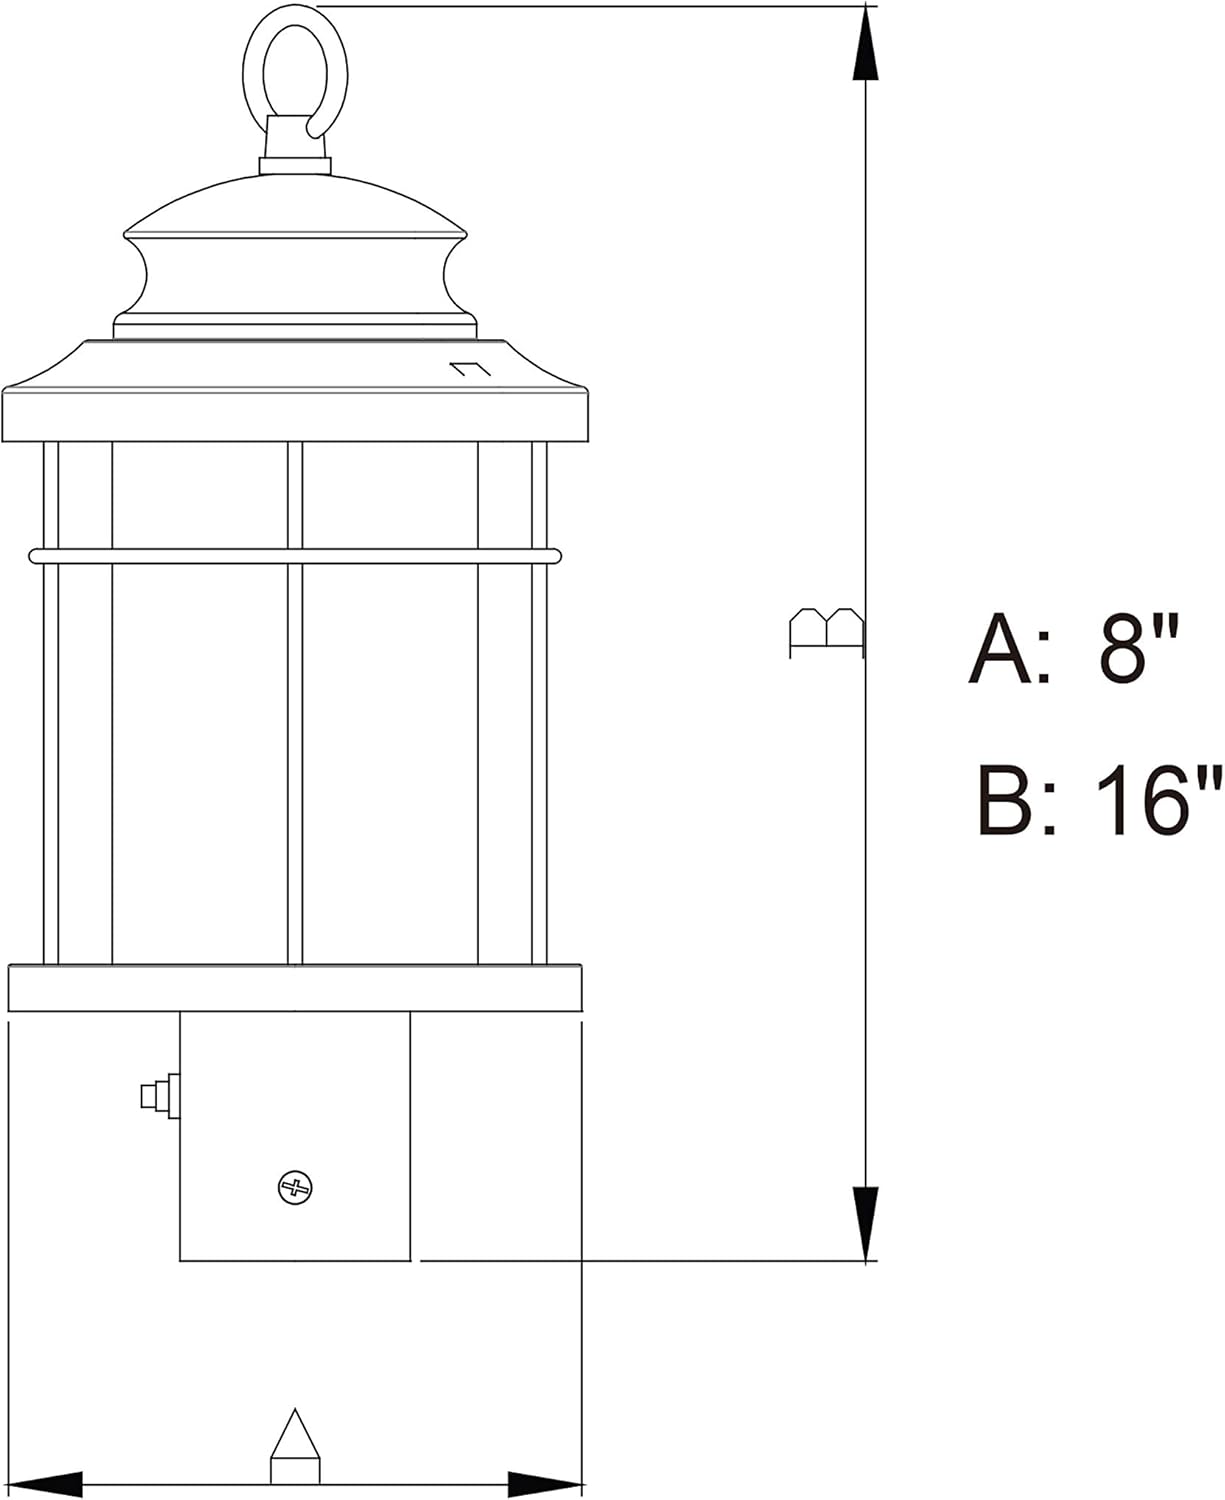
4. Asennusohjeet (asetus)
Before you begin, ensure the power is turned off at the circuit breaker. This fixture is designed to be mounted on a standard 3-inch diameter post (post not included).
- Prepare the Post: Ensure your existing 3-inch diameter post is securely installed and has electrical wiring extending from its top.
- Kytke johdotus: Carefully connect the fixture's wires to your household electrical wires. Use the provided wire nuts to secure connections:
- Connect the black wire from the fixture to the black (hot) wire from the post.
- Connect the white wire from the fixture to the white (neutral) wire from the post.
- Connect the green or bare copper ground wire from the fixture to the green or bare copper ground wire from the post.
- Kiinnitä teline: Carefully place the fixture onto the top of the 3-inch post, aligning any pre-drilled holes if applicable. Secure the fixture to the post using the provided mounting screws. Do not overtighten.
- Asenna lasivarjostin: Gently place the clear crackle glass shade into the fixture, ensuring it is seated properly and securely.
- Palauta virta: Kun valaisin on asennettu tukevasti ja kaikki liitännät on tehty, kytke virta takaisin sulakkeesta.


5. Käyttöohjeet
The VAXCEL Melbourne Post Light features an integrated dusk-to-dawn photocell sensor for automatic operation. There are no manual controls for this light fixture.
- Automaattinen päälle/pois: The photocell sensor (refer to Figure 3) detects ambient light levels. The fixture will automatically turn on when it gets dark and turn off when it detects sufficient daylight.
- Käyttöönotto: Upon initial power-up, the light may take a few minutes to calibrate or may turn on briefly before turning off if it is daytime. This is normal operation.
6. Huolto
Regular maintenance will help preserve the appearance and functionality of your VAXCEL Melbourne Post Light.
- Puhdistus: Puhdistaaksesi valaisimen, varmista, että virta on katkaistu. Pyyhi pehmeällä,amp liinalla. Älä käytä hankaavia puhdistusaineita tai liuottimia, sillä ne voivat vahingoittaa pintaa tai lasia.
- LED-valonlähde: The LED light source is integrated and designed for long-lasting performance. It is not user-replaceable.
- Valokenno: Keep the photocell sensor (Figure 3) free from dirt, debris, or obstructions (e.g., leaves, snow) to ensure proper dusk-to-dawn operation.
7. Vianmääritys
If your VAXCEL Melbourne Post Light is not functioning as expected, refer to the following common issues and solutions:
| Ongelma | Mahdollinen syy | Ratkaisu |
|---|---|---|
| Valo ei syty yöllä. | Laitteeseen ei tule virtaa. Photocell is obstructed or faulty. Johdotusongelma. | Check circuit breaker and wall switch (if applicable). Ensure photocell is clean and not blocked by objects. Verify wiring connections are secure (with power off). |
| Valo palaa päivän aikana. | Photocell is obstructed or faulty. Insufficient ambient light reaching the sensor. | Ensure photocell is clean and not blocked. Relocate the fixture if it's in a shaded area during the day. |
| Valo välkkyy tai himmenee. | Löysä johtoliitäntä. Tehon vaihtelut. | Tarkista kaikki johdotusliitännät (virta katkaistuna). Jos epäilet sähköjännitteen vaihteluita, ota yhteyttä sähköasentajaan. |
If these steps do not resolve the issue, please contact VAXCEL customer support.
8. Takuutiedot
The VAXCEL Melbourne 1L LED Dusk to Dawn Outdoor Post Light (Model T0165) is covered by a 5 vuoden rajoitettu takuu from the date of purchase. This warranty covers defects in materials and workmanship under normal use. For full warranty terms and conditions, please refer to the VAXCEL official websivustolla tai ota yhteyttä asiakastukeen.
9. Yhteystiedot
For further assistance, technical support, or warranty claims, please contact VAXCEL customer service:
- Websivusto: Käy VAXCEL-kaupassa Amazonissa
- Please have your model number (T0165) and proof of purchase ready when contacting support.