1. Johdanto
Thank you for choosing the Meister 600W Belt Sander MBS600-1. This powerful tool is designed for efficient sanding of large flat surfaces made of wood, plastic, and metal. It is ideal for tasks such as removing paint and varnish, deburring plastic, and preparing surfaces for finishing. This manual provides essential information for safe operation, proper setup, maintenance, and troubleshooting to ensure optimal performance and longevity of your belt sander.
2. Tärkeitä turvallisuusohjeita
Noudata aina sähkötyökaluja käyttäessäsi perusturvallisuusohjeita tulipalon, sähköiskun ja henkilövahinkojen välttämiseksi. Säilytä tämä käyttöohje myöhempää tarvetta varten.
Sähkötyökalujen yleinen turvallisuus
- Työalueen turvallisuus: Pidä työalueesi puhtaana ja hyvin valaistuna. Epäsotkuiset tai pimeät alueet altistavat onnettomuuksille. Älä käytä sähkötyökaluja räjähdysvaarallisissa ilmakehissä, kuten syttyvien nesteiden, kaasujen tai pölyn läsnä ollessa.
- Sähköturvallisuus: Sähkötyökalun pistokkeiden on sovittava pistorasiaan. Älä koskaan muuta pistoketta millään tavalla. Vältä kosketusta maadoitettuihin pintoihin, kuten putkiin, pattereihin, liesiin ja jääkaappeihin.
- Henkilökohtainen turvallisuus: Always wear eye protection. Use dust masks, non-skid safety shoes, hard hats, or hearing protection for appropriate conditions. Dress properly. Do not wear loose clothing or jewelry. Keep hair and clothing away from moving parts.
- Työkalun käyttö ja hoito: Älä pakota sähkötyökalua. Käytä työhösi sopivaa sähkötyökalua. Irrota pistoke virtalähteestä ennen säätöjen tekemistä, lisävarusteiden vaihtamista tai sähkötyökalun varastointia.
Hihnahiomakoneen erityisturvallisuus
- Varmista, että hiomanauha on asennettu ja kiristetty oikein ennen käyttöä.
- Always use the auxiliary handle for secure guidance and control of the machine.
- Connect the dust extraction system to maintain a clean and safe working environment.
- Älä hio asbestia sisältäviä materiaaleja.
- The tool is GS certified, indicating compliance with German safety standards.
3. Pakkauksen sisältö
Carefully unpack your Meister 600W Belt Sander and check that all items are present and undamaged. If any parts are missing or damaged, please contact your retailer.
- 1 x Meister 600W Belt Sander MBS600-1
- 1 x Fabric abrasive belt, grit 80
- 1 x External dust extraction adapter (2 pieces)
- 1 x Pölynkeräyslaatikko

Figure 1: Meister 600W Belt Sander MBS600-1 with included accessories: sanding belt, dust collection box, and dust extraction adapter.
4. Tuotteen ominaisuudet ja komponentit
Familiarize yourself with the main components of your belt sander before operation.
- Power Switch with Lock-on Function: Jatkuvaan käyttöön.
- Nopeuden säätövalitsin: Allows continuous adjustment of belt speed for material-specific work.
- Apukahva: Provides secure grip and guidance.
- Pölynpoistoliitäntä: For connecting the dust collection box or an external vacuum system.
- Quick-Release Lever: For fast and tool-free sanding belt changes.
- Soft-Grip Inserts: Mukavaan ja turvalliseen käsittelyyn.
- LED Operating Indicator: Shows when the tool is powered on.

Figure 2: Power switch with lock-on function and LED indicator.

Figure 3: Speed adjustment dial for continuous speed control.

Figure 4: Dust extraction adapter and dust collection box attachment.
5. Asennus
Hiomanauhan kiinnitys
- Varmista, että työkalu on irrotettu virtalähteestä.
- Locate the quick-release lever on the side of the sander.
- Push the quick-release lever to loosen the belt tension.
- Slide the old sanding belt off (if applicable) and slide the new belt onto the rollers, ensuring the arrow on the belt matches the direction of rotation indicated on the tool.
- Release the quick-release lever to tension the belt.
- Manually rotate the belt a few times to ensure it is centered. If not, use the belt tracking adjustment knob (if present) to center it.
Pölynkeräyksen yhdistäminen
- For internal dust collection, attach the provided dust collection box to the dust extraction port. Ensure it clicks securely into place.
- For external dust extraction, attach the 2-piece adapter to the dust extraction port, then connect your external vacuum hose to the adapter.
Kiinteä käyttö
The belt sander can be quickly converted for stationary use by clamping it to a workbench. This is useful for tasks like sharpening or sanding smaller workpieces.
- Varmista, että työkalu on irrotettu pistorasiasta.
- Position the sander upside down on a stable workbench.
- Secure the sander using appropriate clamps (not included) through the designated mounting points. Ensure the sander is stable and will not move during operation.
- Always ensure adequate ventilation and clear the area around the sanding belt.

Figure 5: Belt sander set up for stationary use, clamptyöpöydälle.
6. Käyttöohjeet
Virran kytkeminen päälle/pois
- Käynnistää: Press the power switch. The LED operating indicator will light up.
- Jatkuvaa käyttöä varten: Press the power switch and then press the lock button. The tool will continue to run without holding the switch.
- To Turn Off (from continuous operation): Paina virtakytkintä uudelleen.
Nopeuden säätäminen
Use the speed adjustment dial to select the appropriate belt speed (170-250 m/min) for your material and application. Lower speeds are generally suitable for fine sanding or heat-sensitive materials, while higher speeds are for coarse material removal.
Hiontatekniikat
- Mobiilikäyttö: Hold the sander firmly with both hands using the main handle and auxiliary handle. Place the sander flat on the workpiece and move it evenly across the surface. Apply light, consistent pressure.
- Kiinteä käyttö: With the sander clamped to a workbench, carefully bring the workpiece to the moving sanding belt. Maintain a firm grip on the workpiece and move it smoothly against the belt.
- Materiaalin soveltuvuus: This sander is effective for wood, plastic, and metal. Always test on a scrap piece first to determine the optimal speed and pressure.
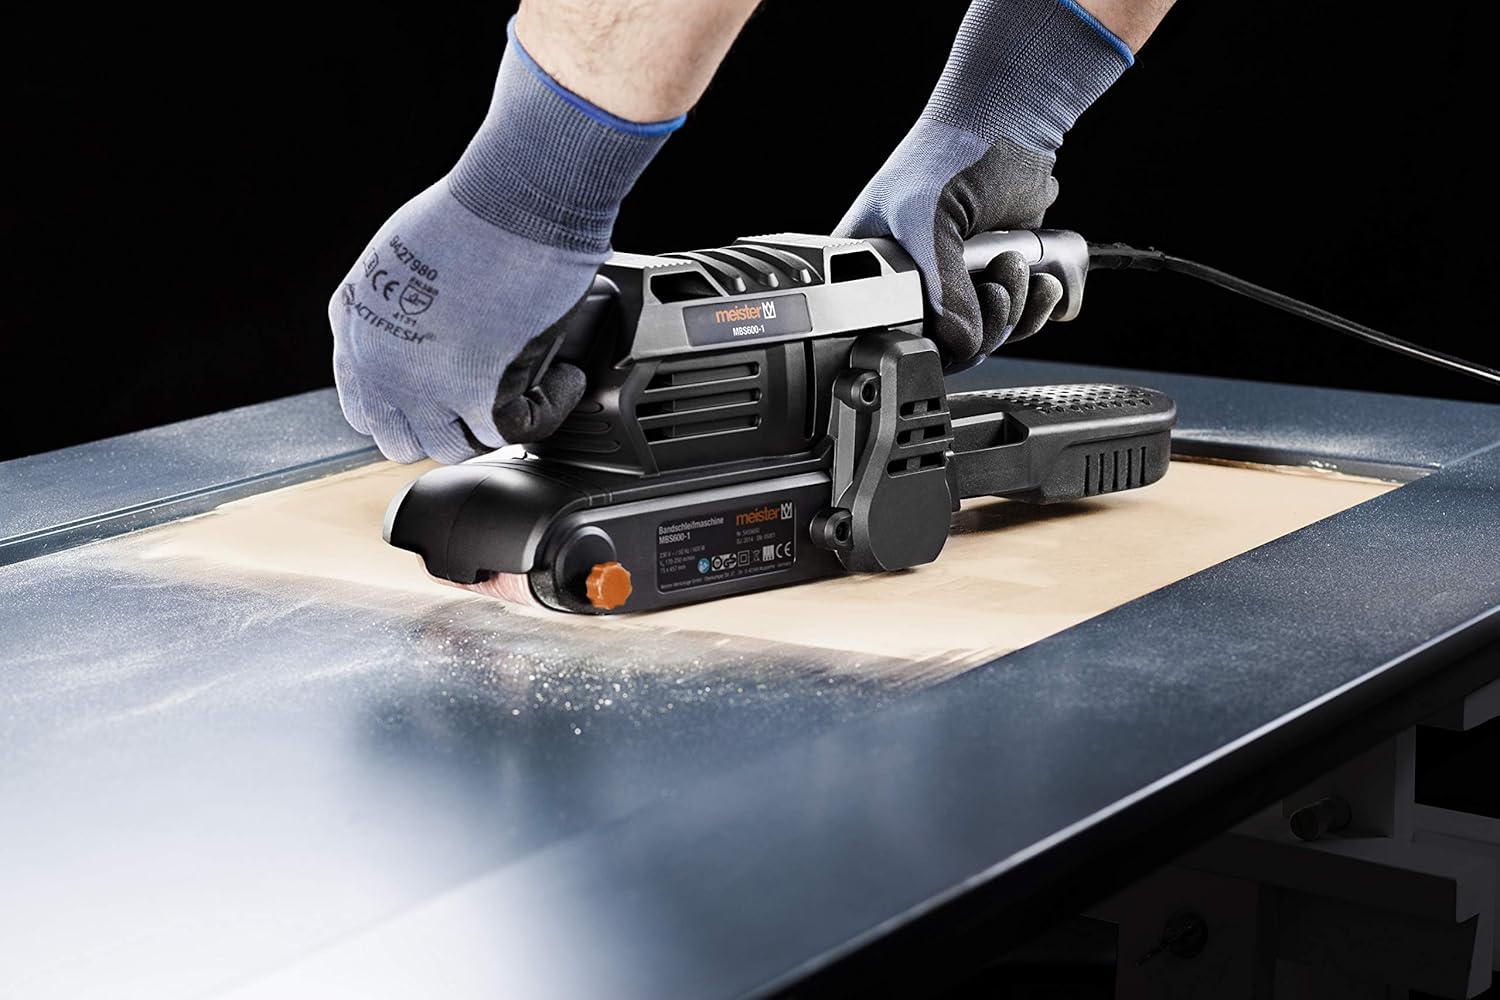
Figure 6: Operating the belt sander on a flat surface.
7. Huolto
Säännöllinen huolto varmistaa työkalusi pitkän käyttöiän ja turvallisen toiminnan.
Työkalun puhdistaminen
- Irrota työkalu aina ennen puhdistamista.
- Puhdista pöly ja roskat tuuletusaukoista ja hiomanauhan ympäristöstä pehmeällä harjalla tai paineilmalla.
- Pyyhi kotelo mainoksellaamp kangas. Älä käytä voimakkaita kemikaaleja tai hankaavia puhdistusaineita.
Changing Sanding Belts
Refer to the 'Attaching the Sanding Belt' section under Setup for detailed instructions on changing the abrasive belt.
Pölysäiliön tyhjennys
Regularly empty the dust collection box to maintain effective dust extraction and prevent clogging. Detach the box, empty its contents, and reattach it securely.
8. Vianmääritys
Tässä on joitakin yleisiä ongelmia ja niiden mahdollisia ratkaisuja:
| Ongelma | Mahdollinen syy | Ratkaisu |
|---|---|---|
| Sander ei käynnisty | Ei virtalähdettä; Viallinen kytkin | Check power connection and outlet; Contact service if switch is faulty. |
| Hiomanauha luistaa tai valuu pois | Belt not tensioned correctly; Belt tracking misaligned | Re-tension belt with quick-release lever; Adjust belt tracking knob. |
| Poor sanding results | Worn sanding belt; Incorrect grit; Too much pressure | Replace sanding belt; Use appropriate grit for the task; Apply lighter, even pressure. |
| Liikaa pölyä | Dust box full or not attached correctly; Dust extraction port blocked | Empty and reattach dust box; Clear any blockages in the dust port or adapter. |
9. Tekniset tiedot
| Erittely | Arvo |
|---|---|
| Mallinumero | MBS600-1 (Reference: 5455650) |
| Nimellisteho | 600 W |
| Virtalähde | 230V/50Hz |
| Hihnan nopeus | 170 - 250 m/min (continuously adjustable) |
| Hiontapinta | 150 x 75 mm |
| Hiomahihnan koko | 457 x 75 mm |
| Paino | 2.5 kg (product) / 3.14 kg (package) |
| Kaapelin pituus | 300 cm (3 metriä) |
| Mukana olevat komponentit | 1 x Belt Sander, 1 x K80 Abrasive Belt, 1 x 2-piece External Dust Adapter, 1 x Dust Box |
| Valmistaja | Conmetall Meister GmbH - Tools - FR |
10. Takuu ja tuki
The Meister 600W Belt Sander MBS600-1 is manufactured to high-quality standards and is GS certified for your safety. For warranty claims or technical support, please refer to the warranty card included with your product or contact your retailer. Keep your proof of purchase for any warranty-related inquiries.
Information regarding spare parts availability is not provided in the product details. For any specific spare part inquiries, please contact the manufacturer or your point of purchase.